* fix: handles filter options in form state merge
* chore: fix and reintegrate fields-relationship e2e tests
* chore: update withMergedProps function for e2e tests
* chore: improve flakiness with access control test suite
* fix issue with redirecting from a drawer
* chore: watches for created id in drawers
---------
Co-authored-by: James <james@trbl.design>
* moved refresh permissions test suite to access control
* support for custom Save, SaveDraft and Publish buttons in admin config for collections and globals
* moved navigation content to client side so that permissions can be refreshed from active state
* test: passing point fields test suite
* chore: removes waits from point fields test suite
* chore: removes unnecessary waits in dates field test suite
* chore: removes waits entirely from dates tests
* chore: adds translates function for longitude/latitude
* chore: renames coordinate function and conditionally renders hypen in the function
* test: passing collapsible fields test suite
* chore: passes indexPath into ArrayRow & updates path in collapsible field
* fix: collapsible paths and indexPath prop types
* chore: improves path and schemaPath syntax
* leftover
* chore: updates selectors in collapsibles tests
* chore: updates selector in live-preview test suite
---------
Co-authored-by: Jacob Fletcher <jacobsfletch@gmail.com>
* fix: only execute onChange if form modified
* fix: move document loading logic from RSC to DocumentInfoProvider
* fix: make it work for globals
* chore: remove unnecessary diffs
---------
Co-authored-by: Jarrod Flesch <jarrodmflesch@gmail.com>
BREAKING CHANGE: collection.admin.hooks.beforeDuplicate removed and instead should be handled using field beforeDuplicate hooks which take the full field hook arguments.
* feat: duplicate doc moved from frontend to backend concern
* feat: default beforeDuplicate hook functions on unique fields
* docs: beforeDuplicate field hook
* test: duplicate doc local api
* chore: fix build errors
* chore: add access.create call to duplicate operation
* chore: perfectionist reorder imports
* chore: attach mongoMemoryServer to db and destroy in tests
* bump mongodb-memory-server to 9.x
---------
Co-authored-by: Paul Popus <paul@nouance.io>
* fix: cannot get versions view for globals, return Unauthorized view if you are unauthorized instead of the Not Found view for document edit views. This makes it match the API
* chore: ensure there is always an error view to render if needed
* working playwright
* chore: use zipped, local build of playwright instead of patching it
* chore: remove bloat
* chore: get playwright and lexical to work by fixing imports from cjs modules
* chore: explores pattern for rscs in lexical
* WORKING!!!!!!
* fix(richtext-slate): field map path
* Working Link Drawer
* fix issues after merge
* AlignFeature
* Fix AlignFeature
---------
Co-authored-by: James <james@trbl.design>
* wip moves payload, user and data into partial req
* chore: adjust req type
* chore(next): installs sass and resolves type errors
* feat: working login route/view
* fix: me route
* chore(next): scaffolds access routes (#4562)
* chore(next): scaffolds admin layout and dashboard view (#4566)
* chore(next): builds initPage utility (#4589)
* feat(3.0): next route handlers (#4590)
* chore: removes old files
* chore(next): ssr list view (#4594)
* chore: removes old files
* chore: adjusts graphql file imports to align with new operation exports
* chore: allows for custom endpoints
* chore: cleanup
* chore(next): ssr edit view (#4614)
* chore(ui): ssr main nav (#4619)
* chore(next): ssr account view (#4620)
* chore(next): ssr auth views and document create (#4631)
* chore(next): ssr globals view (#4640)
* chore(next): scaffolds document layout (#4644)
* chore(next): ssr versions view (#4645)
* chore(next): ssr field conditions (#4675)
* chore(next): ssr field validations (#4700)
* chore(next): moves dashboard view into next dir
* chore(next): moves account view into next dir
* chore(next): moves global edit view into next dir
* chore(next): returns isolated configs and locale from initPage
* chore(next): ssr api view (#4721)
* feat: adds i18n functionality within Rest API, Local and Client contexts (#4749)
* chore: separate client translation groups with empty line
* chore: add missing translation used in db adapters
* chore: simplify next/routes export and import paths
* chore: renames PayloadT to Payload
* chore(next): custom views (#4748)
* chore: fix translation tsconfig
* chore: adjust other package ts-configs that rely on translations
* chore(next): installs @payloadcms/ui as direct dependency
* chore(next): progress to build
* chore(next): migrates types (#4792)
* fixes acccept-language detection
* chore(next): moves remaining components out from payload core (#4794)
* chore(deps): removes all unused dependencies from payload core (#4797)
* chore(next): achieves buildable state (#4803)
* adds Translation component and removes more react-i18next
* fixes up remaining translation strings
* fixes a few i18n TODO's
* chore: remaining translation strings without colons
* chore: adds missing ja translations
* chore(next): ssr group field (#4830)
* chore: removes placeholder t function
* chore: removes old file
* chore(bundler-webpack): removes webpack bundler
* chore(bundler-vite): removes vite bundler
* chore(next): ssr tabs field (#4863)
* chore(next): ssr row field
* chore(next): ssr textarea field
* chore(next): wires server action into document edit view (#4873)
* chore(next): conditional logic (#4880)
* chore(next): ssr radio, point, code, json, ui, and hidden fields (#4891)
* chore(next): ssr collapsible field (#4894)
* chore: remove findByID from req
* chore: adjusts file property on request type
* comment clarification
* chore: wires up busboy with Requst readstream
* chore: ports over express-fileupload into a NextJS compatible format
* chore: adjust upload file structure
* chore: adds try/catch around routes, corrects a few route responses
* chore: renames file/function
* chore: improve req type safety in local operations, misc req.files replacements
* chore: misc type and fn export changes
* chore: ensures root routes take pass unmodified request to root routes
* chore: improve types
* chore: consolidates locale api req initialization (#4922)
* chore(next): overhauls field rendering strategy (#4924)
* chore(next): ssr array field (#4937)
* chore(next): ssr blocks field (#4942)
* chore(next): ssr upload field and document drawer (#4957)
* chore(next): wires form submissions (#4982)
* chore: api handler adjustments
* feat: adds graphql playground handler
* adds credentials include setting to playground
* remove old playground init, stub graphql handler location
* fix: allow for null fallbackLocale
* fix: correctly prioritize locales passed as null
* chore: move all graphql code into next package
* graphql changes
* chore: semi working version of graphql http layer
* gql fix attempts
* rm console log
* chore: partial gql changes
* chore: adds gql and gql-http back into payload
* chore: removes collection from req
* chore: separates graphql package out for schema generation
* chore: dep cleanup
* chore: move graphql handlers
* chore: removes unused deps
* chore(next): ssr list view (#5032)
* chore: refactor response handler order for custom endpoints
* chore: add back in condition for collection GET path with 2 slugs
* chore: rm optional chain
* chore: import sort route file
* chore: allows custom endpoints to attempt before erroring
* feat: adds memoization to translation functions (#5036)
* chore: fix APIError import
* chore: return attemptCustomEndpointBeforeError responses
* chore(next): properly instantiates table columns
* fix(next): attaches params to req and properly assigns prefs key (#5042)
* chore: reorganize next route order
* chore(next): adds RouteError handler to next routes
* chore: builds payload successfully
* chore: misc file omissions
* fix(ui): maintains proper column order
* fix(ui): ensures first cell is a link
* fix(next): properly copies url object in createPayloadRequest (#5064)
* fix(ui): bumps react-toastify to v10.0.4 to fix hydration warnings
* feat: add route for static file GET requests (#5065)
* chore(next): allows resolved config promise to be thread through initPage (#5071)
* chore(ui): conditionally renders field label from props
* feat(next): next install script
* chore: pass config to route handlers
* feat: initial test suite framework (#4929)
* chore(next): renderable account, api, and create first user views (#5084)
* fix(next): properly parses search params in find, update, and delete handlers (#5088)
* chore(next): ssr versions view (#5085)
* chore: adds homepage for scss testing
* chore: moves dev folder to top, establishes new test pattern
* chore: working turbopack
* chore: sets up working dynamic payload-config imports
* remove unused code
* chore: rm console log
* misc
* feat: correctly subs out ability to boot REST API within same process
* chore: WIP dev suites
* chore: removes need for REST_API folder in test dir
* removes duplicate bootAdminPanel fn
* misc
* specify default export
* chore: sets up jest to work with next/jest
* chore: progress to mongodb and sharp builds
* chore: passing community tests
* chore: sorta workin
* chore: adjust payload-config import
* chore: adds rest client for Next handlers
* chore: removes test garb
* chore: restores payload-config tsconfig path temporarily
* chore: establishes pattern for memory db during tests
* chore: bumps mongoose to 7
* chore(next): 404s on nested create urls
* chore: functional _community e2e
* chore: increases e2e expect timeout
* fix(next): sanitizes locale toString from client config
* chore: type fixes
* chore: pulls mongodb from main
* chore: uses graphql to log user in
* feat: passing auth test suite
* chore(ui): threads params through context and conditionally renders document tabs (#5094)
* feat(ui): adds params context (#5095)
* chore: removes unecessary memory allocation for urlPropertiesObject object
* chore: passing graphql test suite
* chore: removes references to bson
* chore: re-enables mongodb memory server for auth test suite
* chore: replace bson with bson-objectid
* feat: passing collections-rest int suite
* chore: fixes bad imports
* chore: more passing int suites
* feat: passing globals int tests
* feat: passing hooks int test suite
* chore: remove last express file
* chore: start live-preview int test migration
* chore: passing localization int tests
* passing relationships int tests
* chore: partial passing upload int tests
* chore: fixes scss imports
* chore(ui): renders document info provider at root (#5106)
* chore: adds schema path to useFieldPath provider, more passing tests
* chore: begins work to optimize translation imports
* chore: add translations to ui ts-config references
* chore: add exports folder to package json exports
* chore: adds readme how-to-use instructions
* chore: attempts refactor of translation imports
* chore: adds authentication:account translation key to server keys
* chore: finishes translation optimization
* chore: ignores warnings from mongodb
* chore(ui): renders live document title (#5115)
* chore(ui): ssr document tabs (#5116)
* chore: handles redirecting from login
* chore: handle redirect with no searchParams
* chore: handle missing segments
* chore(next): migrates server action into standalone api endpoint (#5122)
* chore: adjust dashboard colection segments
* test: update e2e suites
* fix(ui): prevents unnecessary calls to form state
* chore: fix finding global config fields from schema path
* fix(next): executes root POST endpoints
* chore(ui): ignores values returned by form state polling
* chore: scaffolds ssr rte
* chore: renders client leaves
* chore: server-side rendered rich text elements
* chore: defines ClientFunction pattern
* chore(ui): migrates relationship field
* chore: adds translations, cleans up slate
* chore: functional slate link
* chore: slate upload ssr
* chore: relationship slate ssr
* chore: remaining slate ssr
* chore: fixes circular workspace dep
* chore: correct broken int test import paths
* chore: remove media files from root
* chore: server renders custom edit view
* fix(ui): resolves infinite loading in versions view
* fix(next): resolves global edit view lookup
* chore: payload builds
* chore: delete unused files
* chore: removes local property from payload
* chore: adds mongodb as dev dep in db-mongodb package
* chore: hide deprecation warnings for tempfile and jest-environment-jsdom
* chore: remove all translations from translations dist
* chore: clean ts-config files
* chore: simple type fixes
* chore(ui): server renders custom list view
* chore: fix next config payload-config alias
* chore: adds turbo alias paths
* chore: adjusts translation generation
* chore: improve auth function
* chore: eslint config for packages/ui
* chore(ui): exports FormState
* chore(next): migrates account view to latest patterns
* chore: disable barbie mode
* chore(ui): lints
* chore(next): lints
* chore: for alexical
* chore: custom handler type signature adjustment
* fix: non-boolean condition result causes infinite looping (#4579)
* chore(richtext-lexical): upgrade lexical from v0.12.5 to v0.12.6 (#4732)
* chore(richtext-lexical): upgrade all lexical packages from 0.12.5 to 0.12.6
* fix(richtext-lexical): fix TypeScript errors
* fix indenting
* feat(richtext-lexical): Blocks: generate type definitions for blocks fields (#4529)
* feat(richtext-lexical)!: Update lexical from 0.12.6 to 0.13.1, port over all useful changes from playground (#5066)
* feat(richtext-lexical): Update lexical from 0.12.6 to 0.13.1, port over all useful changes from playground
* chore: upgrade lexical version used in monorepo
* chore: remove the 3
* chore: upgrade nodemon versions (#5059)
* feat: add more options to addFieldStatePromise so that it can be used for field flattening (#4799)
* feat(plugin-seo)!: remove support for payload <2.7.0 (#4765)
* chore(plugin-seo): remove test script from package.json (#4762)
* chore: upgrade @types/nodemailer from v6.4.8 to v6.4.14 (#4733)
* chore: revert auth and initPage changes
* chore(next): moves edit and list views (#5170)
* fix: "The punycode module is deprecated" warning by updating nodemailer
* chore: adjust translations tsconfig paths in root
* chore: fix merge build
---------
Co-authored-by: Jarrod Flesch <jarrodmflesch@gmail.com>
Co-authored-by: Jacob Fletcher <jacobsfletch@gmail.com>
Co-authored-by: Jarrod Flesch <30633324+JarrodMFlesch@users.noreply.github.com>
Co-authored-by: Elliot DeNolf <denolfe@gmail.com>
Co-authored-by: James <james@trbl.design>
Co-authored-by: Alessio Gravili <alessio@gravili.de>
Co-authored-by: Alessio Gravili <70709113+AlessioGr@users.noreply.github.com>
* feat(richtext-lexical): Update lexical from 0.12.6 to 0.13.1, port over all useful changes from playground
* chore: upgrade lexical version used in monorepo
BREAKING: An unpopulated, internal link node no longer saves the doc id under fields.doc.value.id. Now, it saves it under fields.doc.value.
Migration inside of payload is automatic. If you are reading from the link node inside of your frontend, though, you will have to adjust it.
The version property of the link and autoLink node has been changed from 1 to 2.
* fix(richtext-lexical): Link: allow phone numbers as URLs starting with tel:+
* feat(richtext-lexical): Link Feature: immediately validate URL field in drawer form
* Remove console log
* feat(richtext-lexical): ability to configure link feature enabled relations on a field-level
* feat(richtext-lexical): ability to configure Relationship feature enabled relations on a field-level
* chore(richtext-lexical): Improve Link feature props typing
* chore(richtext-lexical): Improve Link and Relationship feature props typing
* fix(richtext-lexical): Link drawer types
* chore: merge conflict resolve
* chore(richtext-lexical): Link Feature: add comments that explain how getBaseFields works
* chore(richtext-lexical): lazy import all React things
* chore(richtext-lexical): use useMemo for lazy-loaded React Components to prevent lag and flashes when parent component re-renders
* chore: make exportPointerFiles.ts script usable for other packages as well by hoisting it up to the workspace root and making it configurable
* chore(richtext-lexical): make sure no client-side code is imported by default from Features
* chore(richtext-lexical): remove unnecessary scss files
* chore(richtext-lexical): adjust package.json exports
* chore(richtext-*): lazy-import Field & Cell Components, move Client-only exports to /components subpath export
* chore(richtext-lexical): make sure nothing client-side is directly exported from the / subpath export anymore
* add missing imports
* chore: remove breaking changes for Slate
* LazyCellComponent & LazyFieldComponent
* chore(richtext-lexical): Add int test which reproduces the issue
* chore: Remove unnecessary await in core afterRead promise
* fix(richtext-lexical): re-use recurseNestedFields from payload instead of using own recurseNestedFields
* chore(richtext-lexical): pass in missing properties which are available in the core afterRead hook
* chore: remove unnecessary block
* chore(richtext-lexical): Add a hint that the slash menu exists to the user
* Update LexicalEditor.tsx
---------
Co-authored-by: Alessio Gravili <70709113+AlessioGr@users.noreply.github.com>
* fix(richtext-lexical): make sure block fields are wrapped in a uniquely-named group
* chore: remove redundant hook
* chore(richtext-lexical): attempt to fix unnecessary unsaved changes warning regression
* cleanup everything
* chore: more cleanup
* debug
* looks like properly cloning the formdata for setting initial state fixes the issue where the old formdata is updated even if node.setFields is not called
* chore: fix e2e tests
* chore: fix e2e tests (a selector has changed)
* chore: fix int tests (due to new blocks data format)
* chore: fix incorrect insert block commands in drawer
* chore: add new e2e test
* chore: fail e2e tests when there are browser console errors
* fix(breaking): beforeInput and afterInput: fix missing key errors, consistent typing and cases in name
* chore: new lexical int tests and working test structure
* chore: more int tests, and better lexical collection structure
* fix(richtext-lexical): Blocks: unnecessary saving node value when initially opening a document
* feat(richtext-lexical): 'bottom' position value for plugins
* feat: TestRecorderFeature
* chore: restructuring to seed and clear db before each test
* chore: make sure all tests pass
* chore: make sure indexes are created in seed.ts - this fixes one erroring test
* chore: speed up test runs through db snapshots
* chore: support drizzle when resetting db
* chore: simplify seeding process, by moving boilerplate db reset / snapshot logic into a wrapper function
* chore: add new seeding process to admin test suite
* chore(deps): upgrade jest and playwright
* chore: make sure mongoose-specific tests are not skipped
* chore: fix point test, which was depending on another test (that's bad!)
* chore: fix incorrect import
* chore: remove unnecessary comments
* chore: clearly label lexicalE2E test file as todo
* chore: simplify seed logic
* chore: move versions test suite to new seed system
Fixes#3904
* fix(db-mongodb): improve find query performance
* fix: add optimization to other operations which use pagination: findGlobalVersions, findVersions, queryDrafts
* fix: index createdAt field by default
* feat(live-preview): another oen
* wip: changelog script
* wippppp
* chore: this worked
* wip: changelog working
* chore(script): working changelog gen
* chore(script): update changelog during release
* chore(richtext-lexical): add jsdocs for afterReadPromise in GraphQL
* feat(richtext-lexical): HTML Serializer
* chore(richtext-lexical): adjust comment
* chore(richtext-lexical): change the way the html serializer works
* chore: working html converter field, improve various exports
* feat: link and heading html serializers
* fix: populationPromises not being added properly
* feat: allow html serializers to be async
* feat: upload html serializer
* feat: text format => html
* feat: lists => html
* feat: Quote => html
* chore: improve Checklist => html conversion, by passing in the full parent to converters
* feat: pass collection, global and field props to collection, global and field hooks - where applicable
* fix: initial request context not set for all operations
* chore: add tests which check the collection prop for collection hooks
* feat: add context to props of global hooks
* chore: add global tests for global and field props
* chore: int tests: use JSON instead of object hashes
* Fix generate:types bug #3697
generateEntityDeclarations function creates mismatched type names. We'll simply use the existing Config type instead.
* code cleanup
* fix(bundler-webpack): better node_modules resolution
* chore: see if retries are affecting new webpack changes
* chore: reinstate retries
This reverts commit 96989295ba.
* chore: default to process.cwd() if cannot find node_modules path
* feat: update templates to 2.0 and support create-payload-app
* chore: rich text updates
* chore(templates): remove mongoURL
* chore: migrates rich text fields in website
* chore: manually aliases dotenv in templates
* chore: installs new beta in website template
* chore: type issues
* chore (template): add alias for fs to website template
* chore: more template updates
---------
Co-authored-by: James <james@trbl.design>
Co-authored-by: Dan Ribbens <dan.ribbens@gmail.com>
BREAKING CHANGE: If your config has a `admin.components.routes` array, you will need to key them into the `admin.components.views` object. The configuration options should remain unchanged.
Specified that you don't need to provide any credentials when using a correct IAM Role. IAM Roles are recommended by AWS over direct credentials due to superior security.
without default value, it gives error in payload admin page (in console of browser)
caught SyntaxError: "undefined" is not valid JSON
at JSON.parse (<anonymous>)
at ./src/payload.config.ts
as envs are not availabe in payload admin GCS_CREDENTIALS gives undefined
resulting JSON.parse(undefined) raises this error
description:Please add a link to a reproduction. See the fork [reproduction-guide](https://github.com/payloadcms/payload/blob/master/.github/reproduction-guide.md) for more information.
description:Want us to look into your issue faster? Follow the [reproduction-guide](https://github.com/payloadcms/payload/blob/main/.github/reproduction-guide.md) for more information.
validations:
required:false
- type:textarea
attributes:
label:Describe the Bug
validations:
required:true
- type:textarea
@@ -19,11 +24,6 @@ body:
description:Steps to reproduce the behavior, please provide a clear description of how to reproduce the issue, based on the linked minimal reproduction. Screenshots can be provided in the issue body below. If using code blocks, make sure that [syntax highlighting is correct](https://docs.github.com/en/get-started/writing-on-github/working-with-advanced-formatting/creating-and-highlighting-code-blocks#syntax-highlighting) and double check that the rendered preview is not broken.
validations:
required:true
- type:textarea
attributes:
label:Describe the Bug
validations:
required:true
- type:input
id:version
attributes:
@@ -31,6 +31,11 @@ body:
description:What version of Payload are you running?
validations:
required:true
- type:input
id:adapters-plugins
attributes:
label:Adapters and Plugins
description:What adapters and plugins are you using? ie. db-mongodb, db-postgres, bundler-webpack, etc.
- type:markdown
attributes:
value:Before submitting the issue, go through the steps you've written down to make sure the steps provided are detailed and clear.
1. [fork](https://github.com/payloadcms/payload/fork) this repo
2.run `yarn` to install dependencies
3.open up the `test/_community` directory
4.add any necessary `collections/globals/fields` in this directory to recreate the issue you are experiencing
5.run `yarn dev _community` to start the admin panel
1. [Fork](https://github.com/payloadcms/payload/fork) this repo
2.Optionally, create a new branch for your reproduction
3.Run `pnpm install` to install dependencies
4.Open up the `test/_community` directory
5.Add any necessary `collections/globals/fields` in this directory to recreate the issue you are experiencing
6. Run `pnpm dev _community` to start the admin panel
**NOTE:** The goal is to isolate the problem by reducing the number of `collections/globals/fields` you add to the `test/_community` folder. This folder is _not_ meant for you to copy your project into, but rather recreate the issue you are experiencing with minimal config.
@@ -21,7 +22,7 @@
-`config.ts` - This is the _granular_ Payload config for testing. It should be as lightweight as possible. Reference existing configs for an example
-`int.spec.ts` [Optional] - This is the test file run by jest. Any test file must have a `*int.spec.ts` suffix.
-`e2e.spec.ts` [Optional] - This is the end-to-end test file that will load up the admin UI using the above config and run Playwright tests.
-`payload-types.ts` - Generated types from `config.ts`. Generate this file by running `yarn dev:generate-types _community`.
-`payload-types.ts` - Generated types from `config.ts`. Generate this file by running `pnpm dev:generate-types _community`.
The directory split up in this way specifically to reduce friction when creating tests and to add the ability to boot up Payload with that specific config. You should modify the files in `test/_community` to get started.
@@ -39,12 +40,12 @@ There are a couple ways run integration tests:
- **Granularly** - you can run individual tests in vscode by installing the Jest Runner plugin and using that to run individual tests. Clicking the `debug` button will run the test in debug mode allowing you to set break points.
- **Manually** - you can run all int tests in the `/test/_community/int.spec.ts` file by running the following command:
```bash
yarn test:int _community
pnpm test:int _community
```
### Running E2E tests (Admin Panel UI tests)
@@ -56,8 +57,8 @@ The easiest way to run E2E tests is to install
Once they are installed you can open the `testing` tab in vscode sidebar and drill down to the test you want to run, i.e. `/test/_community/e2e.spec.ts`
- It is recommended to add the test credentials (located in `test/credentials.ts`) to your autofill for `localhost:3000/admin` as this will be required on every nodemon restart. The default credentials are `dev@payloadcms.com` as email and `test` as password.
The default credentials are `dev@payloadcms.com` as email and `test` as password. They can be found in `test/credentials.ts`. By default, these will be autofilled, so no log-in is required.
<configurationdefault="false"name="Run Dev Fields"type="NodeJSConfigurationType"application-parameters="--no-deprecation fields"path-to-js-file="test/dev.js"working-dir="$PROJECT_DIR$">
<configurationdefault="false"name="Run Dev _community"type="NodeJSConfigurationType"application-parameters="--no-deprecation _community"path-to-js-file="test/dev.js"working-dir="$PROJECT_DIR$">
@@ -14,7 +14,7 @@ If you find a vulnerability within the core Payload repository, and we determine
## Documentation edits
Payload documentation can be found directly within its codebase and you can feel free to make changes / improvements to any of it through opening a PR. We utilize these files directly in our website and will periodically deploy documentation updates as necessary.
Payload documentation can be found directly within its codebase, and you can feel free to make changes / improvements to any of it through opening a PR. We utilize these files directly in our website and will periodically deploy documentation updates as necessary.
## Building additional features
@@ -30,9 +30,17 @@ Our design review ensures that proposed changes fit seamlessly with other compon
To help us work on new features, you can create a new feature request post in [GitHub Discussion](https://github.com/payloadcms/payload/discussions) or discuss it in our [Discord](https://discord.com/invite/payload). New functionality often has large implications across the entire Payload repo, so it is best to discuss the architecture and approach before starting work on a pull request.
### Installation & Requirements
Payload is structured as a Monorepo, encompassing not only the core Payload platform but also various plugins and packages. To install all required dependencies, you have to run `pnpm install` once in the root directory. **PNPM IS REQUIRED!** Yarn or npm will not work - you will have to use pnpm to develop in the core repository. In most systems, the easiest way to install pnpm is to run `corepack enable` in your terminal.
If you're coming from a very outdated version of payload, it is recommended to nuke the node_modules folder before running pnpm install. On UNIX systems, you can easily do that using the `pnpm clean:unix` command, which will delete all node_modules folders and build artefacts.
It is also recommended to use at least Node v18 or higher. You can check your current node version by typing `node --version` in your terminal. The easiest way to switch between different node versions is to use [nvm](https://github.com/nvm-sh/nvm#intro).
### Code
Most new functionality should keep testing in mind. With 1.0, testability of new features has been vastly improved. All top-level directories within the `test/` directory are for testing a specific category: `fields`, `collections`, etc.
Most new functionality should keep testing in mind. All top-level directories within the `test/` directory are for testing a specific category: `fields`, `collections`, etc.
If it makes sense to add your feature to an existing test directory, please do so.
@@ -49,21 +57,35 @@ A typical directory with `test/` will be structured like this:
-`config.ts` - This is the _granular_ Payload config for testing. It should be as lightweight as possible. Reference existing configs for an example
-`int.spec.ts` - This is the test file run by jest. Any test file must have a `*int.spec.ts` suffix.
-`e2e.spec.ts` - This is the end-to-end test file that will load up the admin UI using the above config and run Playwright tests. These tests are typically only needed if a large change is being made to the Admin UI.
-`payload-types.ts` - Generated types from `config.ts`. Generate this file by running `pnpm dev:generate-types my-test-dir`.
-`payload-types.ts` - Generated types from `config.ts`. Generate this file by running `pnpm dev:generate-types my-test-dir`. Replace `my-test-dir` with the name of your testing directory.
The directory split up in this way specifically to reduce friction when creating tests and to add the ability to boot up Payload with that specific config.
Each test directory is split up in this way specifically to reduce friction when creating tests and to add the ability to boot up Payload with that specific config.
The following command will start Payload with your config: `pnpm dev my-test-dir`. This command will start up Payload using your config and refresh a test database on every restart.
The following command will start Payload with your config: `pnpm dev my-test-dir`. Example: `pnpm dev fields` for the test/`fields` test suite. This command will start up Payload using your config and refresh a test database on every restart. If you're using VS Code, the most common run configs are automatically added to your editor - you should be able to find them in your VS Code launch tab.
By default, it will automatically log you in with the default credentials. To disable that, you can either pass in the --no-auto-login flag (example: `pnpm dev my-test-dir --no-auto-login`) or set the `PAYLOAD_PUBLIC_DISABLE_AUTO_LOGIN` environment variable to `false`.
By default, payload will [automatically log you in](https://payloadcms.com/docs/authentication/config#admin-autologin) with the default credentials. To disable that, you can either pass in the --no-auto-login flag (example: `pnpm dev my-test-dir --no-auto-login`) or set the `PAYLOAD_PUBLIC_DISABLE_AUTO_LOGIN` environment variable to `false`.
If you wish to use to your own Mongo database for the `test` directory instead of using the in memory database, all you need to do is add the following env vars to the `test/dev.ts` file:
The default credentials are `dev@payloadcms.com` as E-Mail and `test` as password. These are used in the auto-login.
### Testing with your own MongoDB database
If you wish to use your own MongoDB database for the `test` directory instead of using the in memory database, all you need to do is add the following env vars to the `test/dev.ts` file:
-`process.env.NODE_ENV`
-`process.env.PAYLOAD_TEST_MONGO_URL`
- Simply set `process.env.NODE_ENV` to `test` and set `process.env.PAYLOAD_TEST_MONGO_URL` to your mongo url e.g. `mongodb://127.0.0.1/your-test-db`.
- Simply set `process.env.NODE_ENV` to `test` and set `process.env.PAYLOAD_TEST_MONGO_URL` to your MongoDB URL e.g. `mongodb://127.0.0.1/your-test-db`.
NOTE: It is recommended to add the test credentials (located in `test/credentials.ts`) to your autofill for `localhost:3000/admin` as this will be required on every nodemon restart. The default credentials are `dev@payloadcms.com` as E-Mail and `test` as password.
### Using Postgres
If you have postgres installed on your system, you can also run the test suites using postgres. By default, mongodb is used.
To do that, simply set the `PAYLOAD_DATABASE` environment variable to `postgres`.
### Running the e2e and int tests
You can run the entire test suite using `pnpm test`. If you wish to only run e2e tests, you can use `pnpm test:e2e`. If you wish to only run int tests, you can use `pnpm test:int`.
By default, `pnpm test:int` will only run int test against MongoDB. To run int tests against postgres, you can use `pnpm test:int:postgres`. You will have to have postgres installed on your system for this to work.
### Commits
@@ -89,3 +111,14 @@ If you are committing to [templates](./templates) or [examples](./examples), use
## Pull Requests
For all Pull Requests, you should be extremely descriptive about both your problem and proposed solution. If there are any affected open or closed issues, please leave the issue number in your PR message.
## Previewing docs
This is how you can preview changes you made locally to the docs:
3. Duplicate the `.env.example` file and rename it to `.env`
4. Add a `DOCS_DIR` environment variable to the `.env` file which points to the absolute path of your modified docs folder. For example `DOCS_DIR=/Users/yourname/Documents/GitHub/payload/docs`
5. Run `yarn run fetchDocs:local`. If this was successful, you should see no error messages and the following output: *Docs successfully written to /.../website/src/app/docs.json*. There could be error messages if you have incorrect markdown in your local docs folder. In this case, it will tell you how you can fix it
6. You're done! Now you can start the website locally using `yarn run dev` and preview the docs under [http://localhost:3000/docs/](http://localhost:3000/docs/)
@@ -45,7 +45,7 @@ There are a couple ways to do this:
- **Granularly** - you can run individual tests in vscode by installing the Jest Runner plugin and using that to run individual tests. Clicking the `debug` button will run the test in debug mode allowing you to set break points.
- **Manually** - you can run all int tests in the `/test/_community/int.spec.ts` file by running the following command:
@@ -62,7 +62,7 @@ The easiest way to run E2E tests is to install
Once they are installed you can open the `testing` tab in vscode sidebar and drill down to the test you want to run, i.e. `/test/_community/e2e.spec.ts`
> 🎉 <strong>Payload 2.0 is now available!</strong> Read more in the <a target="_blank" href="https://payloadcms.com/blog/payload-2-0" rel="dofollow"><strong>announcement post</strong></a>.
<h3>Benefits over a regular CMS</h3>
<ul>
<li>Don’t hit some third-party SaaS API, hit your own API</li>
@@ -47,20 +41,27 @@ Create a cloud account, connect your GitHub, and [deploy in minutes](https://pay
Before beginning to work with Payload, make sure you have all of the [required software](https://payloadcms.com/docs/getting-started/installation).
```text
npx create-payload-app
npx create-payload-app@latest
```
Alternatively, it only takes about five minutes to [create an app from scratch](https://payloadcms.com/docs/getting-started/installation#from-scratch).
Jumpstart your next project by starting with a pre-made template. These are production-ready, end-to-end solutions designed to get you to market as fast as possible.
Eliminate the need to combine Shopify and a CMS, and instead do it all with Payload + Stripe. Best of all, you can extend it as much as you need.
[All Official Templates](https://github.com/orgs/payloadcms/repositories?q=topic%3Apayload-template) · [Community Templates](https://github.com/topics/payload-template)
Eliminate the need to combine Shopify and a CMS, and instead do it all with Payload + Stripe. Comes with a beautiful, fully functional front-end complete with shopping cart, checkout, orders, and much more.
**If you maintain your own template, consider adding the `payload-template` topic to your GitHub repository for others to find.**
Build any kind of website, blog, or portfolio from small to enterprise. Comes with a beautiful, fully functional front-end complete with posts, projects, comments, and much more.
We're constantly adding more templates to our [Templates Directory](https://github.com/payloadcms/payload/tree/main/templates). If you maintain your own template, consider adding the `payload-template` topic to your GitHub repository for others to find.
@@ -88,15 +89,19 @@ Eliminate the need to combine Shopify and a CMS, and instead do it all with Payl
Check out the [Payload website](https://payloadcms.com/docs/getting-started/what-is-payload) to find in-depth documentation for everything that Payload offers.
Migrating from v1 to v2? Check out the [2.0 Release Notes](https://github.com/payloadcms/payload/releases/tag/v2.0.0) on how to do it.
## 🙋 Contributing
If you want to add contributions to this repository, please follow the instructions in [contributing.md](./contributing.md).
If you want to add contributions to this repository, please follow the instructions in [contributing.md](./CONTRIBUTING.md).
## 📚 Examples
The examples directory is a great resource for learning how to setup Payload in a variety of different ways.
The [Examples Directory](./examples) is a great resource for learning how to setup Payload in a variety of different ways, but you can also find great examples in our blog and throughout our social media.
desc: Bundlers are used to bundle the code that serves Payload's Admin Panel.
---
Payload has two official bundlers, the [Webpack Bundler](/docs/admin/webpack) and the [Vite Bundler](/docs/admin/vite). You must install a bundler to use the admin panel.
##### Install a bundler
Webpack (recommended):
```text
yarn add @payloadcms/bundler-webpack
```
Vite (beta):
```text
yarn add @payloadcms/bundler-vite
```
##### Configure the bundler
```ts
// payload.config.ts
import { buildConfig } from 'payload/config'
import { webpackBundler } from '@payloadcms/bundler-webpack'
// import { viteBundler } from '@payloadcms/bundler-vite'
export default buildConfig({
// highlight-start
admin: {
bundler: webpackBundler(), // or viteBundler()
},
// highlight-end
})
```
### What are bundlers?
At their core, a bundler's main goal is to take a bunch of files and turn them into a few optimized files that you ship to the browser. The admin UI has a root `index.html` entry point, and from there the bundler traverses the dependency tree, bundling all of the files that are required from that point on.
Since the bundled file is sent to the browser, it can't include any server-only code. You will need to remove any server-only code from your admin UI before bundling it. You can learn more about [excluding server code](/docs/admin/excluding-server-code) section.
<Banner type="warning">
<strong>Using environment variables in the admin UI</strong>
<br />
Bundles should not contain sensitive information. By default, Payload excludes env variables from
the bundle. If you need to use env variables in your payload config, you need to prefix them with
`PAYLOAD_PUBLIC_` to make them available to the client-side code.
While designing the Payload Admin panel, we determined it should be as minimal and straightforward as possible to allow easy customization and control. There are many times where you may want to completely control how a whole view or a field works. You might even want to add in your own routes entirely. In order for Payload to support that level of customization without introducing versioning / future-proofing issues, Payload provides for a pattern to supply your own React components via your Payload config.
While designing the Payload Admin panel, we determined it should be as minimal and straightforward as possible to allow easy customization and control. There are many times where you may want to completely control how a whole view or a field works. You might even want to add in new views entirely. In order for Payload to support this level of customization without introducing versioning / future-proofing issues, Payload provides for a pattern to supply your own React components via your Payload config.
To swap in your own React component, first, consult the list of available component overrides below. Determine the scope that corresponds to what you are trying to accomplish, and then author your React component accordingly.
<Banner type="success">
<strong>Tip:</strong>
<br />
Custom components will automatically be provided with all props that the default component would
accept.
Custom components will automatically be provided with all props that the default component
normally accepts.
</Banner>
### Base Component Overrides
You can override a set of admin panel-wide components by providing a component to your base Payload config's `admin.components` property. The following options are available:
| **`Nav`** | Contains the sidebar and mobile Nav in its entirety. |
| **`logout.Button`** | A custom React component. |
| **`BeforeDashboard`** | Array of components to inject into the built-in Dashboard, _before_ the default dashboard contents. |
| **`AfterDashboard`** | Array of components to inject into the built-in Dashboard, _after_ the default dashboard contents. [Demo](https://github.com/payloadcms/payload/tree/master/test/admin/components/AfterDashboard/index.tsx) |
| **`BeforeLogin`** | Array of components to inject into the built-in Login, _before_ the default login form. |
| **`AfterLogin`** | Array of components to inject into the built-in Login, _after_ the default login form. |
| **`BeforeNavLinks`** | Array of components to inject into the built-in Nav, _before_ the links themselves. |
| **`AfterNavLinks`** | Array of components to inject into the built-in Nav, _after_ the links. |
| **`views.Account`** | The Account view is used to show the currently logged in user's Account page. |
| **`views.Dashboard`** | The main landing page of the Admin panel. |
| **`graphics.Icon`** | Used as a graphic within the `Nav` component. Often represents a condensed version of a full logo. |
| **`graphics.Logo`** | The full logo to be used in contexts like the `Login` view. |
| **`routes`** | Define your own routes to add to the Payload Admin UI. [More](#custom-routes) |
| **`providers`** | Define your own provider components that will wrap the Payload Admin UI. [More](#custom-providers) |
| **`Nav`** | Contains the sidebar / mobile menu in its entirety. |
| **`BeforeNavLinks`** | Array of components to inject into the built-in Nav, _before_ the links themselves. |
| **`AfterNavLinks`** | Array of components to inject into the built-in Nav, _after_ the links. |
| **`BeforeDashboard`** | Array of components to inject into the built-in Dashboard, _before_ the default dashboard contents. |
| **`AfterDashboard`** | Array of components to inject into the built-in Dashboard, _after_ the default dashboard contents. [Demo](https://github.com/payloadcms/payload/tree/main/test/admin/components/AfterDashboard/index.tsx) |
| **`BeforeLogin`** | Array of components to inject into the built-in Login, _before_ the default login form. |
| **`AfterLogin`** | Array of components to inject into the built-in Login, _after_ the default login form. |
| **`logout.Button`** | A custom React component. |
| **`graphics.Icon`** | Used as a graphic within the `Nav` component. Often represents a condensed version of a full logo. |
| **`graphics.Logo`** | The full logo to be used in contexts like the `Login` view. |
| **`providers`** | Define your own provider components that will wrap the Payload Admin UI. [More](#custom-providers) |
| **`actions`** | Array of custom components to be rendered in the Payload Admin UI header, providing additional interactivity and functionality. |
| **`views`** | Override or create new views within the Payload Admin UI. [More](#views) |
#### Full example:
Here is a full example showing how to swap some of these components for your own.
`payload.config.js`
```ts
import { buildConfig } from 'payload/config'
import {
MyCustomNav,
MyCustomLogo,
@@ -51,6 +51,7 @@ import {
MyCustomAccount,
MyCustomDashboard,
MyProvider,
MyCustomAdminAction,
} from './customComponents'
export default buildConfig({
@@ -61,6 +62,7 @@ export default buildConfig({
Icon: MyCustomIcon,
Logo: MyCustomLogo,
},
actions: [MyCustomAdminAction],
views: {
Account: MyCustomAccount,
Dashboard: MyCustomDashboard,
@@ -71,31 +73,101 @@ export default buildConfig({
})
```
_For more examples regarding how to customize components, look at the following [examples](https://github.com/payloadcms/payload/tree/master/test/admin/components)._
#### Views
You can easily swap entire views with your own by using the `admin.components.views` property. At the root level, Payload renders the following views by default, all of which can be overridden:
| **`Account`** | The Account view is used to show the currently logged in user's Account page. |
| **`Dashboard`** | The main landing page of the Admin panel. |
To swap out any of these views, simply pass in your custom component to the `admin.components.views` property of your Payload config. For example:
```ts
// payload.config.ts
{
// ...
admin: {
components: {
views: {
Account: MyCustomAccountView,
Dashboard: MyCustomDashboardView,
},
},
},
}
```
For more granular control, pass a configuration object instead. Each view corresponds to its own `<Route />` component in [React Router v5](https://v5.reactrouter.com). Payload exposes all of the properties of React Router:
_\* An asterisk denotes that a property is required._
#### Adding new views
To add a _new_ view to the Admin Panel, simply add another key to the `views` object with at least a `path` and `Component` property. For example:
```ts
// payload.config.ts
{
// ...
admin: {
components: {
views: {
MyCustomView: {
Component: MyCustomView,
path: '/my-custom-view',
},
},
},
},
}
```
<Banner type="warning">
<strong>Note:</strong>
<br />
Routes are cascading. This means that unless explicitly given the `exact` property, they will
match on URLs that simply _start_ with the route's path. This is helpful when creating catch-all
routes in your application. Alternatively, you could define your nested route _before_ your parent
route.
</Banner>
_For more examples regarding how to customize components, look at the following [examples](https://github.com/payloadcms/payload/tree/main/test/admin/components)._
For help on how to build your own custom view components, see [building a custom view component](#building-a-custom-view-component).
### Collections
You can override components on a Collection-by-Collection basis via each Collection's `admin` property.
You can override components on a collection-by-collection basis via the `admin.components` property.
| **`views.Edit`** | Used while a document within this Collection is being edited. |
| **`views.List`** | The `List` view is used to render a paginated, filterable table of Documents in this Collection. |
| **`BeforeList`** | Array of components to inject _before_ the built-in List view |
| **`BeforeListTable`** | Array of components to inject _before_ the built-in List view's table |
| **`AfterList`** | Array of components to inject _after_ the built-in List view |
| **`AfterListTable`** | Array of components to inject _after_ the built-in List view's table |
| **`edit.SaveButton`** | Replace the default `Save` button with a custom component. Drafts must be disabled |
| **`edit.SaveDraftButton`** | Replace the default `Save Draft` button with a custom component. Drafts must be enabled and autosave must be disabled. |
| **`edit.PublishButton`** | Replace the default `Publish` button with a custom component. Drafts must be enabled. |
| **`edit.PreviewButton`** | Replace the default `Preview` button with a custom component. |
| **`BeforeList`** | Array of components to inject _before_ the built-in List view |
| **`BeforeListTable`** | Array of components to inject _before_ the built-in List view's table |
| **`AfterListTable`** | Array of components to inject _after_ the built-in List view's table |
| **`AfterList`** | Array of components to inject _after_ the built-in List view |
| **`views`** | Override or create new views within the Payload Admin UI. [More](#collection-views) |
#### Examples
Here is a full example showing how to swap some of these components for your own:
Some text before the default list view component. If you just want to do that, you can also
use the admin.components.list.BeforeList hook
</p>
<List {...props} />
</div>
)
To swap out entire views on collections, you can use the `admin.components.views` property on the collection's config. Payload renders the following views by default, all of which can be overridden:
| **`Edit`** | The Edit view is used to edit a single document for a given collection. |
| **`List`** | The List view is used to show a list of documents for a given collection. |
To swap out any of these views, simply pass in your custom component to the `admin.components.views` property of your Payload config. This will replace the entire view, including the page breadcrumbs, title, tabs, etc, _as well as all nested routes_.
```ts
// Collection.ts
{
// ...
admin: {
components: {
views: {
Edit: MyCustomEditView,
List: MyCustomListView,
},
},
},
}
```
_For help on how to build your own custom view components, see [building a custom view component](#building-a-custom-view-component)._
**Customizing Nested Views within 'Edit' in Collections**
The `Edit` view in collections consists of several nested views, each serving a unique purpose. You can customize these nested views using the `admin.components.views.Edit` property in the collection's configuration. This approach allows you to replace specific nested views while keeping the overall structure of the `Edit` view intact, including the page breadcrumbs, title, tabs, etc.
Here's an example of how you can customize nested views within the `Edit` view in collections, including the use of the `actions` property:
```ts
// Collection.ts
{
// ...
admin: {
components: {
views: {
Edit: {
Default: {
Component: MyCustomDefaultTab,
actions: [CollectionEditButton], // Custom actions for the default edit view
},
API: {
Component: MyCustomAPIView,
actions: [CollectionAPIButton], // Custom actions for API view
},
LivePreview: {
Component: MyCustomLivePreviewView,
actions: [CollectionLivePreviewButton], // Custom actions for Live Preview
},
Version: {
Component: MyCustomVersionView,
actions: [CollectionVersionButton], // Custom actions for Version view
},
Versions: {
Component: MyCustomVersionsView,
actions: [CollectionVersionsButton], // Custom actions for Versions view
},
},
List: {
actions: [CollectionListButton],
},
},
},
},
}
```
**Adding New Tabs to 'Edit' View**
You can also add _new_ tabs to the `Edit` view by adding another key to the `components.views.Edit[key]` object with a `path` and `Component` property. See [Custom Tabs](#custom-tabs) for more information.
### Globals
As with Collections, You can override components on a global-by-global basis via their `admin` property.
As with Collections, you can override components on a global-by-global basis via the `admin.components` property.
| **`views.Edit`** | Used while this Global is being edited. |
| **`edit.SaveButton`** | Replace the default `Save` button with a custom component. Drafts must be disabled |
| **`edit.SaveDraftButton`** | Replace the default `Save Draft` button with a custom component. Drafts must be enabled and autosave must be disabled. |
| **`edit.PublishButton`** | Replace the default `Publish` button with a custom component. Drafts must be enabled. |
| **`edit.PreviewButton`** | Replace the default `Preview` button with a custom component. |
| **`elements.SaveButton`** | Replace the default `Save` button with a custom component. Drafts must be disabled |
| **`elements.SaveDraftButton`** | Replace the default `Save Draft` button with a custom component. Drafts must be enabled and autosave must be disabled. |
| **`elements.PublishButton`** | Replace the default `Publish` button with a custom component. Drafts must be enabled. |
| **`elements.PreviewButton`** | Replace the default `Preview` button with a custom component. |
| **`views`** | Override or create new views within the Payload Admin UI. [More](#global-views) |
#### Global views
To swap out views for globals, you can use the `admin.components.views` property on the global's config. Payload renders the following views by default, all of which can be overridden:
| **`Edit`** | The Edit view is used to edit a single document for a given Global. |
To swap out any of these views, simply pass in your custom component to the `admin.components.views` property of your Payload config. This will replace the entire view, including the page breadcrumbs, title, and tabs, _as well as all nested views_.
```ts
// Global.ts
{
// ...
admin: {
components: {
views: {
Edit: MyCustomEditView,
},
},
},
}
```
_For help on how to build your own custom view components, see [building a custom view component](#building-a-custom-view-component)._
**Customizing Nested Views within 'Edit' in Globals**
Similar to collections, Globals allow for detailed customization within the `Edit` view. This includes the ability to swap specific nested views while maintaining the overall structure of the `Edit` view. You can use the `admin.components.views.Edit` property in the Globals configuration to achieve this, and this will only replace the nested view, leaving the page breadcrumbs, title, and tabs intact.
Here's how you can customize nested views within the `Edit` view in Globals, including the use of the `actions` property:
```ts
// Global.ts
{
// ...
admin: {
components: {
views: {
Edit: {
Default: {
Component: MyCustomGlobalDefaultTab,
actions: [GlobalEditButton], // Custom actions for the default edit view
},
API: {
Component: MyCustomGlobalAPIView,
actions: [GlobalAPIButton], // Custom actions for API view
},
LivePreview: {
Component: MyCustomGlobalLivePreviewView,
actions: [GlobalLivePreviewButton], // Custom actions for Live Preview
},
Version: {
Component: MyCustomGlobalVersionView,
actions: [GlobalVersionButton], // Custom actions for Version view
},
Versions: {
Component: MyCustomGlobalVersionsView,
actions: [GlobalVersionsButton], // Custom actions for Versions view
},
},
},
},
},
}
```
You can also add _new_ tabs to the `Edit` view by adding another key to the `components.views.Edit[key]` object with a `path` and `Component` property. See [Custom Tabs](#custom-tabs) for more information.
### Custom Tabs
You can easily swap individual collection or global edit views. To do this, pass an _object_ to the `admin.components.views.Edit` property of the config. Payload renders the following views by default, all of which can be overridden:
// You can also define `components.views.Edit` as a component, this will override _all_ nested views
Default: MyCustomDefaultTab,
Versions: MyCustomVersionsTab,
Version: MyCustomVersionTab,
API: MyCustomAPITab,
LivePreview: MyCustomLivePreviewTab,
},
},
},
},
}
```
To add a _new_ tab to the `Edit` view, simply add another key to `components.views.Edit[key]` with at least a `path` and `Component` property. For example:
| **`user`** | The currently logged in user. Will be `null` if no user is logged in. |
| **`canAccessAdmin`** \* | If the currently logged in user is allowed to access the admin panel or not. |
<Banner type="warning">
<strong>Note:</strong>
<br />
It's up to you to secure your custom views. If your view requires a user to be logged in or to
have certain access rights, you should handle that within your view component yourself.
</Banner>
#### Example
You can find examples of custom views in the [Payload source code `/test/admin/components/views` folder](https://github.com/payloadcms/payload/tree/main/test/admin/components/views). There, you'll find two custom views:
1. A custom view that uses the `DefaultTemplate`, which is the built-in Payload template that displays the sidebar and "eyebrow nav"
1. A custom view that uses the `MinimalTemplate` - which is just a centered template used for things like logging in or out
To see how to pass in your custom views to create custom views of your own, take a look at the `admin.components.views` property of the [Payload test admin config](https://github.com/payloadcms/payload/blob/main/test/admin/config.ts).
### Fields
@@ -204,6 +490,15 @@ All Payload fields support the ability to swap in your own React components. So,
| **`Cell`** | Used in the `List` view's table to represent a table-based preview of the data stored in the field. [More](#cell-component) |
| **`Field`** | Swap out the field itself within all `Edit` views. [More](#field-component) |
As an alternative to replacing the entire Field component, you may want to keep the majority of the default Field component and only swap components within. This allows you to replace the **`Label`** or **`Error`** within a field component or add additional components inside the field with **`beforeInput`** or **`afterInput`**. **`beforeInput`** and **`afterInput`** are allowed in any fields that don't contain other fields, except [UI](/docs/fields/ui) and [Rich Text](/docs/fields/rich-text).
components, including the <strong>useField</strong> hook, [click here](/docs/admin/hooks).
</Banner>
## Custom routes
## Label Component
You can easily add your own custom routes to the Payload Admin panel using the `admin.components.routes` property. Payload currently uses the extremely powerful React Router v5.x and custom routes support all the properties of the React Router `<Route />` component.
These are the props that will be passed to your custom Label.
**Custom routes support the following properties:**
| **`htmlFor`** | Property used to set `for` attribute for label. |
| **`label`** | Label value provided in field, it can be used with i18n. |
| **`required`** | A boolean value that represents if the field is required or not. |
#### Example
You can find examples of custom route views in the [Payload source code `/test/admin/components/views` folder](https://github.com/payloadcms/payload/tree/master/test/admin/components/views). There, you'll find two custom routes:
```tsx
import React from 'react'
import { useTranslation } from 'react-i18next'
1. A custom view that uses the `DefaultTemplate`, which is the built-in Payload template that displays the sidebar and "eyebrow nav"
1. A custom view that uses the `MinimalTemplate` - which is just a centered template used for things like logging in or out
import { getTranslation } from 'payload/utilities/getTranslation'
To see how to pass in your custom views to create custom routes of your own, take a look at the `admin.components.routes` property of the [Payload test admin config](https://github.com/payloadcms/payload/blob/master/test/admin/config.ts).
| **`showError`** | A boolean value that represents if the error should be shown. |
#### Example
```tsx
import React from 'react'
type Props = {
message: string
showError?: boolean
}
const CustomError: React.FC<Props> = (props) => {
const { message, showError } = props
if (showError) {
return <p style={{ color: 'red' }}>{message}</p>
} else return null
}
```
## afterInput and beforeInput
With these properties you can add multiple components before and after the input element. For example, you can add an absolutely positioned button to clear the current field value.
@@ -31,7 +31,7 @@ To make it as easy as possible for you to override our styles, Payload uses [BEM
In addition to adding your own style definitions, you can also override Payload's built-in CSS variables. We use as much as possible behind the scenes, and you can override any of them that you'd like to.
You can find the built-in Payload CSS variables within [`./src/admin/scss/app.scss`](https://github.com/payloadcms/payload/blob/master/src/admin/scss/app.scss) and [`./src/admin/scss/colors.scss`](https://github.com/payloadcms/payload/blob/master/src/admin/scss/colors.scss). The following variables are defined and can be overridden:
You can find the built-in Payload CSS variables within [`./src/admin/scss/app.scss`](https://github.com/payloadcms/payload/blob/main/packages/payload/src/admin/scss/app.scss) and [`./src/admin/scss/colors.scss`](https://github.com/payloadcms/payload/blob/main/packages/payload/src/admin/scss/colors.scss). The following variables are defined and can be overridden:
TODO: expand on this and make sure it looks nice, talk about how if you use a `process.env.SERVER_URL`, it might not be usable in your Payload config in your admin UI, but it needs to be, so it should be prefixed like `process.env.PAYLOAD_PUBLIC_SERVER_URL` to work in both places
## Admin environment vars
<Banner type="warning">
@@ -14,10 +12,11 @@ TODO: expand on this and make sure it looks nice, talk about how if you use a `p
<br />
Be careful about what variables you provide to your client-side code. Analyze every single one to
make sure that you're not accidentally leaking anything that an attacker could exploit. Only keys
that are safe to be available to everyone in plain text should be provided to your Admin panel.
that are safe for anyone to read in plain text should be provided to your Admin panel.
</Banner>
By default, `env` variables are **not** provided to the Admin panel for security and safety reasons. But, Payload provides you with a way to still provide `env` vars to your frontend code.
By default, `env` variables are **not** provided to the Admin panel for security and safety reasons.
But, Payload provides you with a way to still provide `env` vars to your frontend code.
**Payload will automatically supply any present `env` variables that are prefixed with `PAYLOAD_PUBLIC_` directly to the Admin panel.**
desc: Learn how to exclude server-only code from the Payload Admin UI bundle
---
- Talk about the theory behind using aliases to exclude files
- Talk about environment variables maybe?
Because the Admin Panel browser bundle includes your Payload Config file, files using server-only modules need to be excluded.
It's common for your config to rely on server only modules to perform logic in access control functions, hooks, and other contexts.
Any file that imports a server-only module such as `fs`, `stripe`, `authorizenet`, `nodemailer`, etc. **cannot** be included in the browser bundle.
#### Example Scenario
Say we have a collection called `Subscriptions` that has a `beforeChange` hook that creates a Stripe subscription whenever a Subscription document is created in Payload.
**Collection config**:
```ts
// collections/Subscriptions/index.ts
import { CollectionConfig } from 'payload/types'
import createStripeSubscription from './hooks/createStripeSubscription'
The above code is NOT production-ready and should not be referenced to create Stripe
subscriptions. Although creating a beforeChange hook is a completely valid spot to do things like
create subscriptions, the code above is incomplete and insecure, meant for explanation purposes
only.
</Banner>
**As-is, this collection will prevent your Admin panel from bundling or loading correctly, because Stripe relies on some Node-only packages.**
#### How to fix this
You need to make sure that you use `alias`es to tell your bundler to import "safe" files vs. attempting to import any server-side code that you need to get rid of. Depending on your bundler (Webpack, Vite, etc.) the steps involved may be slightly different.
The basic idea is to create a file that exports an empty object, and then alias import paths of any files that import server-only modules to that empty object file.
This way when your bundler goes to import a file that contains server-only modules, it will instead import the empty object file, which will not break the browser bundle.
### Aliasing server-only modules
To remove files that contain server-only modules from your bundle, you can use an `alias`.
In the Subscriptions config file above, we are importing the hook like so:
```ts
// collections/Subscriptions/index.ts
import createStripeSubscription from './hooks/createStripeSubscription'
```
By default the browser bundle will now include all the code from that file and any files down the tree. We know that the file imports `stripe`.
To fix this, we need to alias the `createStripeSubscription` file to a different file that can safely be included in the browser bundle.
First, we will create a mock file to replace the server-only file when bundling:
```js
// mocks/modules.js
export default {}
/**
* NOTE: if you are destructuring an import
* the mock file will need to export matching
* variables as the destructured object.
*
* export const namedExport = {}
*/
```
Aliasing with [Webpack](/docs/admin/webpack) can be done by:
```ts
// payload.config.ts
import { buildConfig } from 'payload/config'
import { webpackBundler } from '@payloadcms/bundler-webpack'
import { Subscriptions } from './collections/Subscriptions'
@@ -126,7 +126,7 @@ You can send the following actions to the `dispatchFields` function.
| **`REPLACE_STATE`** | Completely replaces form state |
| **`UPDATE`** | Update any property of a specific field's state |
To see types for each action supported within the `dispatchFields` hook, check out the Form types [here](https://github.com/payloadcms/payload/blob/master/src/admin/components/forms/Form/types.ts).
To see types for each action supported within the `dispatchFields` hook, check out the Form types [here](https://github.com/payloadcms/payload/blob/main/packages/payload/src/admin/components/forms/Form/types.ts).
### useForm
@@ -324,7 +324,7 @@ The `useForm` hook returns an object with the following properties: |
},
{
drawerTitle: 'addFieldRow',
drawerDescription: 'A useful method to programtically add a row to an array or block field.',
drawerDescription: 'A useful method to programmatically add a row to an array or block field.',
drawerSlug: 'addFieldRow',
drawerContent: (
<>
@@ -347,7 +347,7 @@ The `useForm` hook returns an object with the following properties: |
value: <strong><code>rowIndex</code></strong>,
},
{
value: "The index of the row to add",
value: "The index of the row to add. If omitted, the row will be added to the end of the array.",
Returns methods to set and get user preferences. More info can be found [here](https://payloadcms.com/docs/admin/preferences).
### useTheme
Returns the currently selected theme (`light`, `dark` or `auto`), a set function to update it and a boolean `autoMode`, used to determine if the theme value should be set automatically based on the user's device preferences.
```tsx
import { useTheme } from 'payload/components/utilities'
const MyComponent: React.FC = () => {
// highlight-start
const { autoMode, setTheme, theme } = useTheme()
// highlight-end
return (
<>
<span>
The current theme is {theme} and autoMode is {autoMode}
The `useDocumentEvents` hook provides a way of subscribing to cross-document events, such as updates made to nested documents within a drawer. This hook will report document events that are outside the scope of the document currently being edited. This hook provides the following:
| **`mostRecentUpdate`** | An object containing the most recently updated document. It contains the `entitySlug`, `id` (if collection), and `updatedAt` properties |
| **`reportUpdate`** | A method used to report updates to documents. It accepts the same arguments as the `mostRecentUpdate` property. |
**Example:**
```tsx
import { useDocumentEvents } from 'payload/components/hooks'
Payload dynamically generates a beautiful, fully functional React admin panel to manage your data. It's extremely powerful and can be customized / extended upon easily by swapping in your own React components. You can add additional views, modify how built-in views look / work, swap out Payload branding for your client's, build your own field types and much more.
TODO: change the sentence below to reference our adapter pattern, and officially supported bundlers, linking to Vite and Webpackdocs pages specifically
The Payload Admin panel is built with Webpack, code-split, highly performant (even with 100+ fields), and written fully in TypeScript.
The Payload Admin panel can be bundled with our officially supported [Vite](/docs/admin/vite) and [webpack](/docs/admin/webpack) bundlers or you can integrate another bundler following our adapter pattern approach.
When bundled, it is code-split, highly performant (even with 100+ fields), and written fully in TypeScript.
<Banner type="success">
The Admin panel is meant to be simple enough to give you a starting point but not bring too much
@@ -28,25 +28,25 @@ The Payload Admin panel is built with Webpack, code-split, highly performant (ev
All options for the Admin panel are defined in your base Payload config file.
TODO: add `vite` and `bundler` properties to the table below
| `user` | The `slug` of a Collection that you want be used to log in to the Admin dashboard. [More](/docs/admin/overview#the-admin-user-collection) |
| `buildPath` | Specify an absolute path for where to store the built Admin panel bundle used in production. Defaults to `path.resolve(process.cwd(), 'build')`. |
| `meta` | Base meta data to use for the Admin panel. Included properties are `titleSuffix`, `ogImage`, and `favicon`. |
| `disable` | If set to `true`, the entire Admin panel will be disabled. |
| `indexHTML` | Optionally replace the entirety of the `index.html` file used by the Admin panel. Reference the [base index.html file](https://github.com/payloadcms/payload/blob/master/src/admin/index.html) to ensure your replacement has the appropriate HTML elements. |
| `css` | Absolute path to a stylesheet that you can use to override / customize the Admin panel styling. [More](/docs/admin/customizing-css). |
| `scss` | Absolute path to a Sass variables / mixins stylesheet meant to override Payload styles to make for an easy re-skinning of the Admin panel. [More](/docs/admin/customizing-css#overriding-scss-variables). |
| `dateFormat` | Global date format that will be used for all dates in the Admin panel. Any valid [date-fns](https://date-fns.org/) format pattern can be used. |
| `avatar` | Set account profile picture. Options: `gravatar`, `default` or a custom React component. |
| `autoLogin` | Used to automate admin log-in for dev and demonstration convenience. [More](/docs/authentication/config). |
| `livePreview` | Enable real-time editing for instant visual feedback of your front-end application. [More](/docs/live-preview/overview). |
| `components` | Component overrides that affect the entirety of the Admin panel. [More](/docs/admin/components) |
| `webpack` | Customize the Webpack config that's used to generate the Admin panel. [More](/docs/admin/webpack) |
| **`logoutRoute`** | The route for the `logout` page. |
| **`inactivityRoute`** | The route for the `logout` inactivity page. |
| `bundler` | The bundler that you would like to use to bundle the admin panel. Officially supported bundlers: [Webpack](/docs/admin/webpack) and [Vite](/docs/admin/vite). |
| `user` | The `slug` of a Collection that you want be used to log in to the Admin dashboard. [More](/docs/admin/overview#the-admin-user-collection) |
| `buildPath` | Specify an absolute path for where to store the built Admin panel bundle used in production. Defaults to `path.resolve(process.cwd(), 'build')`. |
| `meta` | Base meta data to use for the Admin panel. Included properties are `titleSuffix`, `ogImage`, and `favicon`. |
| `disable`| If set to `true`, the entire Admin panel will be disabled. |
| `indexHTML` | Optionally replace the entirety of the `index.html` file used by the Admin panel. Reference the [base index.html file](https://github.com/payloadcms/payload/blob/main/packages/payload/src/admin/index.html) to ensure your replacement has the appropriate HTML elements. |
| `css` | Absolute path to a stylesheet that you can use to override / customize the Admin panel styling. [More](/docs/admin/customizing-css). |
| `scss` | Absolute path to a Sass variables / mixins stylesheet meant to override Payload styles to make for an easy re-skinning of the Admin panel. [More](/docs/admin/customizing-css#overriding-scss-variables). |
| `dateFormat` | Global date format that will be used for all dates in the Admin panel. Any valid [date-fns](https://date-fns.org/) format pattern can be used. |
| `avatar` | Set account profile picture. Options: `gravatar`, `default` or a custom React component. |
| `autoLogin` | Used to automate admin log-in for dev and demonstration convenience. [More](/docs/authentication/config). |
| `livePreview` | Enable real-time editing for instant visual feedback of your front-end application. [More](/docs/live-preview/overview). |
| `components` | Component overrides that affect the entirety of the Admin panel. [More](/docs/admin/components) |
| `webpack` | Customize the Webpack config that's used to generate the Admin panel. [More](/docs/admin/webpack) |
| `vite` | Customize the Vite config that's used to generate the Admin panel. [More](/docs/admin/vite) |
| `logoutRoute` | The route for the `logout` page. |
| `inactivityRoute` | The route for the `logout` inactivity page. |
- Talk about how you should see performance improvements in both build times and HMR
- Initial load might not be substantially faster, because Vite pre-bundles dependencies
- Talk about the new `admin.vite` property
- Talk about how for compatibility, the Vite config still automatically adds aliases that come in from the `admin.webpack` property
<Banner type="info">
The Vite bundler is currently in beta. If you would like to help us test this package, we'd love
to hear from you if you find any [bugs or issues](https://github.com/payloadcms/payload/issues/)!
</Banner>
- Aliases work differently in Vite vs. Webpack (you can't pass Vite an absolute path to your alias source, it needs to match perfectly)
Payload has a Vite bundler that you can install and bundle the Admin Panel with. This is an alternative to the [Webpack](/docs/admin/webpack) bundler and might give some performance boosts to your development workflow.
To use Vite as your bundler, first you need to install the package:
```bash
yarn add @payloadcms/bundler-vite
```
Then you will need to add the [bundler](/docs/admin/bundlers) to your Payload config:
```ts
import { buildConfig } from '@payloadcms/config'
import { viteBundler } from '@payloadcms/bundler-vite'
export default buildConfig({
collections: [],
admin: {
bundler: viteBundler(),
},
})
```
Vite works fundamentally differently than Webpack. In development mode, it will first pre-bundle any of your dependencies that are CommonJS-only, and then it'll leverage ESM directly in your browser for a better HMR experience.
It then uses Rollup to create production builds of your admin UI. With Vite, you should see a decent performance boost—especially after your first cold start. However, that first cold start might take a few more seconds.
<Banner type="warning">
In most cases, Vite should work out of the box. But existing Payload plugins may need to make
compatibility changes to support Vite.
</Banner>
This is because Vite aliases work fundamentally differently than Webpack aliases, and Payload relies on aliasing server-only code out of the Payload config to ensure that the bundled admin JS works within your browser.
Here are the main differences between how Vite aliases work and how Webpack aliases work.
**Vite aliases do not work with absolute paths.**
In Vite, alias keys must <strong>exactly match</strong> a import paths. If you have 2 files that import the same server-only module, but have different import paths, you would need to add 2 aliases to support both import paths.
```ts
// File A
import serverOnlyModule from '../server-only-module'
// File B
import serverOnlyModule from '../../server-only-module'
// payload.config.ts
// You would need to add 2 aliases to support both import paths
**Vite aliases do not get applied to pre-bundled dependencies.**
This especially affects plugins, as plugins will be pre-bundled by Vite using `esbuild`. To get around this and support Vite, plugin authors need to configure an alias to their plugin at the top level, so that the alias will work accordingly.
Here's an example. Say your plugin is called `payload-plugin-cool`. It's imported as follows:
```ts
import { myCoolPlugin } from 'payload-plugin-cool'
```
That plugin should create an alias to support Vite as follows:
This will effectively alias the entire plugin and work with Vite. If the plugin requires admin-specific code, then the `./my-admin-plugin.js` alias target file should reflect any changes necessary to the admin UI that the main server-side plugin performs.
### Extending the Vite config
The Payload config supports a new property for plugins to be able to extend the Vite config specifically. That property exists on the main Payload config under `admin.vite`. You can check out the [Vite docs](https://vitejs.dev/config/shared-options.html) for more information on what you can do with the Vite config.
It's a function that takes a Vite config, and returns an updated Vite config. Here's an example:
Learn more about [aliasing server-only modules](https://payloadcms.com/docs/admin/excluding-server-code#aliasing-server-only-modules).
Even though there is a new property for Vite configs specifically, we have implemented some "compatibility" between Webpack and Vite out-of-the-box.
If your config specifies Webpack aliases, we attempt to leverage them automatically within the Vite config. They are merged into the Vite alias configuration seamlessly and may work out-of-the-box.
- Talk about how Webpack is stable, and should be used unless you are adventurous.
- Show a code example about how to install and pass the Webpack bundler to the Payload config
Payload has a Webpack (v5) bundler that you can build the Admin panel with. For now, we recommended using it because it is stable. If you are feeling a bit more adventurous you can give the [Vite](/docs/admin/vite) bundler a shot.
Payload allows usage of Webpack 5 to build the Admin panel. It comes with support for many common functionalities such as SCSS and Typescript out of the box, but there are many cases where you may need to add support for additional functionalities.
Out of the box, the Webpack bundler supports common functionalities such as SCSS and Typescript, but there are many cases where you may need to add support for additional functionalities.
To use webpack as your bundler, you must import the `@payloadcms/bundler-webpack` package and define it as the bundler in your Payload config.
#### Installation
To extend the Webpack config, add the `webpack` key to your base Payload config, and provide a function that accepts the default Webpack config as its only argument:
```bash
yarn add @payloadcms/bundler-webpack
```
`payload.config.ts`
#### Import the bundler
```ts
// payload.config.ts
import { buildConfig } from 'payload/config'
import { webpackBundler } from '@payloadcms/bundler-webpack'
export default buildConfig({
// highlight-start
admin: {
bundler: webpackBundler(),
},
// highlight-end
})
```
### Extending Webpack
If you need to extend the Webpack config, you can do so by passing a function to the `admin.webpack` property on your Payload config.
The function will receive the Webpack config as an argument and should return the modified config.
```ts
// payload.config.ts
import { buildConfig } from 'payload/config'
import { webpackBundler } from '@payloadcms/bundler-webpack'
export default buildConfig({
admin: {
bundler: webpackBundler()
// highlight-start
webpack: (config) => {
// Do something with the config here
// full control of the Webpack config
return config
},
// highlight-end
},
bunder: webpackBundler(),
```
TODO: move the aliasing section to its own page
- Talk about how Webpack is stable, and should be used unless you are adventurous.
- Show a code example about how to install and pass the Webpack bundler to the Payload config
### Aliasing server-only modules
A common use case for extending the Payload config is to alias server-only modules, thus preventing them from inclusion into the browser JavaScript bundle.
As the Payload config is used in both server **and** client contexts, you may find yourself writing code in your Payload config that may be incompatible with browser environments.
Examples of **non** browser-friendly packages:
- `fs`
- `stripe`
- `authorizenet`
- `nodemailer`
You may rely on server-only packages such as the above to perform logic in access control functions, hooks, and other contexts (which is great!) but when you boot up your Payload app and try to view it in the browser, you'll likely run into missing dependency issues or other general incompatibilities.
<Banner type="success">
<strong>Tip:</strong>
<br />
To avoid problems with server code making it to your Webpack bundle, you can use the{' '}
<strong>alias</strong> Webpack feature to tell Webpack to avoid importing the modules you want to
restrict to server-only.
</Banner>
<strong>
For example, let's say that you have a Collection called `Subscriptions` which relies on Stripe:
</strong>
<br />
<br />
`collections/Subscriptions/index.js`
```ts
import { CollectionConfig } from 'payload/types'
import createStripeSubscription from './hooks/createStripeSubscription'
export const Subscription: CollectionConfig = {
slug: 'subscriptions',
hooks: {
beforeChange: [createStripeSubscription],
},
fields: [
{
name: 'stripeSubscriptionID',
type: 'text',
required: true,
},
],
}
```
The collection above features a `beforeChange` hook that creates a Stripe subscription whenever a Subscription document is created in Payload.
<strong>That hook might look something like this:</strong>
The above code will alias the file at path `createStripeSubscriptionPath` to a mocked module, which might look like this:
`mocks/emptyObject.js`
```js
export default {}
```
Now, when Webpack sees that you're attempting to import your `createStripeSubscriptionPath` file, it'll disregard that actual file and load your mock file instead. Not only will your Admin panel now bundle successfully, you will have optimized its filesize by removing unnecessary code! And you might have learned something about Webpack, too.
@@ -45,6 +45,14 @@ To enable API keys on a collection, set the `useAPIKey` auth option to `true`. F
your API keys will not be.
</Banner>
<Banner type="warning">
<strong>Important:</strong>
If you change your `PAYLOAD_SECRET`, you will need to regenerate your API keys.
<br />
The secret key is used to encrypt the API keys, so if you change the secret, existing API keys will
no longer be valid.
</Banner>
#### Authenticating via API Key
To authenticate REST or GraphQL API requests using an API key, set the `Authorization` header. The header is case-sensitive and needs the slug of the `auth.useAPIKey` enabled collection, then " API-Key ", followed by the `apiKey` that has been assigned. Payload's built-in middleware will then assign the user document to `req.user` and handle requests with the proper access control. By doing this, Payload recognizes the request being made as a request by the user associated with that API key.
@@ -82,7 +77,7 @@ Once enabled, each document that is created within the Collection can be thought
### Token-based auth
Successfully logging in returns a `JWT` (JSON web token) which is how a user will identify themselves to Payload. By providing this JWT via either an HTTP-only cookie or an `Authorization` header, Payload will automatically identify the user and add its user JWT data to the Express `req`, which is available throughout Payload including within access control, hooks, and more.
Successfully logging in returns a `JWT` (JSON web token) which is how a user will identify themselves to Payload. By providing this JWT via either an HTTP-only cookie or an `Authorization: JWT` or `Authorization: Bearer` header, Payload will automatically identify the user and add its user JWT data to the Express `req`, which is available throughout Payload including within access control, hooks, and more.
You can specify what data gets encoded to the JWT token by setting `saveToJWT` to true in your auth collection fields. If you wish to use a different key other than the field `name`, you can provide it to `saveToJWT` as a string. It is also possible to use `saveToJWT` on fields that are nested in inside groups and tabs. If a group has a `saveToJWT` set it will include the object with all sub-fields in the token. You can set `saveToJWT: false` for any fields you wish to omit. If a field inside a group has `saveToJWT` set, but the group does not, the field will be included at the top level of the token.
@@ -30,6 +30,26 @@ Payload Cloud gives you S3 file storage backed by Cloudflare as a CDN, and this
AWS Cognito is used for authentication to your S3 bucket. The[Payload Cloud Plugin](https://github.com/payloadcms/plugin-cloud)will automatically pick up these values. These values are only if you'd like to access your files directly, outside of Payload Cloud.
#### Accessing Files Outside of Payload Cloud
If you'd like to access your files outside of Payload Cloud, you'll need to retrieve some values from your project's settings and put them into your environment variables. In Payload Cloud, navigate to the File Storage tab and copy the values using the copy button. Put these values in your .env file. Also copy the Cognito Password value separately and put into your .env file as well.
When you are done, you should have the following values in your .env file:
```env
PAYLOAD_CLOUD=true
PAYLOAD_CLOUD_ENVIRONMENT=prod
PAYLOAD_CLOUD_COGNITO_USER_POOL_CLIENT_ID=
PAYLOAD_CLOUD_COGNITO_USER_POOL_ID=
PAYLOAD_CLOUD_COGNITO_IDENTITY_POOL_ID=
PAYLOAD_CLOUD_PROJECT_ID=
PAYLOAD_CLOUD_BUCKET=
PAYLOAD_CLOUD_BUCKET_REGION=
PAYLOAD_CLOUD_COGNITO_PASSWORD=
```
The plugin will pick up these values and use them to access your files.
### Build Settings
You can update settings from your Project’s Settings tab. Changes to your build settings will trigger a redeployment of your project.
@@ -43,12 +63,13 @@ From the Environment Variables page of the Settings tab, you can add, update and
With Payload Cloud, you can add custom domain names to your project. To do so, first go to the Domains page of the Settings tab of your project. Here you can see your default domain. To add a new domain, type in the domain name you wish to use.
<Banner>
Note: do not include the protocol (http:// or https://) or any routes (/page). Only include the
Note: do not include the protocol (http:// or https://) or any paths (/page). Only include the
domain name and extension, and optionally a subdomain. - your-domain.com - backend.your-domain.com
Payload Collections are defined through configs of their own, and you can define as many as your application needs. Each Collection will scaffold a new collection automatically in your database of choice, based on fields that you define.
Payload Collections are defined through configs of their own, and you can define as many as your application needs. Each
Collection will scaffold a new collection automatically in your database of choice, based on fields that you define.
It's often best practice to write your Collections in separate files and then import them into the main Payload config.
| **`slug`** \* | Unique, URL-friendly string that will act as an identifier for this Collection. |
| **`fields`** \* | Array of field types that will determine the structure and functionality of the data stored within this Collection. [Click here](/docs/fields/overview) for a full list of field types as well as how to configure them. |
| **`indexes`** \* | Array of database indexes to create, including compound indexes that have multiple fields. |
| **`labels`** | Singular and plural labels for use in identifying this Collection throughout Payload. Auto-generated from slug if not defined. |
| **`admin`** | Admin-specific configuration. See below for [more detail](#admin-options). |
| **`hooks`** | Entry points to "tie in" to Collection actions at specific points. [More](/docs/hooks/overview#collection-hooks) |
| **`access`** | Provide access control functions to define exactly who should be able to do what with Documents in this Collection. [More](/docs/access-control/overview/#collections) |
| **`auth`** | Specify options if you would like this Collection to feature authentication. For more, consult the [Authentication](/docs/authentication/config) documentation. |
| **`upload`** | Specify options if you would like this Collection to support file uploads. For more, consult the [Uploads](/docs/upload/overview) documentation. |
| **`timestamps`** | Set to false to disable documents' automatically generated `createdAt` and `updatedAt` timestamps. |
| **`versions`** | Set to true to enable default options, or configure with object properties. [More](/docs/versions/overview#collection-config) |
| **`endpoints`** | Add custom routes to the REST API. Set to `false` to disable routes. [More](/docs/rest-api/overview#custom-endpoints) |
| **`graphQL`** | An object with `singularName` and `pluralName` strings used in schema generation. Auto-generated from slug if not defined. Set to `false` to disable GraphQL. |
| **`typescript`** | An object with property `interface` as the text used in schema generation. Auto-generated from slug if not defined. |
| **`defaultSort`** | Pass a top-level field to sort by default in the collection List view. Prefix the name of the field with a minus symbol ("-") to sort in descending order. |
| **`pagination`** | Set pagination-specific options for this collection. [More](#pagination) |
| **`custom`** | Extension point for adding custom data (e.g. for plugins) |
| **`slug`** \* | Unique, URL-friendly string that will act as an identifier for this Collection. |
| **`fields`** \* | Array of field types that will determine the structure and functionality of the data stored within this Collection. [Click here](/docs/fields/overview) for a full list of field types as well as how to configure them. |
| **`labels`** | Singular and plural labels for use in identifying this Collection throughout Payload. Auto-generated from slug if not defined. |
| **`admin`** | Admin-specific configuration. See below for [more detail](#admin-options). |
| **`hooks`** | Entry points to "tie in" to Collection actions at specific points. [More](/docs/hooks/overview#collection-hooks) |
| **`access`** | Provide access control functions to define exactly who should be able to do what with Documents in this Collection. [More](/docs/access-control/overview/#collections) |
| **`auth`** | Specify options if you would like this Collection to feature authentication. For more, consult the [Authentication](/docs/authentication/config) documentation. |
| **`upload`** | Specify options if you would like this Collection to support file uploads. For more, consult the [Uploads](/docs/upload/overview) documentation. |
| **`timestamps`** | Set to false to disable documents' automatically generated `createdAt` and `updatedAt` timestamps. |
| **`versions`** | Set to true to enable default options, or configure with object properties. [More](/docs/versions/overview#collection-config) |
| **`endpoints`** | Add custom routes to the REST API. Set to `false` to disable routes. [More](/docs/rest-api/overview#custom-endpoints) |
| **`graphQL`** | An object with `singularName` and `pluralName` strings used in schema generation. Auto-generated from slug if not defined. Set to `false` to disable GraphQL. |
| **`typescript`** | An object with property `interface` as the text used in schema generation. Auto-generated from slug if not defined. |
| **`disableDuplicate`** | When true, do not show the "Duplicate" button while editing documents within this collection and prevent `duplicate` from all APIs. |
| **`defaultSort`** | Pass a top-level field to sort by default in the collection List view. Prefix the name of the field with a minus symbol ("-") to sort in descending order. |
| **`dbName`** | Custom table or collection name depending on the database adapter. Auto-generated from slug if not defined.
| **`custom`** | Extension point for adding custom data (e.g. for plugins) |
_\* An asterisk denotes that a property is required._
You can find an assortment of [example collection configs](https://github.com/payloadcms/public-demo/tree/master/src/collections) in the Public Demo source code on GitHub.
You can find an assortment
of [example collection configs](https://github.com/payloadcms/public-demo/tree/master/src/payload/collections) in the Public
Demo source code on GitHub.
### Admin options
You can customize the way that the Admin panel behaves on a collection-by-collection basis by defining the `admin` property on a collection's config.
You can customize the way that the Admin panel behaves on a collection-by-collection basis by defining the `admin`
@@ -73,7 +77,6 @@ You can customize the way that the Admin panel behaves on a collection-by-collec
| `useAsTitle` | Specify a top-level field to use for a document title throughout the Admin panel. If no field is defined, the ID of the document is used as the title. |
| `description` | Text or React component to display below the Collection label in the List view to give editors more information. |
| `defaultColumns` | Array of field names that correspond to which columns to show by default in this collection's List view. |
| `disableDuplicate ` | Disables the "Duplicate" button while editing documents within this collection. |
| `hideAPIURL` | Hides the "API URL" meta field while editing documents within this collection. |
| `enableRichTextLink` | The [Rich Text](/docs/fields/rich-text) field features a `Link` element which allows for users to automatically reference related documents within their rich text. Set to `true` by default. |
| `enableRichTextRelationship` | The [Rich Text](/docs/fields/rich-text) field features a `Relationship` element which allows for users to automatically reference related documents within their rich text. Set to `true` by default. |
@@ -81,12 +84,15 @@ You can customize the way that the Admin panel behaves on a collection-by-collec
| `livePreview` | Enable real-time editing for instant visual feedback of your front-end application. [More](/docs/live-preview/overview). |
| `components` | Swap in your own React components to be used within this collection. [More](/docs/admin/components#collections) |
| `listSearchableFields` | Specify which fields should be searched in the List search view. [More](#list-searchable-fields) |
| **`pagination`** | Set pagination-specific options for this collection. [More](#pagination) |
### Preview
Collection `admin` options can accept a `preview` function that will be used to generate a link pointing to the frontend of your app to preview data.
Collection `admin` options can accept a `preview` function that will be used to generate a link pointing to the frontend
of your app to preview data.
If the function is specified, a Preview button will automatically appear in the corresponding collection's Edit view. Clicking the Preview button will link to the URL that is generated by the function.
If the function is specified, a Preview button will automatically appear in the corresponding collection's Edit view.
Clicking the Preview button will link to the URL that is generated by the function.
**The preview function accepts two arguments:**
@@ -130,21 +136,30 @@ Here are a few options that you can specify options for pagination on a collecti
### Access control
You can specify extremely granular access control (what users can do with documents in a collection) on a collection by collection basis. To learn more, go to the [Access Control](/docs/access-control/overview) docs.
You can specify extremely granular access control (what users can do with documents in a collection) on a collection by
collection basis. To learn more, go to the [Access Control](/docs/access-control/overview) docs.
### Hooks
Hooks are a powerful way to extend collection functionality and execute your own logic, and can be defined on a collection by collection basis. To learn more, go to the [Hooks](/docs/hooks/overview) documentation.
Hooks are a powerful way to extend collection functionality and execute your own logic, and can be defined on a
collection by collection basis. To learn more, go to the [Hooks](/docs/hooks/overview) documentation.
### Field types
Collections support all field types that Payload has to offer—including simple fields like text and checkboxes all the way to more complicated layout-building field groups like Blocks. [Click here](/docs/fields/overview) to learn more about field types.
Collections support all field types that Payload has to offer—including simple fields like text and checkboxes all the
way to more complicated layout-building field groups like Blocks. [Click here](/docs/fields/overview) to learn more
about field types.
### List Searchable Fields
In the List view, there is a "search" box that allows you to quickly find a document with a search. By default, it searches on the ID field. If you have `admin.useAsTitle` defined, the list search will use that field. However, you can define more than one field to search to make it easier on your admin editors to find the data they need.
In the List view, there is a "search" box that allows you to quickly find a document with a search. By default, it
searches on the ID field. If you have `admin.useAsTitle` defined, the list search will use that field. However, you can
define more than one field to search to make it easier on your admin editors to find the data they need.
For example, let's say you have a Posts collection with `title`, `metaDescription`, and `tags` fields - and you want all three of those fields to be searchable in the List view. You can simply add `admin.listSearchableFields: ['title', 'metaDescription', 'tags']` - and the admin UI will automatically search on those three fields plus the ID field.
For example, let's say you have a Posts collection with `title`, `metaDescription`, and `tags` fields - and you want all
three of those fields to be searchable in the List view. You can simply
add `admin.listSearchableFields: ['title', 'metaDescription', 'tags']` - and the admin UI will automatically search on
those three fields plus the ID field.
<Banner type="warning">
<strong>Note:</strong>
@@ -153,50 +168,6 @@ For example, let's say you have a Posts collection with `title`, `metaDescriptio
so your admin queries can remain performant.
</Banner>
### Admin Hooks
In addition to collection hooks themselves, Payload provides for admin UI-specific hooks that you can leverage.
**`beforeDuplicate`**
The `beforeDuplicate` hook is an async function that accepts an object containing the data to duplicate, as well as the locale of the doc to duplicate. Within this hook, you can modify the data to be duplicated, which is useful in cases where you have unique fields that need to be incremented or similar, as well as if you want to automatically modify a document's `title`.
Example:
```ts
import { BeforeDuplicate, CollectionConfig } from 'payload/types'
// Your auto-generated Page type
import { Page } from '../payload-types.ts'
const beforeDuplicate: BeforeDuplicate<Page> = ({ data }) => {
@@ -26,6 +26,7 @@ As with Collection configs, it's often best practice to write your Globals in se
| **`graphQL.name`** | Text used in schema generation. Auto-generated from slug if not defined. |
| **`typescript`** | An object with property `interface` as the text used in schema generation. Auto-generated from slug if not defined. |
| **`custom`** | Extension point for adding custom data (e.g. for plugins) |
| **`dbName`** | Custom table or collection name for this global depending on the database adapter. Auto-generated from slug if not defined.
_\* An asterisk denotes that a property is required._
@@ -59,20 +60,20 @@ export default Nav
#### Global config example
You can find an [example Global config](https://github.com/payloadcms/public-demo/blob/master/src/globals/MainMenu.ts) in the Public Demo source code on GitHub.
You can find a few [example Global configs](https://github.com/payloadcms/public-demo/tree/master/src/payload/globals) in the Public Demo source code on GitHub.
### Admin options
You can customize the way that the Admin panel behaves on a Global-by-Global basis by defining the `admin` property on a Global's config.
Payload features deep field-based localization support. Maintaining as many locales as you need is easy. All localization support is opt-in by default. To do so, follow the two steps below.
Payload features deep field-based localization support. Maintaining as many locales as you need is easy. All
localization support is opt-in by default. To do so, follow the two steps below.
### Enabling in the Payload config
Add the `localization` property to your Payload config to enable localization project-wide. You'll need to provide a list of all locales that you'd like to support as well as set a few other options.
Add the `localization` property to your Payload config to enable localization project-wide. You'll need to provide a
list of all locales that you'd like to support as well as set a few other options.
**Example Payload config set up for localization:**
@@ -57,39 +59,97 @@ export default buildConfig({
})
```
**Example Payload config set up for localization with full locales objects (
including [internationalization](/docs/configuration/i18n) support):**
```ts
import { buildConfig } from 'payload/config'
export default buildConfig({
collections: [
// collections go here
],
localization: {
locales: [
{
label: {
en: 'English', // English label
nb: 'Engelsk', // Norwegian label
},
code: 'en',
},
{
label: {
en: 'Norwegian', // English label
nb: 'Norsk', // Norwegian label
},
code: 'nb',
},
],
defaultLocale: 'en',
fallback: true,
},
})
```
**Here is a brief explanation of each of the options available within the `localization` property:**
**`locales`**
Array-based list of all locales that you would like to support. These can be strings of locale codes or objects with a `label`, a locale `code`, and the `rtl` (right-to-left) property. The locale codes do not need to be in any specific format. It's up to you to define how to represent your locales. Common patterns are to use two-letter ISO 639 language codes or four-letter language and country codes (ISO 3166‑1) such as `en-US`, `en-UK`, `es-MX`, etc.
Array-based list of all the languages that you would like to support. This can be an array containing strings for each
language code you want your project to store and serve or objects with a `label`, a locale `code`, `rtl` (
right-to-left), and `fallbackLocale` property. The locale codes do not need to be in any specific format. It's up to you
to define how to represent your locales. Common patterns are to use two-letter ISO 639 language codes or four-letter
language and country codes (ISO 3166‑1) such as `en-US`, `en-UK`, `es-MX`, etc.
| **`code`** \* | Unique code to identify the language throughout the APIs for `locale` and `fallbackLocale` |
| **`label`** | A string to use for the selector when choosing a language, or an object keyed on the i18n keys for different languages in use. |
| **`rtl`** | A boolean that when true will make the admin UI display in Right-To-Left. |
| **`fallbackLocale`** | The code for this language to fallback to when properties of a document are not present. |
_\* An asterisk denotes that a property is required._
**`defaultLocale`**
Required string that matches one of the locale codes from the array provided. By default, if no locale is specified, documents will be returned in this locale.
Required string that matches one of the locale codes from the array provided. By default, if no locale is specified,
documents will be returned in this locale.
**`fallback`**
Boolean enabling "fallback" locale functionality. If a document is requested in a locale, but a field does not have a localized value corresponding to the requested locale, then if this property is enabled, the document will automatically fall back to the fallback locale value. If this property is not enabled, the value will not be populated.
Boolean enabling "fallback" locale functionality. If a document is requested in a locale, but a field does not have a
localized value corresponding to the requested locale, then if this property is enabled, the document will automatically
fall back to the fallback locale value. If this property is not enabled, the value will not be populated.
### Field by field localization
Payload localization works on a **field** level—not a document level. In addition to configuring the base Payload config to support localization, you need to specify each field that you would like to localize.
Payload localization works on a **field** level—not a document level. In addition to configuring the base Payload config
to support localization, you need to specify each field that you would like to localize.
**Here is an example of how to enable localization for a field:**
```js
{
name: 'title',
type: 'text',
// highlight-start
localized: true,
type
:
'text',
// highlight-start
localized
:
true,
// highlight-end
}
```
With the above configuration, the `title` field will now be saved in the database as an object of all locales instead of a single string.
With the above configuration, the `title` field will now be saved in the database as an object of all locales instead of
a single string.
All field types with a `name` property support the `localized` property—even the more complex field types like `array`s and `block`s.
All field types with a `name` property support the `localized` property—even the more complex field types like `array`s
and `block`s.
<Banner>
<strong>Note:</strong>
@@ -111,7 +171,8 @@ All field types with a `name` property support the `localized` property—even t
### Retrieving localized docs
When retrieving documents, you can specify which locale you'd like to receive as well as which fallback locale should be used.
When retrieving documents, you can specify which locale you'd like to receive as well as which fallback locale should be
used.
##### REST API
@@ -123,7 +184,8 @@ Specify your desired locale by providing the `locale` query parameter directly i
**`?fallback-locale=`**
Specify fallback locale to be used by providing the `fallback-locale` query parameter. This can be provided as either a valid locale as provided to your base Payload config, or `'null'`, `'false'`, or `'none'` to disable falling back.
Specify fallback locale to be used by providing the `fallback-locale` query parameter. This can be provided as either a
valid locale as provided to your base Payload config, or `'null'`, `'false'`, or `'none'` to disable falling back.
In the GraphQL API, you can specify `locale` and `fallbackLocale` args to all relevant queries and mutations.
The `locale` arg will only accept valid locales, but locales will be formatted automatically as valid GraphQL enum values (dashes or special characters will be converted to underscores, spaces will be removed, etc.). If you are curious to see how locales are auto-formatted, you can use the [GraphQL playground](/docs/graphql/overview#graphql-playground).
The `locale` arg will only accept valid locales, but locales will be formatted automatically as valid GraphQL enum
values (dashes or special characters will be converted to underscores, spaces will be removed, etc.). If you are curious
to see how locales are auto-formatted, you can use the [GraphQL playground](/docs/graphql/overview#graphql-playground).
The `fallbackLocale` arg will accept valid locales as well as `none` to disable falling back.
@@ -159,7 +223,9 @@ query {
##### Local API
You can specify `locale` as well as `fallbackLocale` within the Local API as well as properties on the `options` argument. The `locale` property will accept any valid locale, and the `fallbackLocale` property will accept any valid locale as well as `'null'`, `'false'`, `false`, and `'none'`.
You can specify `locale` as well as `fallbackLocale` within the Local API as well as properties on the `options`
argument. The `locale` property will accept any valid locale, and the `fallbackLocale` property will accept any valid
locale as well as `'null'`, `'false'`, `false`, and `'none'`.
| `serverURL` | A string used to define the absolute URL of your app including the protocol, for example `https://example.com`. No paths allowed, only protocol, domain and (optionally) port |
| `collections` | An array of all Collections that Payload will manage. To read more about how to define your collection configs, [click here](/docs/configuration/collections). |
| `cors` | Either a whitelist array of URLS to allow CORS requests from, or a wildcard string (`'*'`) to accept incoming requests from any domain. |
| `globals` | An array of all Globals that Payload will manage. For more on Globals and their configs, [click here](/docs/configuration/globals). |
| `admin` | Base Payload admin configuration. Specify custom components, control metadata, set the Admin user collection, and [more](/docs/admin/overview#admin-options). |
| `editor` | Default richText editor which will be used by richText fields. |
| `localization` | Opt-in and control how Payload handles the translation of your content into multiple locales. [More](/docs/configuration/localization) |
| `graphQL` | Manage GraphQL-specific functionality here. Define your own queries and mutations, manage query complexity limits, and [more](/docs/graphql/overview#graphql-options). |
| `cookiePrefix` | A string that will be prefixed to all cookies that Payload sets. |
| `csrf` | A whitelist array of URLs to allow Payload cookies to be accepted from as a form of CSRF protection. [More](/docs/authentication/overview#csrf-protection) |
| `defaultDepth` | If a user does not specify `depth` while requesting a resource, this depth will be used. [More](/docs/getting-started/concepts#depth) |
| `maxDepth` | The maximum allowed depth to be permitted application-wide. This setting helps prevent against malicious queries. Defaults to `10`. |
| `indexSortableFields` | Automatically index all sortable top-level fields in the database to improve sort performance and add database compatibility for Azure Cosmos and similar. |
| `upload` | Base Payload upload configuration. [More](/docs/upload/overview#payload-wide-upload-options). |
| `routes` | Control the routing structure that Payload binds itself to. Specify `admin`, `api`, `graphQL`, and `graphQLPlayground`. |
| `email` | Base email settings to allow Payload to generate email such as Forgot Password requests and other requirements. [More](/docs/email/overview#configuration) |
| `express` | Express-specific middleware options such as compression and JSON parsing. [More](/docs/configuration/express) |
| `debug` | Enable to expose more detailed error information. |
| `rateLimit` | Control IP-based rate limiting for all Payload resources. Used to prevent DDoS attacks and [more](/docs/production/preventing-abuse#rate-limiting-requests). |
| `hooks` | Tap into Payload-wide hooks. [More](/docs/hooks/overview) |
| `plugins` | An array of Payload plugins. [More](/docs/plugins/overview) |
| `endpoints` | An array of custom API endpoints added to the Payload router. [More](/docs/rest-api/overview#custom-endpoints) |
| `custom` | Extension point for adding custom data (e.g. for plugins) |
| `admin` \* | Base Payload admin configuration. Specify bundler\*, custom components, control metadata, set the Admin user collection, and [more](/docs/admin/overview#admin-options). Required. |
| `editor` \* | Rich Text Editor which will be used by richText fields. Required. |
| `db` \* | Database Adapter which will be used by Payload. Read more [here](/docs/database/overview). Required. |
| `serverURL` | A string used to define the absolute URL of your app including the protocol, for example `https://example.com`. No paths allowed, only protocol, domain and (optionally) port |
| `collections` | An array of all Collections that Payload will manage. To read more about how to define your collection configs, [click here](/docs/configuration/collections). |
| `globals` | An array of all Globals that Payload will manage. For more on Globals and their configs, [click here](/docs/configuration/globals). |
| `cors` | Either a whitelist array of URLS to allow CORS requests from, or a wildcard string (`'*'`) to accept incoming requests from any domain. |
| `localization` | Opt-in and control how Payload handles the translation of your content into multiple locales. [More](/docs/configuration/localization) |
| `graphQL` | Manage GraphQL-specific functionality here. Define your own queries and mutations, manage query complexity limits, and [more](/docs/graphql/overview#graphql-options). |
| `cookiePrefix` | A string that will be prefixed to all cookies that Payload sets. |
| `csrf` | A whitelist array of URLs to allow Payload cookies to be accepted from as a form of CSRF protection. [More](/docs/authentication/overview#csrf-protection) |
| `defaultDepth` | If a user does not specify `depth` while requesting a resource, this depth will be used. [More](/docs/getting-started/concepts#depth) |
| `maxDepth` | The maximum allowed depth to be permitted application-wide. This setting helps prevent against malicious queries. Defaults to `10`. |
| `indexSortableFields` | Automatically index all sortable top-level fields in the database to improve sort performance and add database compatibility for Azure Cosmos and similar. |
| `upload` | Base Payload upload configuration. [More](/docs/upload/overview#payload-wide-upload-options). |
| `routes` | Control the routing structure that Payload binds itself to. Specify `admin`, `api`, `graphQL`, and `graphQLPlayground`. |
| `email` | Base email settings to allow Payload to generate email such as Forgot Password requests and other requirements. [More](/docs/email/overview#configuration) |
| `express` | Express-specific middleware options such as compression and JSON parsing. [More](/docs/configuration/express) |
| `debug` | Enable to expose more detailed error information. |
| `rateLimit` | Control IP-based rate limiting for all Payload resources. Used to prevent DDoS attacks and [more](/docs/production/preventing-abuse#rate-limiting-requests). |
| `hooks` | Tap into Payload-wide hooks. [More](/docs/hooks/overview) |
| `plugins` | An array of Payload plugins. [More](/docs/plugins/overview) |
| `endpoints` | An array of custom API endpoints added to the Payload router. [More](/docs/rest-api/overview#custom-endpoints) |
| `custom` | Extension point for adding custom data (e.g. for plugins) |
_\* An asterisk denotes that a property is required._
#### Simple example
```ts
import { buildConfig } from 'payload/config'
import { mongooseAdapter } from '@payloadcms/db-mongodb'
import { postgresAdapter } from '@payloadcms/db-postgres'
import { postgresAdapter } from '@payloadcms/db-postgres' // beta
import { viteBundler } from '@payloadcms/bundler-vite'
import { webpackBundler } from '@payloadcms/bundler-webpack'
import { lexicalEditor } from '@payloadcms/richtext-lexical'
import { lexicalEditor } from '@payloadcms/richtext-lexical' // beta
import { slateEditor } from '@payloadcms/richtext-slate'
export default buildConfig({
bundler: webpackBundler() // or viteBundler(),
admin: {
bundler: webpackBundler(), // or viteBundler()
},
db: mongooseAdapter({}) // or postgresAdapter({}),
editor: lexicalEditor({}) // or slateEditor({})
collections: [
@@ -103,7 +108,7 @@ export default buildConfig({
#### Full example config
You can see a full [example config](https://github.com/payloadcms/public-demo/blob/master/src/payload.config.ts) in the Public Demo source code on GitHub.
You can see a full [example config](https://github.com/payloadcms/public-demo/blob/master/src/payload/payload.config.ts) in the Public Demo source code on GitHub.
To use Payload with MongoDB, install the package `@payloadcms/db-mongodb`. It will come with everything you need to
store your Payload data in MongoDB.
**Required**. This is a fully qualified MongoDB connection string that points to your MongoDB database. If you don't have MongoDB installed locally, you can [follow these steps for Mac OSX](https://docs.mongodb.com/manual/tutorial/install-mongodb-on-os-x/) and [these steps](https://docs.mongodb.com/manual/tutorial/install-mongodb-on-windows/) for Windows 10. If you want to use a local database and you know you have MongoDB installed locally, a typical connection string will look like this:
Then from there, pass it to your Payload config as follows:
`mongodb://127.0.0.1/payload`
```ts
import { mongooseAdapter } from '@payloadcms/db-mongodb'
In contrast to running MongoDB locally, a popular option is to sign up for a free [MongoDB Atlas account](https://www.mongodb.com/cloud/atlas), which is a fully hosted and cloud-based installation of MongoDB that you don't need to ever worry about.
export default buildConfig({
// Your config goes here
collections: [
// Collections go here
],
// Configure the Mongoose adapter here
db: mongooseAdapter({
// Mongoose-specific arguments go here.
// URL is required.
url: process.env.DATABASE_URI,
}),
})
```
##### `mongoOptions`
###Options
Customize MongoDB connection options. Payload will connect to your MongoDB database using default options which you can override and extend to include all the [options](https://mongoosejs.com/docs/connections.html#options) available to mongoose.
| `autoPluralization` | Tell Mongoose to auto-pluralize any collection names if it encounters any singular words used as collection `slug`s. |
| `connectOptions` | Customize MongoDB connection options. Payload will connect to your MongoDB database using default options which you can override and extend to include all the [options](https://mongoosejs.com/docs/connections.html#options) available to mongoose. |
| `disableIndexHints` | Set to true to disable hinting to MongoDB to use 'id' as index. This is currently done when counting documents for pagination, as it increases the speed of the count function used in that query. Disabling this optimization might fix some problems with AWS DocumentDB. Defaults to false |
| `migrationDir` | Customize the directory that migrations are stored. |
| `transactionOptions` | An object with configuration properties used in [transactions](https://www.mongodb.com/docs/manual/core/transactions/) or `false` which will disable the use of transactions. | |
### Access to Mongoose models
After Payload is initialized, this adapter exposes all of your Mongoose models and they are available for you to work
desc: Manage your data and customize the Admin Panel by swapping in your own React components. Create, modify or remove views, fields, styles and much more.
desc: With Payload, you bring your own database and own your data. You have full control.
---
Payload is compatible with a wide range of database systems. You may choose to configure your project with any of the supported databases by adding the necessary dependencies and following the setup instructions for the database adapter of choice.
Payload interacts with your database via the database adapter that you choose. Right now, Payload officially supports two database adapters:
We will be adding support for SQLite and MySQL in the near future using Drizzle ORM.
To use a specific database adapter, you need to install it and configure it according to its own specifications. Visit the documentation for your applicable database adapter to learn more.
## Selecting a database
There are several factors to consider when choosing which database technology and hosting option is right for your project and workload.
There are several factors to consider when choosing which database technology and hosting option is right for your project and workload. Payload can theoretically support any database, but it's up to you to decide which database to use.
#### When to use MongoDB
If your project has a lot of dynamic fields, and you are comfortable with allowing Payload to enforce data integrity across your documents, MongoDB is a great choice. With it, your Payload documents are stored as _one_ document in your database—no matter if you have localization enabled, how many block or array fields you have, etc. This means that the shape of your data in your database will very closely reflect your field schema, and there is minimal complexity involved in storing or retrieving your data.
You should prefer MongoDB if:
- You prefer simplicity within your database
- You don't want to deal with keeping production / staging databases in sync via [DDL changes](https://en.wikipedia.org/wiki/Data_definition_language)
- Most (or everything) in your project is localized
- You leverage a lot of array fields, block fields, or `hasMany` select fields and similar
#### When to use a relational DB
Many projects might call for more rigid database architecture where the shape of your data is strongly enforced at the database level. For example, if you know the shape of your data and it's relatively "flat", and you don't anticipate it to change often, your workload might suit relational databases like Postgres very well.
You should prefer a relational DB like Postgres if:
- You are comfortable with migration workflows
- You require enforced data consistency at the database level
- You have a lot of relationships between collections and require relationships to be enforced
#### Differences in Payload features
It's important to note that almost everything Payload does is available in all of our officially supported database adapters, including localization, arrays, blocks, etc.
The only thing that is not supported in Postgres yet is the [Point field](/docs/fields/point), but that should be added soon.
It's up to you to choose which database you would like to use.
## Configuration
To configure the database for your Payload an adapter can be assigned to `config.db`.
To configure the database for your Payload application, an adapter can be assigned to `config.db`. This property is required within your Payload config.
## Transactions
Database transactions allow your application to make a series of database changes in an all-or-nothing commit. Consider an HTTP request that creates a new **Order** and has an `afterChange` hook to update the stock count of related **Items**. If an error occurs when updating an **Item** and an HTTP error is returned to the user, you would not want the new **Order** to be persisted or any other items to be changed either. This kind of interaction with the database is handled seamlessly with transactions.
By default, Payload will use transactions for all operations, as long as it is supported by the configured database. Database changes are contained within all Payload operations and any errors thrown will result in all changes being rolled back without being committed. When transactions are not supported by the database, Payload will continue to operate as expected without them.
<Banner type="info">
<strong>Note:</strong>
<br />
MongoDB requires a connection to a replicaset in order to make use of transactions.
</Banner>
The initial request made to Payload will begin a new transaction and attach it to the `req.transactionID`. If you have a `hook` that interacts with the database, you can opt-in to using the same transaction by passing the `req` in the arguments. For example:
// because req.transactionID is assigned from Payload and passed through, my-slug will only persist if the entire request is successful
await req.payload.create({
req,
collection: 'my-slug',
data: {
some: 'data',
import { postgresAdapter } from '@payloadcms/db-postgres'
export default buildConfig({
// Your config goes here
collections: [
// Collections go here
],
// Here is where you pass your database adapter
// and the adapter will require options specific to itself
db: postgresAdapter({
pool: {
connectionString: process.env.DATABASE_URI,
},
})
}
}),
})
```
### Async Hooks with Transactions
Since Payload hooks can be async and be written to not await the result, it is possible to have an incorrect success response returned on a request that is rolled back. If you have a hook where you do not `await` the result, then you should **not** pass the `req.transactionID`.
// Should this call fail, it will not rollback other changes
const safelyIgnoredAsync = req.payload.create({
req: {
...req,
transactionID: undefined,
},
collection: 'my-slug',
data: {
some: 'other data',
},
})
}
```
### Direct Transaction Access
When writing your own scripts or custom endpoints, you may wish to have direct control over the database. This is useful for interacting with your database, outside of Payload's local API.
The following functions can be used for managing transactions:
`payload.db.transaction` - Helper function that takes a callback and wraps begin, commit, and rollback in try, catch, and error respectively.
`payload.db.beginTransaction` - Starts a new session and returns an identifier for later reference.
`payload.db.commitTransaction` - Takes the identifier for the transaction, finalizes any changes.
`payload.db.rollbackTransaction` - Takes the identifier for the transaction, discards any changes.
## Migrations
Payload's migrations are accessible via the `payload` command in your project directory.
Available commands:
- [`migrate`](#migrate) - Performs any migrations that have not yet been run.
- [`migrate:status`](#migrate:status) - Checks the status of migrations.
- [`migrate:down`](#migrate:down) - Reverts the last batch of migrations.
- [`migrate:refresh`](#migrate:refresh) - Rolls back all migrations and runs them again.
- [`migrate:reset`](#migrate:reset) - Rolls back all migrations.
- [`migrate:create`](#migrate:create) - Creates new migration file in migrations directory.
### Migrate
The `migrate` command will run any migrations that have not yet been run. This command is run automatically when you start your Payload server.
`payload migrate`
Example output:
```text
TODO: add example output
```
### Migrate:status
The `migrate:status` command will check the status of migrations.
`payload migrate:status`
Example output:
```text
```
### Migrate:down
Revert the last batch of migrations.
`payload migrate:down`
Example output:
```text
```
### Migrate:refresh
Roll back all migrations and run them again.
`payload migrate:refresh`
Example output:
```text
```
### Migrate:reset
Roll back all migrations.
`payload migrate:reset`
Example output:
```text
```
### Migrate:create
Create a new migration file in the migrations directory.
`payload migrate:create`
Example output:
```text
Migration created at .migrations/20230912_131129_first.ts
To use Payload with Postgres, install the package `@payloadcms/db-postgres`. It leverages Drizzle ORM and `node-postgres` to interact with a Postgres database that you provide.
<Banner>
The Postgres database adapter is currently in beta. If you would like to help us test this
package, we'd love to hear if you find any bugs or issues!
</Banner>
It automatically manages changes to your database for you in development mode, and exposes a full suite of migration controls for you to leverage in order to keep other database environments in sync with your schema. DDL transformations are automatically generated.
To configure Payload to use Postgres, pass the `postgresAdapter` to your Payload config as follows:
```ts
import { postgresAdapter } from '@payloadcms/db-postgres'
| `pool` \* | [Pool connection options](https://orm.drizzle.team/docs/quick-postgresql/node-postgres) that will be passed to Drizzle and `node-postgres`. |
| `push` | Disable Drizzle's [`db push`](https://orm.drizzle.team/kit-docs/overview#prototyping-with-db-push) in development mode. By default, `push` is enabled for development mode only. |
| `migrationDir` | Customize the directory that migrations are stored. |
| `logger` | The instance of the logger to be passed to drizzle. By default Payload's will be used. |
| `schemaName` | A string for the postgres schema to use, defaults to 'public'. |
| `localesSuffix` | A string appended to the end of table names for storing localized fields. Default is '_locales'. |
| `relationshipsSuffix` | A string appended to the end of table names for storing relationships. Default is '_rels'. |
| `versionsSuffix` | A string appended to the end of table names for storing versions. Defaults to '_v'. |
### Access to Drizzle
After Payload is initialized, this adapter will expose the full power of Drizzle to you for use if you need it.
You can access Drizzle as follows:
```text
payload.db.drizzle
```
### Tables, relations, and enums
In addition to exposing Drizzle directly, all of the tables, Drizzle relations, and enum configs are exposed for you via the `payload.db` property as well.
- Tables - `payload.db.tables`
- Enums - `payload.db.enums`
- Relations - `payload.db.relations`
### Prototyping in development mode
Drizzle exposes two ways to work locally in development mode.
The first is [`db push`](https://orm.drizzle.team/kit-docs/overview#prototyping-with-db-push), which automatically pushes changes you make to your Payload config (and therefore, Drizzle schema) to your database so you don't have to manually migrate every time you change your Payload config. This only works in development mode, and should not be mixed with manually running [`migrate`](/docs/database/migrations) commands.
You will be warned if any changes that you make will entail data loss while in development mode. Push is enabled by default, but you can opt out if you'd like.
Alternatively, you can disable `push` and rely solely on migrations to keep your local database in sync with your Payload config.
### Migration workflows
Migrations are extremely powerful thanks to the seamless way that Payload and Drizzle work together. Let's take the following scenario:
1. You are building your Payload config locally, with a local database used for testing.
1. You have left the default setting of `push` enabled, so every time you change your Payload config (add or remove fields, collections, etc.), Drizzle will automatically push changes to your local DB.
1. Once you're done with your changes, or have completed a feature, you can run `npm run payload migrate:create`.
1. Payload and Drizzle will look for any existing migrations, and automatically generate all SQL changes necessary to convert your schema from its prior state into the state of your current Payload config, and store the resulting DDL in a newly created migration.
1. Once you're ready to go to production, you will be able to run `npm run payload migrate` against your production database, which will apply any new migrations that have not yet run.
1. Now your production database is in sync with your Payload config!
<Banner type="warning">
Warning: do not mix "push" and migrations with your local development database. If you use "push"
locally, and then try to migrate, Payload will throw a warning, telling you that these two methods
desc: Database transactions are fully supported within Payload.
---
Database transactions allow your application to make a series of database changes in an all-or-nothing commit. Consider an HTTP request that creates a new **Order** and has an `afterChange` hook to update the stock count of related **Items**. If an error occurs when updating an **Item** and an HTTP error is returned to the user, you would not want the new **Order** to be persisted or any other items to be changed either. This kind of interaction with the database is handled seamlessly with transactions.
By default, Payload will use transactions for all operations, as long as it is supported by the configured database. Database changes are contained within all Payload operations and any errors thrown will result in all changes being rolled back without being committed. When transactions are not supported by the database, Payload will continue to operate as expected without them.
<Banner type="info">
<strong>Note:</strong>
<br />
MongoDB requires a connection to a replicaset in order to make use of transactions.
</Banner>
The initial request made to Payload will begin a new transaction and attach it to the `req.transactionID`. If you have a `hook` that interacts with the database, you can opt-in to using the same transaction by passing the `req` in the arguments. For example:
// because req.transactionID is assigned from Payload and passed through, my-slug will only persist if the entire request is successful
await req.payload.create({
req,
collection: 'my-slug',
data: {
some: 'data',
},
})
}
```
### Async Hooks with Transactions
Since Payload hooks can be async and be written to not await the result, it is possible to have an incorrect success response returned on a request that is rolled back. If you have a hook where you do not `await` the result, then you should **not** pass the `req.transactionID`.
// Should this call fail, it will not rollback other changes
// because the req (and its transactionID) is not passed through
const safelyIgnoredAsync = req.payload.create({
collection: 'my-slug',
data: {
some: 'other data',
},
})
}
```
### Direct Transaction Access
When writing your own scripts or custom endpoints, you may wish to have direct control over transactions. This is useful for interacting with your database outside of Payload's local API.
The following functions can be used for managing transactions:
`payload.db.beginTransaction` - Starts a new session and returns a transaction ID for use in other Payload Local API calls.
`payload.db.commitTransaction` - Takes the identifier for the transaction, finalizes any changes.
`payload.db.rollbackTransaction` - Takes the identifier for the transaction, discards any changes.
| **`fromName`** \* | The name part of the From field that will be seen on the delivered email |
| **`fromAddress`** \* | The email address part of the From field that will be used when delivering email |
| **`transport`** | The NodeMailer transport object for when you want to do it yourself, not needed when transportOptions is set |
| **`transportOptions`** | An object that configures the transporter that Payload will create. For all the available options see the [NodeMailer documentation](https://nodemailer.com/smtp/) or see the examples below |
| **`logMockCredentials`** | If set to true and no transport/transportOptions, ethereal credentials will be logged to console on startup |
| **`fromName`** \* | The name part of the From field that will be seen on the delivered email |
| **`fromAddress`** \* | The email address part of the From field that will be used when delivering email |
| **`transport`** | The NodeMailer transport object for when you want to do it yourself, not needed when transportOptions is set |
| **`transportOptions`** | An object that configures the transporter that Payload will create. For all the available options see the [NodeMailer documentation](https://nodemailer.com) or see the examples below |
| **`logMockCredentials`** | If set to true and no transport/transportOptions, ethereal credentials will be logged to console on startup |
_\* An asterisk denotes that a property is required._
### Use SMTP
Simple Mail Transfer Protocol, also known as SMTP can be passed in using the `transportOptions` object on the `email` options.
Simple Mail Transfer Protocol (SMTP) options can be passed in using the `transportOptions` object on the `email` options. See the [NodeMailer SMTP documentation](https://nodemailer.com/smtp/) for more information, including details on when `secure` should and should not be set to `true`.
**Example email part using SMTP:**
**Example email options using SMTP:**
```ts
payload.init({
@@ -50,12 +50,9 @@ payload.init({
user: process.env.SMTP_USER,
pass: process.env.SMTP_PASS,
},
port: 587,
secure: true, // use TLS
tls: {
// do not fail on invalid certs
rejectUnauthorized: false,
},
port: Number(process.env.SMTP_HOST),
secure: Number(process.env.SMTP_PORT) === 465, // true for port 465, false (the default) for 587 and others
requireTLS: true,
},
fromName: 'hello',
fromAddress: 'hello@example.com',
@@ -71,7 +68,7 @@ payload.init({
### Use an email service
Many third party mail providers are available and offer benefits beyond basic SMTP. As an example your payload init could look this if you wanted to use SendGrid.com though the same approach would work for any other [NodeMailer transports](https://nodemailer.com/transports/) shown here or provided by another third party.
Many third party mail providers are available and offer benefits beyond basic SMTP. As an example, your payload init could look like this if you wanted to use SendGrid.com, though the same approach would work for any other [NodeMailer transports](https://nodemailer.com/transports/) shown here or provided by another third party.
| **`admin`** | Admin-specific configuration. See below for [more detail](#admin-config). |
| **`custom`** | Extension point for adding custom data (e.g. for plugins) |
| **`interfaceName`** | Create a top level, reusable [Typescript interface](/docs/typescript/generating-types#custom-field-interfaces) & [GraphQL type](/docs/graphql/graphql-schema#custom-field-schemas). |
| **`dbName`** | Custom table name for the field when using SQL database adapter ([Postgres](/docs/database/postgres)). Auto-generated from name if not defined. |
_\* An asterisk denotes that a property is required._
@@ -80,6 +80,8 @@ Blocks are defined as separate configs of their own.
| **`imageAltText`** | Customize this block's image thumbnail alt text. |
| **`interfaceName`** | Create a top level, reusable [Typescript interface](/docs/typescript/generating-types#custom-field-interfaces) & [GraphQL type](/docs/graphql/graphql-schema#custom-field-schemas). |
| **`graphQL.singularName`** | Text to use for the GraphQL schema name. Auto-generated from slug if not defined. NOTE: this is set for deprecation, prefer `interfaceName`. |
| **`dbName`** | Custom table name for this block type when using SQL database adapter ([Postgres](/docs/database/postgres)). Auto-generated from slug if not defined.
| **`custom`** | Extension point for adding custom data (e.g. for plugins) |
| **`name`** \* | To be used as the property name when stored and retrieved from the database. [More](/docs/fields/overview#field-names) |
| **`label`** | Text used as a field label in the Admin panel or an object with keys for each language. |
| **`validate`** | Provide a custom validation function that will be executed on both the Admin panel and the backend. [More](/docs/fields/overview#validation) |
| **`index`** | Build an [index](/docs/database/overview) for this field to produce faster queries. Set this field to `true` if your users will perform queries on this field's data often. |
| **`saveToJWT`** | If this field is top-level and nested in a config supporting [Authentication](/docs/authentication/config), include its data in the user JWT. |
| **`hooks`** | Provide field-based hooks to control logic for this field. [More](/docs/fields/overview#field-level-hooks) |
| **`access`** | Provide field-based access control to denote what users can see and do with this field's data. [More](/docs/fields/overview#field-level-access-control) |
| **`hidden`** | Restrict this field's visibility from all APIs entirely. Will still be saved to the database, but will not appear in any API or the Admin panel. |
| **`defaultValue`** | Provide data to be used for this field's default value, will default to false if field is also `required`. [More](/docs/fields/overview#default-values) |
| **`localized`** | Enable localization for this field. Requires [localization to be enabled](/docs/configuration/localization) in the Base config. |
| **`required`** | Require this field to have a value. |
| **`admin`** | Admin-specific configuration. See the [default field admin config](/docs/fields/overview#admin-config) for more details. |
| **`custom`** | Extension point for adding custom data (e.g. for plugins) |
_\* An asterisk denotes that a property is required._
| **`name`** \* | To be used as the property name when stored and retrieved from the database. [More](/docs/fields/overview#field-names) |
| **`label`** | Text used as a field label in the Admin panel or an object with keys for each language. |
| **`unique`** | Enforce that each entry in the Collection has a unique value for this field. |
| **`index`** | Build an [index](/docs/database#overview) for this field to produce faster queries. Set this field to `true` if your users will perform queries on this field's data often. |
| **`minLength`** | Used by the default validation function to ensure values are of a minimum character length. |
| **`maxLength`** | Used by the default validation function to ensure values are of a maximum character length. |
| **`validate`** | Provide a custom validation function that will be executed on both the Admin panel and the backend. [More](/docs/fields/overview#validation) |
| **`saveToJWT`** | If this field is top-level and nested in a config supporting [Authentication](/docs/authentication/config), include its data in the user JWT. |
| **`hooks`** | Provide field-based hooks to control logic for this field. [More](/docs/fields/overview#field-level-hooks) |
| **`access`** | Provide field-based access control to denote what users can see and do with this field's data. [More](/docs/fields/overview#field-level-access-control) |
| **`hidden`** | Restrict this field's visibility from all APIs entirely. Will still be saved to the database, but will not appear in any API or the Admin panel. |
| **`defaultValue`** | Provide data to be used for this field's default value. [More](/docs/fields/overview#default-values) |
| **`localized`** | Enable localization for this field. Requires [localization to be enabled](/docs/configuration/localization) in the Base config. |
| **`required`** | Require this field to have a value. |
| **`admin`** | Admin-specific configuration. See below for [more detail](#admin-config). |
| **`custom`** | Extension point for adding custom data (e.g. for plugins) |
_\* An asterisk denotes that a property is required._
| **`name`** \* | To be used as the property name when stored and retrieved from the database. [More](/docs/fields/overview#field-names) |
| **`label`** | Text used as a field label in the Admin panel or an object with keys for each language. |
| **`index`** | Build an [index](/docs/database/overview) for this field to produce faster queries. Set this field to `true` if your users will perform queries on this field's data often. |
| **`validate`** | Provide a custom validation function that will be executed on both the Admin panel and the backend. [More](/docs/fields/overview#validation) |
| **`saveToJWT`** | If this field is top-level and nested in a config supporting [Authentication](/docs/authentication/config), include its data in the user JWT. |
| **`hooks`** | Provide field-based hooks to control logic for this field. [More](/docs/fields/overview#field-level-hooks) |
| **`access`** | Provide field-based access control to denote what users can see and do with this field's data. [More](/docs/fields/overview#field-level-access-control) |
| **`hidden`** | Restrict this field's visibility from all APIs entirely. Will still be saved to the database, but will not appear in any API or the Admin panel. |
| **`defaultValue`** | Provide data to be used for this field's default value. [More](/docs/fields/overview#default-values) |
| **`localized`** | Enable localization for this field. Requires [localization to be enabled](/docs/configuration/localization) in the Base config. |
| **`required`** | Require this field to have a value. |
| **`admin`** | Admin-specific configuration. See below for [more detail](#admin-config). |
| **`custom`** | Extension point for adding custom data (e.g. for plugins) |
_\* An asterisk denotes that a property is required._
@@ -44,19 +44,20 @@ _\* An asterisk denotes that a property is required._
In addition to the default [field admin config](/docs/fields/overview#admin-config), you can customize the following fields that will adjust how the component displays in the admin panel via the `date` property.
| **`placeholder`** | Placeholder text for the field. |
| **`date`** | Pass options to customize date field appearance. |
| **`date.displayFormat`** | Format date to be shown in field **cell**. |
| **`date.pickerAppearance`** \* | Determines the appearance of the datepicker: `dayAndTime` `timeOnly` `dayOnly` `monthOnly`. |
| **`date.monthsToShow`** \* | Number of months to display max is 2. Defaults to 1. |
| **`date.minDate`** \* | Min date value to allow. |
| **`date.maxDate`** \* | Max date value to allow. |
| **`date.minTime`** \* | Min time value to allow. |
| **`date.maxTime`** \* | Max date value to allow. |
| **`date.overrides`** \* | Pass any valid props directly to the [react-datepicker](https://github.com/Hacker0x01/react-datepicker/blob/master/docs/datepicker.md) |
| **`date.timeIntervals`** \* | Time intervals to display. Defaults to 30 minutes. |
| **`date.timeFormat`** \* | Determines time format. Defaults to `'h:mm aa'`. |
_\* This property is passed directly to [react-datepicker](https://github.com/Hacker0x01/react-datepicker/blob/master/docs/datepicker.md). ._
| **`name`** \* | To be used as the property name when stored and retrieved from the database. [More](/docs/fields/overview#field-names) |
| **`label`** | Text used as a field label in the Admin panel or an object with keys for each language. |
| **`unique`** | Enforce that each entry in the Collection has a unique value for this field. |
| **`index`** | Build an [index](/docs/database/overview) for this field to produce faster queries. Set this field to `true` if your users will perform queries on this field's data often. |
| **`validate`** | Provide a custom validation function that will be executed on both the Admin panel and the backend. [More](/docs/fields/overview#validation) |
| **`saveToJWT`** | If this field is top-level and nested in a config supporting [Authentication](/docs/authentication/config), include its data in the user JWT. |
| **`hooks`** | Provide field-based hooks to control logic for this field. [More](/docs/fields/overview#field-level-hooks) |
| **`access`** | Provide field-based access control to denote what users can see and do with this field's data. [More](/docs/fields/overview#field-level-access-control) |
| **`hidden`** | Restrict this field's visibility from all APIs entirely. Will still be saved to the database, but will not appear in any API or the Admin panel. |
| **`defaultValue`** | Provide data to be used for this field's default value. [More](/docs/fields/overview#default-values) |
| **`localized`** | Enable localization for this field. Requires [localization to be enabled](/docs/configuration/localization) in the Base config. |
| **`required`** | Require this field to have a value. |
| **`admin`** | Admin-specific configuration. See below for [more detail](#admin-config). |
| **`custom`** | Extension point for adding custom data (e.g. for plugins) |
| **`validate`** | Provide a custom validation function that will be executed on both the Admin panel and the backend. [More](/docs/fields/overview#validation) |
| **`saveToJWT`** | If this field is top-level and nested in a config supporting [Authentication](/docs/authentication/config), include its data in the user JWT. |
| **`hooks`** | Provide field-based hooks to control logic for this field. [More](/docs/fields/overview#field-level-hooks) |
| **`access`** | Provide field-based access control to denote what users can see and do with this field's data. [More](/docs/fields/overview#field-level-access-control) |
| **`hidden`** | Restrict this field's visibility from all APIs entirely. Will still be saved to the database, but will not appear in any API or the Admin panel. |
| **`defaultValue`** | Provide data to be used for this field's default value. [More](/docs/fields/overview#default-values) |
| **`localized`** | Enable localization for this field. Requires [localization to be enabled](/docs/configuration/localization) in the Base config. |
| **`required`** | Require this field to have a value. |
| **`admin`** | Admin-specific configuration. See below for [more detail](#admin-config). |
| **`custom`** | Extension point for adding custom data (e.g. for plugins) |
_\* An asterisk denotes that a property is required._
| **`name`** \* | To be used as the property name when stored and retrieved from the database. [More](/docs/fields/overview#field-names) |
| **`label`** | Text used as a field label in the Admin panel or an object with keys for each language. |
| **`unique`** | Enforce that each entry in the Collection has a unique value for this field. |
| **`index`** | Build a an [index](/docs/database/overview) for this field to produce faster queries. Set this field to `true` if your users will perform queries on this field's data often. |
| **`validate`** | Provide a custom validation function that will be executed on both the Admin panel and the backend. [More](/docs/fields/overview#validation) |
| **`saveToJWT`** | If this field is top-level and nested in a config supporting [Authentication](/docs/authentication/config), include its data in the user JWT. |
| **`hooks`** | Provide field-based hooks to control logic for this field. [More](/docs/fields/overview#field-level-hooks) |
| **`access`** | Provide field-based access control to denote what users can see and do with this field's data. [More](/docs/fields/overview#field-level-access-control) |
| **`hidden`** | Restrict this field's visibility from all APIs entirely. Will still be saved to the database, but will not appear in any API or the Admin panel. |
| **`defaultValue`** | Provide data to be used for this field's default value. [More](/docs/fields/overview#default-values) |
| **`localized`** | Enable localization for this field. Requires [localization to be enabled](/docs/configuration/localization) in the Base config. |
| **`required`** | Require this field to have a value. |
| **`admin`** | Admin-specific configuration. See below for [more detail](#admin-config). |
| **`custom`** | Extension point for adding custom data (e.g. for plugins) |
| **`name`** \* | To be used as the property name when stored and retrieved from the database. [More](/docs/fields/overview#field-names) |
| **`label`** | Text used as a field label in the Admin panel or an object with keys for each language. |
| **`unique`** | Enforce that each entry in the Collection has a unique value for this field. |
| **`index`** | Build an [index](/docs/database/overview) for this field to produce faster queries. Set this field to `true` if your users will perform queries on this field's data often. |
| **`validate`** | Provide a custom validation function that will be executed on both the Admin panel and the backend. [More](/docs/fields/overview#validation) |
| **`saveToJWT`** | If this field is top-level and nested in a config supporting [Authentication](/docs/authentication/config), include its data in the user JWT. |
| **`hooks`** | Provide field-based hooks to control logic for this field. [More](/docs/fields/overview#field-level-hooks) |
| **`access`** | Provide field-based access control to denote what users can see and do with this field's data. [More](/docs/fields/overview#field-level-access-control) |
| **`hidden`** | Restrict this field's visibility from all APIs entirely. Will still be saved to the database, but will not appear in any API or the Admin panel. |
| **`defaultValue`** | Provide data to be used for this field's default value. [More](/docs/fields/overview#default-values) |
| **`localized`** | Enable localization for this field. Requires [localization to be enabled](/docs/configuration/localization) in the Base config. |
| **`required`** | Require this field to have a value. |
| **`admin`** | Admin-specific configuration. See below for [more detail](#admin-config). |
| **`custom`** | Extension point for adding custom data (e.g. for plugins) |
_\* An asterisk denotes that a property is required._
@@ -46,9 +46,9 @@ _\* An asterisk denotes that a property is required._
In addition to the default [field admin config](/docs/fields/overview#admin-config), you can adjust the following properties:
| **`editorOptions`** | Options that can be passed to the monaco editor, [view the full list](https://microsoft.github.io/monaco-editor/api/interfaces/monaco.editor.IDiffEditorConstructionOptions.html). |
| **`editorOptions`** | Options that can be passed to the monaco editor, [view the full list](https://microsoft.github.io/monaco-editor/typedoc/variables/editor.EditorOptions.html). |
| **`name`** \* | To be used as the property name when stored and retrieved from the database. [More](/docs/fields/overview#field-names) |
| **`label`** | Text used as a field label in the Admin panel or an object with keys for each language. |
| **`min`** | Minimum value accepted. Used in the default `validation` function. |
| **`max`** | Maximum value accepted. Used in the default `validation` function. |
| **`hasMany`** | Makes this field an ordered array of numbers instead of just a single number. |
| **`minRows`** | Minimum number of numbers in the numbers array, if `hasMany` is set to true. |
| **`maxRows`** | Maximum number of numbers in the numbers array, if `hasMany` is set to true. |
| **`unique`** | Enforce that each entry in the Collection has a unique value for this field. |
| **`index`** | Build an [index](/docs/database/overview) for this field to produce faster queries. Set this field to `true` if your users will perform queries on this field's data often. |
| **`validate`** | Provide a custom validation function that will be executed on both the Admin panel and the backend. [More](/docs/fields/overview#validation) |
| **`saveToJWT`** | If this field is top-level and nested in a config supporting [Authentication](/docs/authentication/config), include its data in the user JWT. |
| **`hooks`** | Provide field-based hooks to control logic for this field. [More](/docs/fields/overview#field-level-hooks) |
| **`access`** | Provide field-based access control to denote what users can see and do with this field's data. [More](/docs/fields/overview#field-level-access-control) |
| **`hidden`** | Restrict this field's visibility from all APIs entirely. Will still be saved to the database, but will not appear in any API or the Admin panel. |
| **`defaultValue`** | Provide data to be used for this field's default value. [More](/docs/fields/overview#default-values) |
| **`localized`** | Enable localization for this field. Requires [localization to be enabled](/docs/configuration/localization) in the Base config. |
| **`required`** | Require this field to have a value. |
| **`admin`** | Admin-specific configuration. See below for [more detail](#admin-config). |
| **`custom`** | Extension point for adding custom data (e.g. for plugins) |
_\* An asterisk denotes that a property is required._
| `data` | An object of the full collection or global document. |
| `siblingData` | An object of the document data limited to fields within the same parent to the field. |
| `operation` | Will be "create" or "update" depending on the UI action or API call. |
| `id` | The value of the collection `id`, will be `undefined` on create request. |
| `t` | The function for translating text, [more](/docs/configuration/i18n). |
| `user` | The currently authenticated user object. |
| `data` | An object containing the full collection or global document currently being edited |
| `siblingData` | An object containing document data that is scoped to only fields within the same parent of this field |
| `operation` | Will be `create` or `update` depending on the UI action or API call |
| `id` | The `id` of the current document being edited. `id` is `undefined` during the `create` operation |
| `t` | The function for translating text, [more](/docs/configuration/i18n) |
| `user` | An object containing the currently authenticated user |
| `payload` | If the `validate` function is being executed on the server, Payload will be exposed for easily running local operations. |
Example:
### Example
```ts
import { CollectionConfig } from 'payload/types'
@@ -250,11 +252,16 @@ const field = {
### Description
A description can be configured three ways.
A description can be configured in three ways.
- As a string
- As a function that accepts an object containing the field's value, which returns a string
- As a React component that accepts value as a prop
- As a function which returns a string
- As a React component
Functions are called with an optional argument object with the following shape, and React components are rendered with the following props:
- `path` - the path of the field
- `value` - the current value of the field
As shown above, you can simply provide a string that will show by the field, but there are use cases where you may want to create some dynamic feedback. By using a function or a component for the `description` property you can provide realtime feedback as the user interacts with the form.
@@ -268,8 +275,8 @@ As shown above, you can simply provide a string that will show by the field, but
| **`name`** \* | To be used as the property name when stored and retrieved from the database. [More](/docs/fields/overview#field-names) |
| **`label`** | Used as a field label in the Admin panel and to name the generated GraphQL type. |
| **`unique`** | Enforce that each entry in the Collection has a unique value for this field. |
| **`index`** | Build an [index](/docs/database/overview) for this field to produce faster queries. To support location queries, point index defaults to `2dsphere`, to disable the index set to `false`. |
| **`validate`** | Provide a custom validation function that will be executed on both the Admin panel and the backend. [More](/docs/fields/overview#validation) |
| **`saveToJWT`** | If this field is top-level and nested in a config supporting [Authentication](/docs/authentication/config), include its data in the user JWT. |
| **`hooks`** | Provide field-based hooks to control logic for this field. [More](/docs/fields/overview#field-level-hooks) |
| **`access`** | Provide field-based access control to denote what users can see and do with this field's data. [More](/docs/fields/overview#field-level-access-control) |
| **`hidden`** | Restrict this field's visibility from all APIs entirely. Will still be saved to the database, but will not appear in any API or the Admin panel. |
| **`defaultValue`** | Provide data to be used for this field's default value. [More](/docs/fields/overview#default-values) |
| **`localized`** | Enable localization for this field. Requires [localization to be enabled](/docs/configuration/localization) in the Base config. |
| **`required`** | Require this field to have a value. |
| **`admin`** | Admin-specific configuration. See below for [more detail](#admin-config). |
| **`custom`** | Extension point for adding custom data (e.g. for plugins) |
_\* An asterisk denotes that a property is required._
| **`name`** \* | To be used as the property name when stored and retrieved from the database. [More](/docs/fields/overview#field-names) |
| **`options`** \* | Array of options to allow the field to store. Can either be an array of strings, or an array of objects containing an `label` string and a `value` string. |
| **`label`** | Text used as a field label in the Admin panel or an object with keys for each language. |
| **`validate`** | Provide a custom validation function that will be executed on both the Admin panel and the backend. [More](/docs/fields/overview#validation) |
| **`index`** | Build an [index](/docs/database/overview) for this field to produce faster queries. Set this field to `true` if your users will perform queries on this field's data often. |
| **`saveToJWT`** | If this field is top-level and nested in a config supporting [Authentication](/docs/authentication/config), include its data in the user JWT. |
| **`hooks`** | Provide field-based hooks to control logic for this field. [More](/docs/fields/overview#field-level-hooks) |
| **`access`** | Provide field-based access control to denote what users can see and do with this field's data. [More](/docs/fields/overview#field-level-access-control) |
| **`hidden`** | Restrict this field's visibility from all APIs entirely. Will still be saved to the database, but will not appear in any API or the Admin panel. |
| **`defaultValue`** | Provide data to be used for this field's default value. The default value must exist within provided values in `options`. [More](/docs/fields/overview#default-values) |
| **`localized`** | Enable localization for this field. Requires [localization to be enabled](/docs/configuration/localization) in the Base config. |
| **`required`** | Require this field to have a value. |
| **`admin`** | Admin-specific configuration. See below for [more detail](#admin-config). |
| **`custom`** | Extension point for adding custom data (e.g. for plugins) |
| **`enumName`** | Custom enum name for this field when using SQL database adapter ([Postgres](/docs/database/postgres)). Auto-generated from name if not defined.
_\* An asterisk denotes that a property is required._
| **`name`** \* | To be used as the property name when stored and retrieved from the database. [More](/docs/fields/overview#field-names) |
| **`relationTo`** \* | Provide one or many collection `slug`s to be able to assign relationships to. |
| **`filterOptions`** | A query to filter which options appear in the UI and validate against. [More](#filtering-relationship-options). |
| **`hasMany`** | Boolean when, if set to `true`, allows this field to have many relations instead of only one. |
| **`minRows`** | A number for the fewest allowed items during validation when a value is present. Used with `hasMany`. |
| **`maxRows`** | A number for the most allowed items during validation when a value is present. Used with `hasMany`. |
| **`maxDepth`** | Sets a number limit on iterations of related documents to populate when queried. [Depth](/docs/getting-started/concepts#depth) |
| **`label`** | Text used as a field label in the Admin panel or an object with keys for each language. |
| **`unique`** | Enforce that each entry in the Collection has a unique value for this field. |
| **`validate`** | Provide a custom validation function that will be executed on both the Admin panel and the backend. [More](/docs/fields/overview#validation) |
| **`index`** | Build a an [index](/docs/database/overview) for this field to produce faster queries. Set this field to `true` if your users will perform queries on this field's data often. |
| **`saveToJWT`** | If this field is top-level and nested in a config supporting [Authentication](/docs/authentication/config), include its data in the user JWT. |
| **`hooks`** | Provide field-based hooks to control logic for this field. [More](/docs/fields/overview#field-level-hooks) |
| **`access`** | Provide field-based access control to denote what users can see and do with this field's data. [More](/docs/fields/overview#field-level-access-control) |
| **`hidden`** | Restrict this field's visibility from all APIs entirely. Will still be saved to the database, but will not appear in any API or the Admin panel. |
| **`defaultValue`** | Provide data to be used for this field's default value. [More](/docs/fields/overview#default-values) |
| **`localized`** | Enable localization for this field. Requires [localization to be enabled](/docs/configuration/localization) in the Base config. |
| **`required`** | Require this field to have a value. |
| **`admin`** | Admin-specific configuration. See the [default field admin config](/docs/fields/overview#admin-config) for more details. |
| **`custom`** | Extension point for adding custom data (e.g. for plugins) |
| **`name`** \* | To be used as the property name when stored and retrieved from the database. [More](/docs/fields/overview#field-names) |
| **`relationTo`** \* | Provide one or many collection `slug`s to be able to assign relationships to. |
| **`filterOptions`** | A query to filter which options appear in the UI and validate against. [More](#filtering-relationship-options). |
| **`hasMany`** | Boolean when, if set to `true`, allows this field to have many relations instead of only one. |
| **`minRows`** | A number for the fewest allowed items during validation when a value is present. Used with `hasMany`. |
| **`maxRows`** | A number for the most allowed items during validation when a value is present. Used with `hasMany`. |
| **`maxDepth`** | Sets a number limit on iterations of related documents to populate when queried. [Depth](/docs/getting-started/concepts#depth) |
| **`label`** | Text used as a field label in the Admin panel or an object with keys for each language. |
| **`unique`** | Enforce that each entry in the Collection has a unique value for this field. |
| **`validate`** | Provide a custom validation function that will be executed on both the Admin panel and the backend. [More](/docs/fields/overview#validation) |
| **`index`** | Build an [index](/docs/database/overview) for this field to produce faster queries. Set this field to `true` if your users will perform queries on this field's data often. |
| **`saveToJWT`** | If this field is top-level and nested in a config supporting [Authentication](/docs/authentication/config), include its data in the user JWT. |
| **`hooks`** | Provide field-based hooks to control logic for this field. [More](/docs/fields/overview#field-level-hooks) |
| **`access`** | Provide field-based access control to denote what users can see and do with this field's data. [More](/docs/fields/overview#field-level-access-control) |
| **`hidden`** | Restrict this field's visibility from all APIs entirely. Will still be saved to the database, but will not appear in any API or the Admin panel. |
| **`defaultValue`** | Provide data to be used for this field's default value. [More](/docs/fields/overview#default-values) |
| **`localized`** | Enable localization for this field. Requires [localization to be enabled](/docs/configuration/localization) in the Base config. |
| **`required`** | Require this field to have a value. |
| **`admin`** | Admin-specific configuration. See the [default field admin config](/docs/fields/overview#admin-config) for more details. |
| **`custom`** | Extension point for adding custom data (e.g. for plugins) |
_\* An asterisk denotes that a property is required._
@@ -60,29 +60,84 @@ _\* An asterisk denotes that a property is required._
### Admin config
In addition to the default [field admin config](/docs/fields/overview#admin-config), the Relationship field type also allows for the following admin-specific properties:
In addition to the default [field admin config](/docs/fields/overview#admin-config), the Relationship field type also
allows for the following admin-specific properties:
**`isSortable`**
Set to `true` if you'd like this field to be sortable within the Admin UI using drag and drop (only works when `hasMany` is set to `true`).
Set to `true` if you'd like this field to be sortable within the Admin UI using drag and drop (only works when `hasMany`
is set to `true`).
**`allowCreate`**
Set to `false` if you'd like to disable the ability to create new documents from within the relationship field (hides the "Add new" button in the admin UI).
Set to `false` if you'd like to disable the ability to create new documents from within the relationship field (hides
the "Add new" button in the admin UI).
**`sortOptions`**
The `sortOptions` property allows you to define a default sorting order for the options within a Relationship field's
dropdown. This can be particularly useful for ensuring that the most relevant options are presented first to the user.
You can specify `sortOptions` in two ways:
**As a string:**
Provide a string to define a global default sort field for all relationship field dropdowns across different
collections. You can prefix the field name with a minus symbol ("-") to sort in descending order.
Example:
```ts
sortOptions: 'fieldName',
```
This configuration will sort all relationship field dropdowns by `"fieldName"` in ascending order.
**As an object :**
Specify an object where keys are collection slugs and values are strings representing the field names to sort by. This
allows for different sorting fields for each collection's relationship dropdown.
Example:
```ts
sortOptions: {
"pages"
:
"fieldName1",
"posts"
:
"-fieldName2",
"categories"
:
"fieldName3"
}
```
In this configuration:
- Dropdowns related to `pages` will be sorted by `"fieldName1"` in ascending order.
- Dropdowns for `posts` will use `"fieldName2"` for sorting in descending order (noted by the "-" prefix).
- Dropdowns associated with `categories` will sort based on `"fieldName3"` in ascending order.
Note: If `sortOptions` is not defined, the default sorting behavior of the Relationship field dropdown will be used.
### Filtering relationship options
Options can be dynamically limited by supplying a [query constraint](/docs/queries/overview), which will be used both for validating input and filtering available relationships in the UI.
Options can be dynamically limited by supplying a [query constraint](/docs/queries/overview), which will be used both
for validating input and filtering available relationships in the UI.
The `filterOptions` property can either be a `Where` query directly, or a function (synchronous or asynchronous) that returns one. When using a function, it will be called with an argument object containing the following properties:
The `filterOptions` property can either be a `Where` query, or a function returning `true` to not filter, `false` to
prevent all, or a `Where` query. When using a function, it will be
called with an argument object with the following properties:
| `relationTo` | The collection `slug` to filter against, limited to this field's `relationTo` property |
| `data` | An object containing the full collection or global document currently being edited |
| `siblingData` | An object containing document data that is scoped to only fields within the same parent of this field |
| `id` | The `id` of the current document being edited. `id` is `undefined` during the `create` operation |
| `user` | An object containing the currently authenticated user |
### Example
@@ -128,16 +183,21 @@ You can learn more about writing queries [here](/docs/queries/overview).
### How the data is saved
Given the variety of options possible within the `relationship` field type, the shape of the data needed for creating and updating these fields can vary. The following sections will describe the variety of data shapes that can arise from this field.
Given the variety of options possible within the `relationship` field type, the shape of the data needed for creating
and updating these fields can vary. The following sections will describe the variety of data shapes that can arise from
this field.
#### Has One
The most simple pattern of a relationship is to use `hasMany: false` with a `relationTo` that allows for only one type of collection.
The most simple pattern of a relationship is to use `hasMany: false` with a `relationTo` that allows for only one type
of collection.
```ts
{
slug: 'example-collection',
fields: [
fields
:
[
{
name: 'owner', // required
type: 'relationship', // required
@@ -163,12 +223,15 @@ When querying documents in this collection via REST API, you could query as foll
#### Has One - Polymorphic
Also known as **dynamic references**, in this configuration, the `relationTo` field is an array of Collection slugs that tells Payload which Collections are valid to reference.
Also known as **dynamic references**, in this configuration, the `relationTo` field is an array of Collection slugs that
tells Payload which Collections are valid to reference.
```ts
{
slug: 'example-collection',
fields: [
fields
:
[
{
name: 'owner', // required
type: 'relationship', // required
@@ -207,7 +270,9 @@ The `hasMany` tells Payload that there may be more than one collection saved to
```ts
{
slug: 'example-collection',
fields: [
fields
:
[
{
name: 'owners', // required
type: 'relationship', // required
@@ -235,7 +300,9 @@ When querying documents, the format does not change for arrays:
```ts
{
slug: 'example-collection',
fields: [
fields
:
[
{
name: 'owners', // required
type: 'relationship', // required
@@ -247,7 +314,8 @@ When querying documents, the format does not change for arrays:
}
```
Relationship fields with `hasMany` set to more than one kind of collections save their data as an array of objects—each containing the Collection `slug` as the `relationTo` value, and the related document `id` for the `value`:
Relationship fields with `hasMany` set to more than one kind of collections save their data as an array of objects—each
containing the Collection `slug` as the `relationTo` value, and the related document `id` for the `value`:
```json
{
@@ -267,3 +335,30 @@ Relationship fields with `hasMany` set to more than one kind of collections save
Querying is done in the same way as the earlier Polymorphic example:
caption="Admin panel screenshot of a Rich Text field"
/>
The Admin component is built on the powerful [`slatejs`](https://docs.slatejs.org/) editor and is meant to be as extensible and customizable as possible.
Payload's rich text field is built on an "adapter pattern" which lets you specify which rich text editor you'd like to use.
Right now, Payload is officially supporting two rich text editors:
1. [SlateJS](/docs/rich-text/slate) - stable, backwards-compatible with 1.0
2. [Lexical](/docs/rich-text/lexical) - beta, where things will be moving
<Banner type="success">
<strong>Consistent with Payload's goal of making you learn as little of Payload as possible, customizing and using the Rich Text Editor does not involve learning how to develop for a <em>Payload</em> rich text editor.</strong> Instead, you can invest your time and effort into learning Slate, an open-source tool that will allow you to apply your learnings elsewhere as well.
<strong>
Consistent with Payload's goal of making you learn as little of Payload as possible, customizing
and using the Rich Text Editor does not involve learning how to develop for a <em>Payload</em>{' '}
rich text editor.
</strong>{' '}
Instead, you can invest your time and effort into learning the underlying open-source tools that
will allow you to apply your learnings elsewhere as well.
</Banner>
### Config
@@ -39,7 +50,7 @@ The Admin component is built on the powerful [`slatejs`](https://docs.slatejs.or
| **`localized`** | Enable localization for this field. Requires [localization to be enabled](/docs/configuration/localization) in the Base config. |
| **`required`** | Require this field to have a value. |
| **`admin`** | Admin-specific configuration. See below for [more detail](#admin-config). |
| **`editor`** | RichText editor which will be used by this field. |
| **`editor`** | Override the rich text editor specified in your base configuration for this field. |
| **`custom`** | Extension point for adding custom data (e.g. for plugins) |
_\* An asterisk denotes that a property is required._
@@ -52,306 +63,14 @@ In addition to the default [field admin config](/docs/fields/overview#admin-conf
Set this property to define a placeholder string in the text input.
**`elements`**
The `elements` property is used to specify which built-in or custom [SlateJS elements](https://docs.slatejs.org/concepts/02-nodes#element) should be made available to the field within the admin panel.
The default `elements` available in Payload are:
- `h1`
- `h2`
- `h3`
- `h4`
- `h5`
- `h6`
- `blockquote`
- `link`
- `ol`
- `ul`
- `textAlign`
- `indent`
- [`relationship`](#relationship-element)
- [`upload`](#upload-element)
- [`textAlign`](#text-align)
**`leaves`**
The `leaves` property specifies built-in or custom [SlateJS leaves](https://docs.slatejs.org/concepts/08-rendering#leaves) to be enabled within the Admin panel.
The default `leaves` available in Payload are:
- `bold`
- `code`
- `italic`
- `strikethrough`
- `underline`
**`hideGutter`**
Set this property to `true` to hide this field's gutter within the admin panel. The field gutter is rendered as a vertical line and padding, but often if this field is nested within a Group, Block, or Array, you may want to hide the gutter.
**`link.fields`**
This allows [fields](/docs/fields/overview) to be saved as extra fields on a link inside the Rich Text Editor. When this is present, the fields will render inside a modal that can be opened by clicking the "edit" button on the link element.
`link.fields` may either be an array of fields (in which case all fields defined in it will be appended below the default fields) or a function that accepts the default fields as only argument and returns an array defining the entirety of fields to be used (thus providing a mechanism of overriding the default fields).
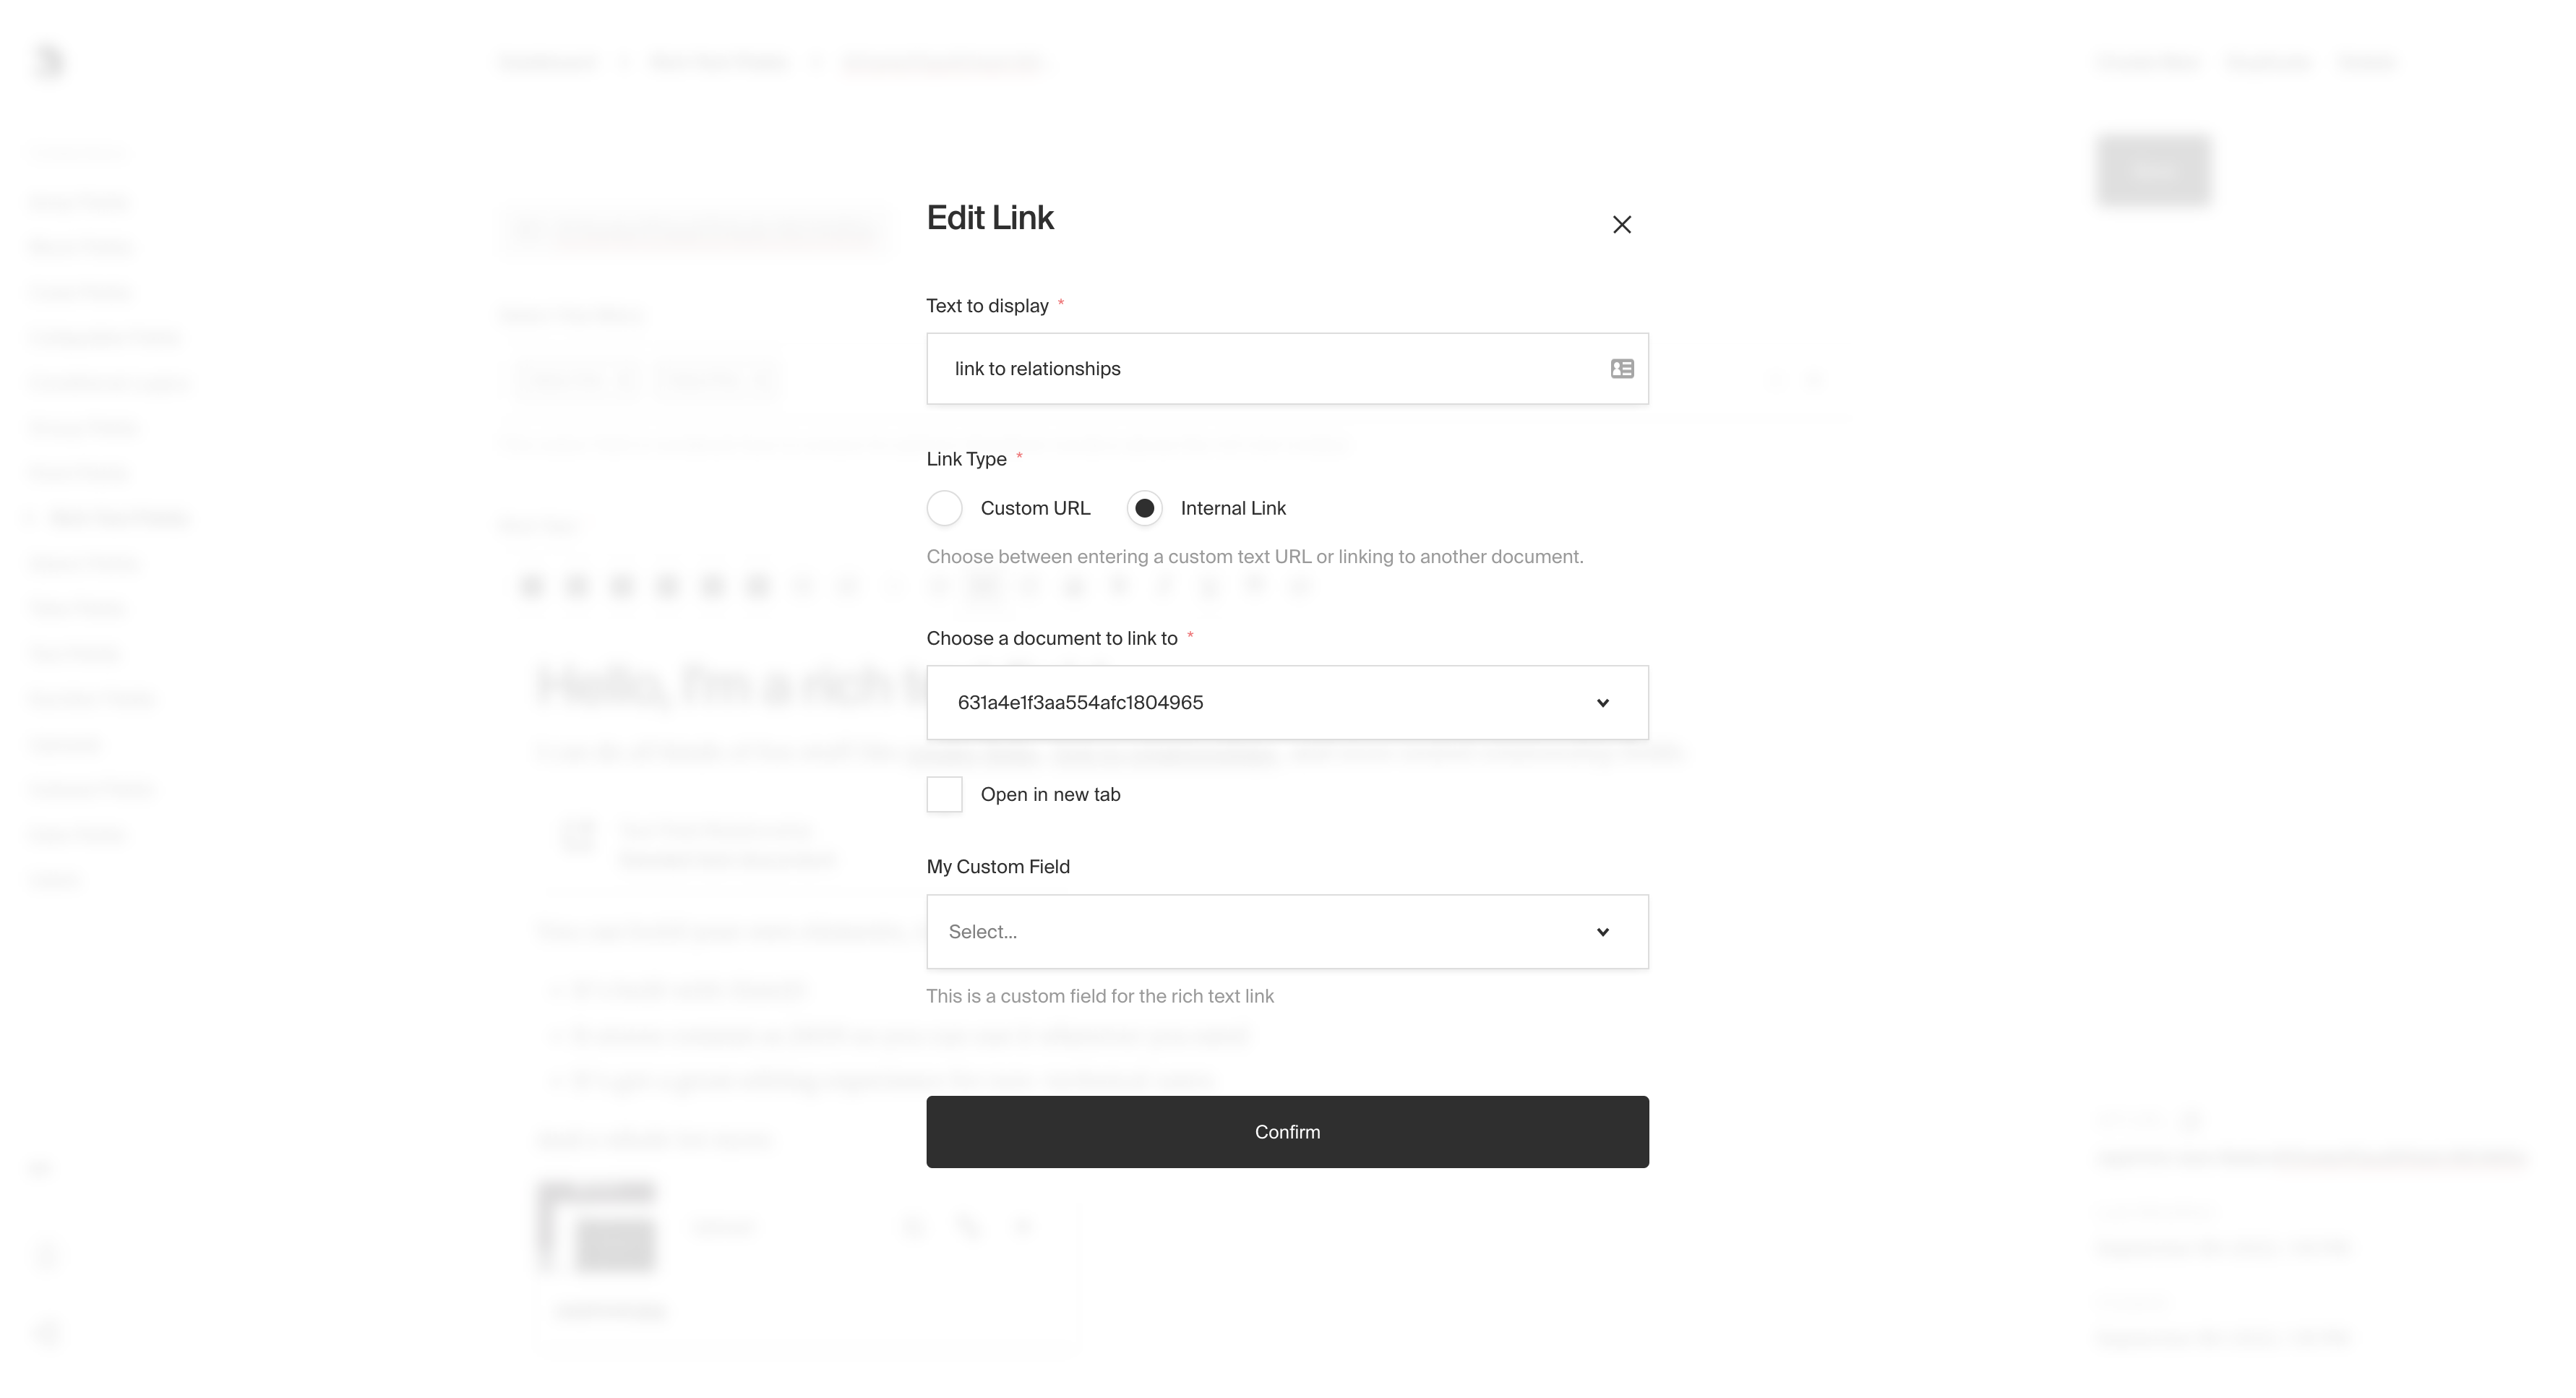
_RichText link with custom fields_
**`upload.collections[collection-name].fields`**
This allows [fields](/docs/fields/overview) to be saved as meta data on an upload field inside the Rich Text Editor. When this is present, the fields will render inside a modal that can be opened by clicking the "edit" button on the upload element.
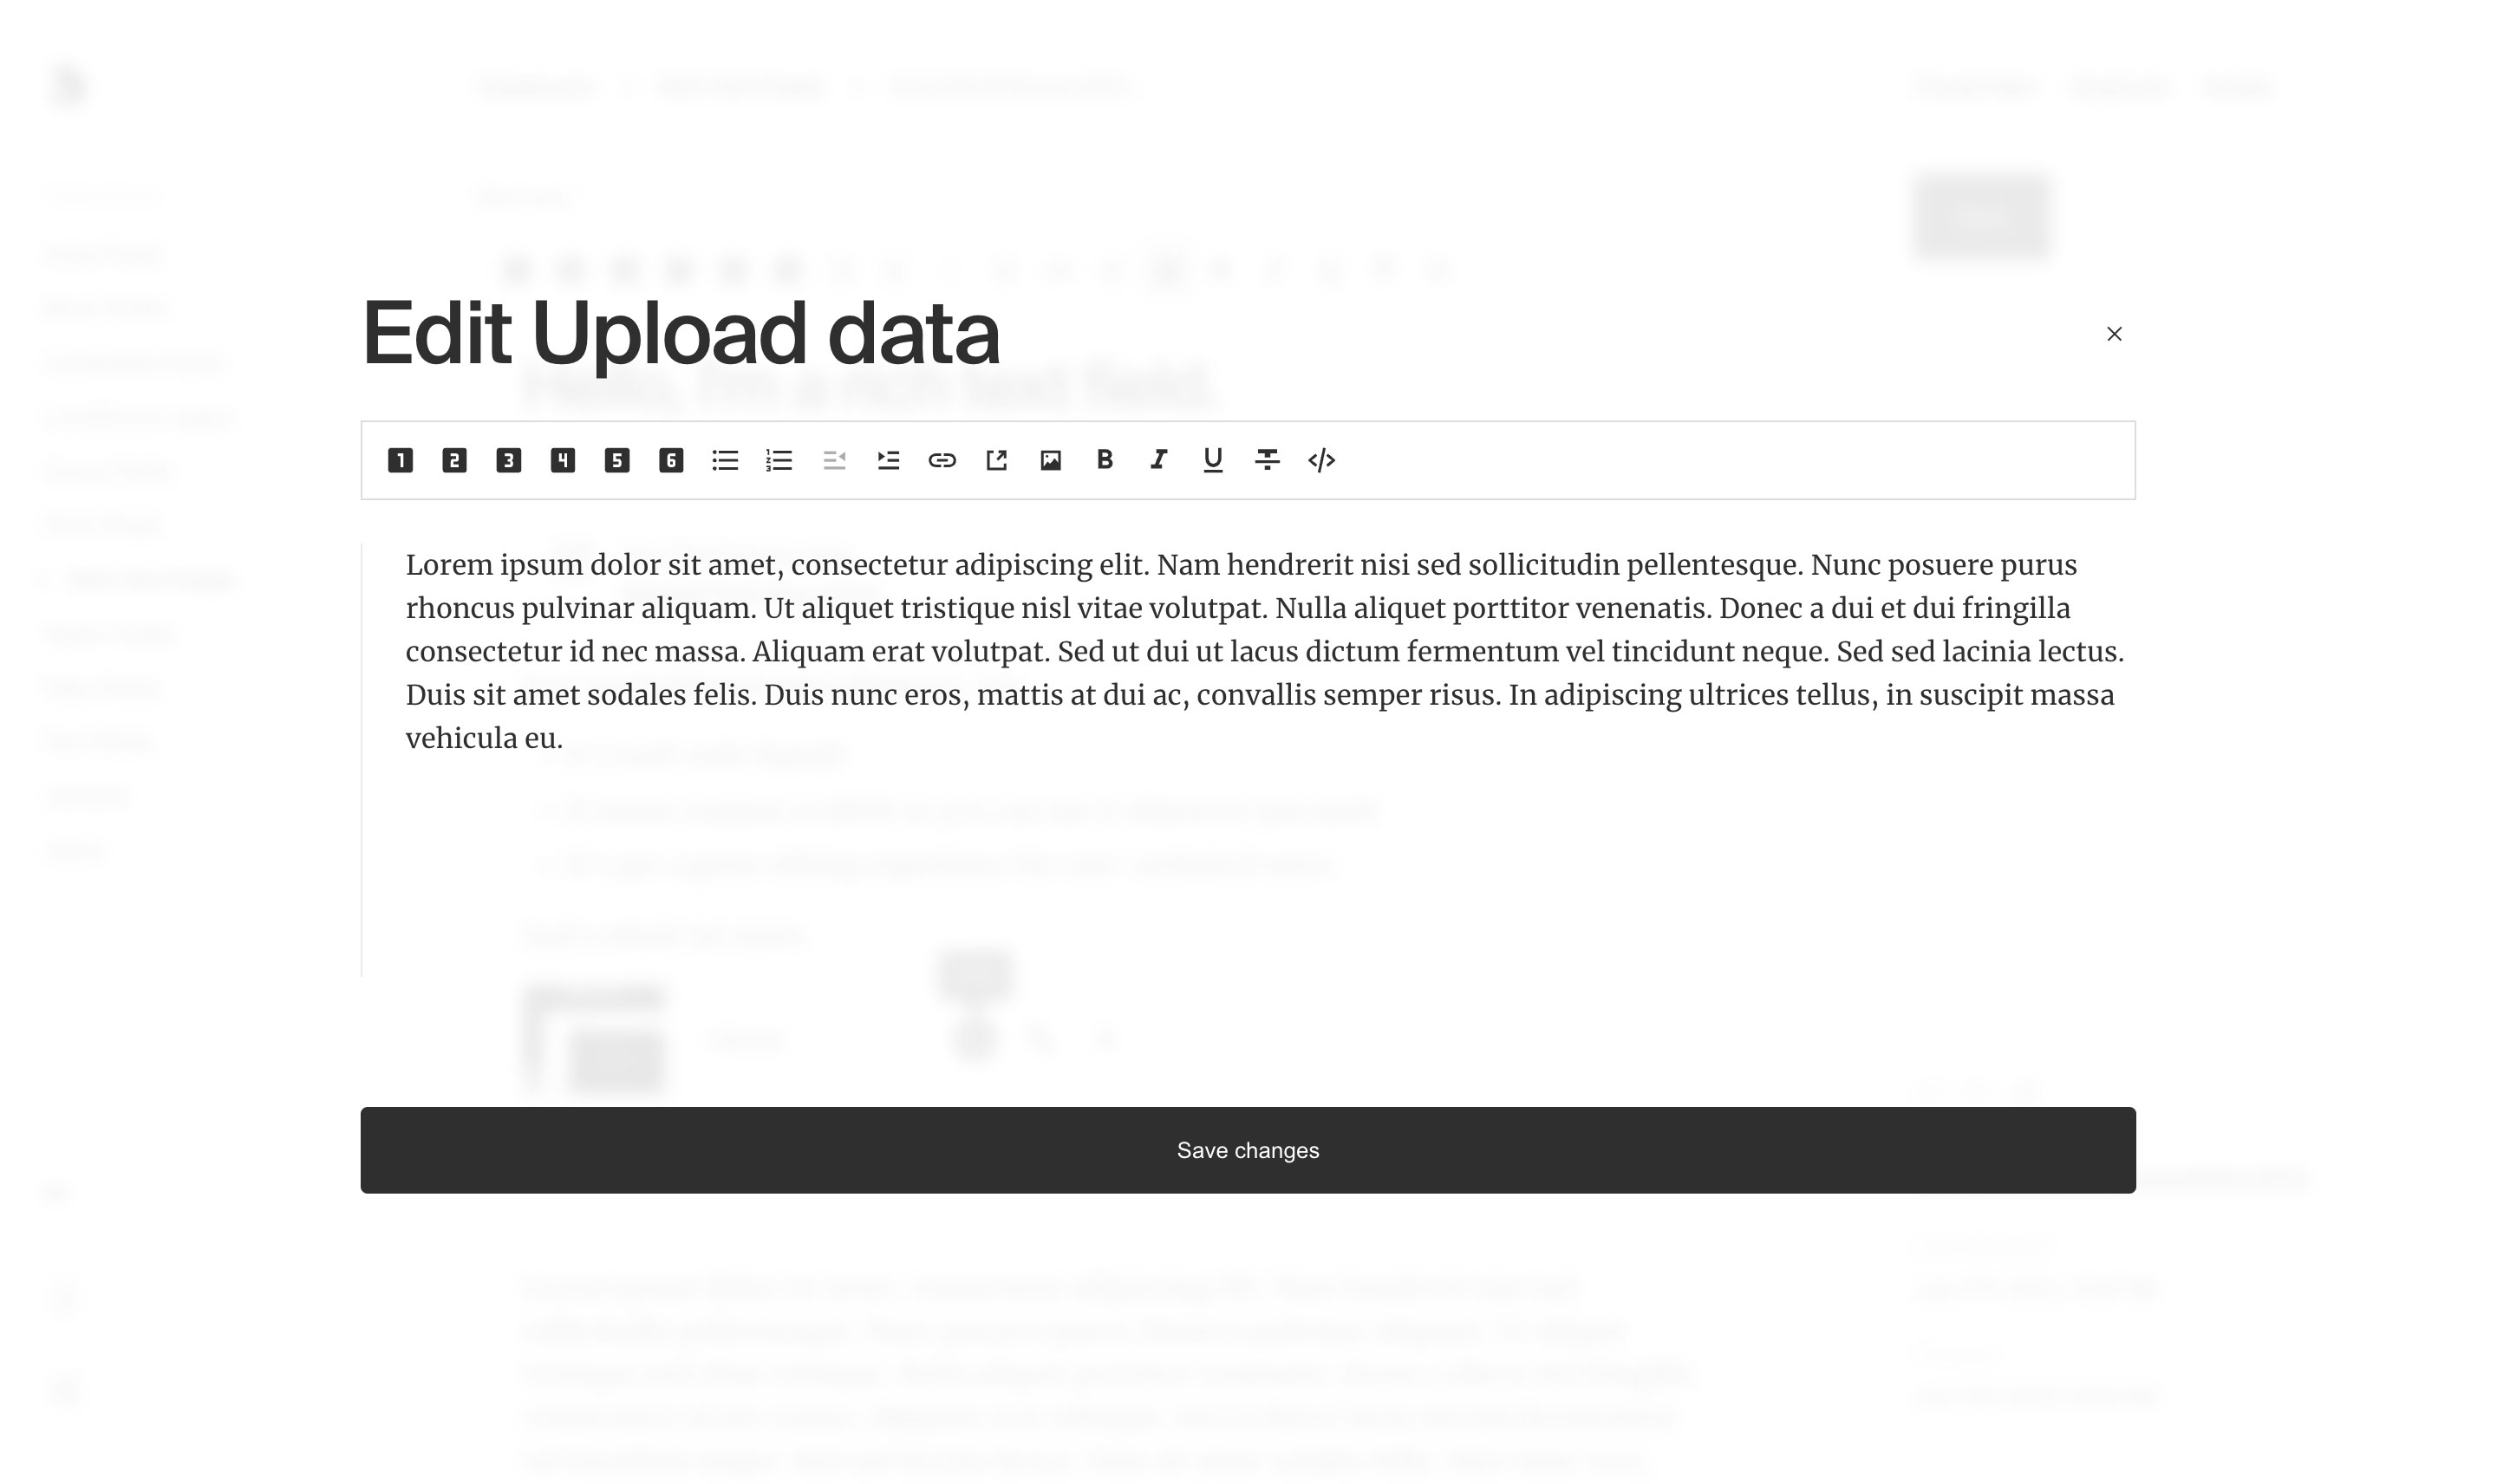
_RichText upload element modal displaying fields from the config_
**`rtl`**
Override the default text direction of the Admin panel for this field. Set to `true` to force right-to-left text direction.
### Relationship element
### Editor-specific options
The built-in `relationship` element is a powerful way to reference other Documents directly within your Rich Text editor.
### Upload element
Similar to the `relationship` element, the `upload` element is a user-friendly way to reference [Upload-enabled collections](/docs/upload/overview) with a UI specifically designed for media / image-based uploads.
<Banner type="success">
<strong>Tip:</strong>
<br />
Collections are automatically allowed to be selected within the Rich Text relationship and upload
elements by default. If you want to disable a collection from being able to be referenced in Rich
Text fields, set the collection admin options of <strong>enableRichTextLink</strong> and{' '}
<strong>enableRichTextRelationship</strong> to false.
</Banner>
Relationship and Upload elements are populated dynamically into your Rich Text field' content. Within the REST and Local APIs, any present RichText `relationship` or `upload` elements will respect the `depth` option that you pass, and will be populated accordingly. In GraphQL, each `richText` field accepts an argument of `depth` for you to utilize.
### TextAlign element
Text Alignment is not included by default and can be added to a Rich Text Editor by adding `textAlign` to the list of elements. TextAlign will alter the existing element to include a new `textAlign` field in the resulting JSON. This field can be used in combination with other elements and leaves to position content to the left, center or right.
### Specifying which elements and leaves to allow
To specify which default elements or leaves should be allowed to be used for this field, define arrays that contain string names for each element or leaf you wish to enable. To specify a custom element or leaf, pass an object with all corresponding properties as outlined below. View the [example](#example) to reference how this all works.
### Building custom elements and leaves
You can design and build your own Slate elements and leaves to extend the editor with your own functionality. To do so, first start by reading the [SlateJS documentation](https://docs.slatejs.org/) and looking at the [Slate examples](https://www.slatejs.org/examples/richtext) to familiarize yourself with the SlateJS editor as a whole.
Once you're up to speed with the general concepts involved, you can pass in your own elements and leaves to your field's admin config.
**Both custom elements and leaves are defined via the following config:**
children: [{ text: 'Here is some default content for this field' }],
},
],
required: true,
admin: {
elements: [
'h2',
'h3',
'h4',
'link',
'blockquote',
{
name: 'cta',
Button: CustomCallToActionButton,
Element: CustomCallToActionElement,
plugins: [
// any plugins that are required by this element go here
],
},
],
leaves: [
'bold',
'italic',
{
name: 'highlight',
Button: CustomHighlightButton,
Leaf: CustomHighlightLeaf,
plugins: [
// any plugins that are required by this leaf go here
],
},
],
link: {
// Inject your own fields into the Link element
fields: [
{
name: 'rel',
label: 'Rel Attribute',
type: 'select',
hasMany: true,
options: ['noopener', 'noreferrer', 'nofollow'],
},
],
},
upload: {
collections: {
media: {
fields: [
// any fields that you would like to save
// on an upload element in the `media` collection
],
},
},
},
},
},
],
}
```
For more examples regarding how to define your own elements and leaves, check out the example [`RichText` field](https://github.com/payloadcms/public-demo/blob/master/src/fields/hero.ts) within the Public Demo source code.
### Generating HTML
As the Rich Text field saves its content in a JSON format, you'll need to render it as HTML yourself. Here is an example for how to generate JSX / HTML from Rich Text content:
The above example is for how to render to JSX, although for plain HTML the pattern is similar.
Just remove the JSX and return HTML strings instead!
</Banner>
### Built-in SlateJS Plugins
Payload comes with a few built-in SlateJS plugins which can be extended to make developing your own elements and leaves a bit easier. They will be documented here over time.
#### `shouldBreakOutOnEnter`
Payload's built-in heading elements all allow a "hard return" to "break out" of the currently active element. For example, if you hit `enter` while typing an `h1`, the `h1` will be "broken out of" and you'll be able to continue writing as the default paragraph element.
If you want to utilize this functionality within your own custom elements, you can do so by adding a custom plugin to your `element` like the following "large body" element example:
Above, you can see that we are creating a custom SlateJS element with a name of `large-body`. This might render a slightly larger body copy on the frontend of your app(s). We pass it a name, button, and element—but additionally, we pass it a `plugins` array containing a single SlateJS plugin.
The plugin itself extends Payload's built-in `shouldBreakOutOnEnter` Slate function to add its own element name to the list of elements that should "break out" when the `enter` key is pressed.
### TypeScript
If you are building your own custom Rich Text elements or leaves, you may benefit from importing the following types:
```ts
import type { RichTextCustomElement, RichTextCustomLeaf } from 'payload/types'
```
For a ton more editor-specific options, including how to build custom rich text elements directly into your editor, take a look at either the [Slate docs](/docs/rich-text/slate) or the [Lexical docs](/docs/rich-text/lexical) depending on which editor you're using.
| **`name`** \* | To be used as the property name when stored and retrieved from the database. [More](/docs/fields/overview#field-names) |
| **`options`** \* | Array of options to allow the field to store. Can either be an array of strings, or an array of objects containing a `label` string and a `value` string. |
| **`hasMany`** | Boolean when, if set to `true`, allows this field to have many selections instead of only one. |
| **`label`** | Text used as a field label in the Admin panel or an object with keys for each language. |
| **`unique`** | Enforce that each entry in the Collection has a unique value for this field. |
| **`validate`** | Provide a custom validation function that will be executed on both the Admin panel and the backend. [More](/docs/fields/overview#validation) |
| **`index`** | Build an [index](/docs/database/overview) for this field to produce faster queries. Set this field to `true` if your users will perform queries on this field's data often. |
| **`saveToJWT`** | If this field is top-level and nested in a config supporting [Authentication](/docs/authentication/config), include its data in the user JWT. |
| **`hooks`** | Provide field-based hooks to control logic for this field. [More](/docs/fields/overview#field-level-hooks) |
| **`access`** | Provide field-based access control to denote what users can see and do with this field's data. [More](/docs/fields/overview#field-level-access-control) |
| **`hidden`** | Restrict this field's visibility from all APIs entirely. Will still be saved to the database, but will not appear in any API or the Admin panel. |
| **`defaultValue`** | Provide data to be used for this field's default value. [More](/docs/fields/overview#default-values) |
| **`localized`** | Enable localization for this field. Requires [localization to be enabled](/docs/configuration/localization) in the Base config. |
| **`required`** | Require this field to have a value. |
| **`admin`** | Admin-specific configuration. See the [default field admin config](/docs/fields/overview#admin-config) for more details. |
| **`custom`** | Extension point for adding custom data (e.g. for plugins) |
| **`enumName`** | Custom enum name for this field when using SQL database adapter ([Postgres](/docs/database/postgres)). Auto-generated from name if not defined. |
| **`dbName`** | Custom table name (if `hasMany` set to `true`) for this field when using SQL database adapter ([Postgres](/docs/database/postgres)). Auto-generated from name if not defined. |
_\* An asterisk denotes that a property is required._
@@ -122,7 +124,7 @@ export const CustomSelectField: Field = {
],
}),
},
}
},
}
```
@@ -133,7 +135,7 @@ import * as React from 'react';
import { SelectInput, useField } from 'payload/components/forms';
import { useAuth } from 'payload/components/utilities';
If you are looking to create a dynamic select field, the following tutorial will walk you through the process of creating a custom select field that fetches its options from an external API.
<VideoDrawer
id='Efn9OxSjA6Y'
label='How to Create a Custom Select Field'
drawerTitle='How to Create a Custom Select Field: A Step-by-Step Guide'
id="Efn9OxSjA6Y"
label="How to Create a Custom Select Field"
drawerTitle="How to Create a Custom Select Field: A Step-by-Step Guide"
/>
If you want to learn more about custom components check out the [Admin > Custom Component](/docs/admin/components#field-component) docs.
| **`name`** \* | To be used as the property name when stored and retrieved from the database. [More](/docs/fields/overview#field-names) |
| **`label`** | Text used as a field label in the Admin panel or an object with keys for each language. |
| **`unique`** | Enforce that each entry in the Collection has a unique value for this field. |
| **`minLength`** | Used by the default validation function to ensure values are of a minimum character length. |
| **`maxLength`** | Used by the default validation function to ensure values are of a maximum character length. |
| **`validate`** | Provide a custom validation function that will be executed on both the Admin panel and the backend. [More](/docs/fields/overview#validation) |
| **`index`** | Build an [index](/docs/database/overview) for this field to produce faster queries. Set this field to `true` if your users will perform queries on this field's data often. |
| **`saveToJWT`** | If this field is top-level and nested in a config supporting [Authentication](/docs/authentication/config), include its data in the user JWT. |
| **`hooks`** | Provide field-based hooks to control logic for this field. [More](/docs/fields/overview#field-level-hooks) |
| **`access`** | Provide field-based access control to denote what users can see and do with this field's data. [More](/docs/fields/overview#field-level-access-control) |
| **`hidden`** | Restrict this field's visibility from all APIs entirely. Will still be saved to the database, but will not appear in any API or the Admin panel. |
| **`defaultValue`** | Provide data to be used for this field's default value. [More](/docs/fields/overview#default-values) |
| **`localized`** | Enable localization for this field. Requires [localization to be enabled](/docs/configuration/localization) in the Base config. |
| **`required`** | Require this field to have a value. |
| **`admin`** | Admin-specific configuration. See below for [more detail](#admin-config). |
| **`custom`** | Extension point for adding custom data (e.g. for plugins) |
| **`hasMany`** | Makes this field an ordered array of text instead of just a single text. |
| **`minRows`** | Minimum number of texts in the array, if `hasMany` is set to true. |
| **`maxRows`** | Maximum number of texts in the array, if `hasMany` is set to true. |
_\* An asterisk denotes that a property is required._
| **`name`** \* | To be used as the property name when stored and retrieved from the database. [More](/docs/fields/overview#field-names) |
| **`label`** | Text used as a field label in the Admin panel or an object with keys for each language. |
| **`unique`** | Enforce that each entry in the Collection has a unique value for this field. |
| **`minLength`** | Used by the default validation function to ensure values are of a minimum character length. |
| **`maxLength`** | Used by the default validation function to ensure values are of a maximum character length. |
| **`validate`** | Provide a custom validation function that will be executed on both the Admin panel and the backend. [More](/docs/fields/overview#validation) |
| **`index`** | Build an [index](/docs/database/overview) for this field to produce faster queries. Set this field to `true` if your users will perform queries on this field's data often. |
| **`saveToJWT`** | If this field is top-level and nested in a config supporting [Authentication](/docs/authentication/config), include its data in the user JWT. |
| **`hooks`** | Provide field-based hooks to control logic for this field. [More](/docs/fields/overview#field-level-hooks) |
| **`access`** | Provide field-based access control to denote what users can see and do with this field's data. [More](/docs/fields/overview#field-level-access-control) |
| **`hidden`** | Restrict this field's visibility from all APIs entirely. Will still be saved to the database, but will not appear in any API or the Admin panel. |
| **`defaultValue`** | Provide data to be used for this field's default value. [More](/docs/fields/overview#default-values) |
| **`localized`** | Enable localization for this field. Requires [localization to be enabled](/docs/configuration/localization) in the Base config. |
| **`required`** | Require this field to have a value. |
| **`admin`** | Admin-specific configuration. See below for [more detail](#admin-config). |
| **`custom`** | Extension point for adding custom data (e.g. for plugins) |
| **`saveToJWT`** | If this field is top-level and nested in a config supporting [Authentication](/docs/authentication/config), include its data in the user JWT. |
| **`hooks`** | Provide field-based hooks to control logic for this field. [More](/docs/fields/overview#field-level-hooks) |
| **`access`** | Provide field-based access control to denote what users can see and do with this field's data. [More](/docs/fields/overview#field-level-access-control) |
| **`hidden`** | Restrict this field's visibility from all APIs entirely. Will still be saved to the database, but will not appear in any API or the Admin panel. |
| **`defaultValue`** | Provide data to be used for this field's default value. [More](/docs/fields/overview#default-values) |
| **`localized`** | Enable localization for this field. Requires [localization to be enabled](/docs/configuration/localization) in the Base config. |
| **`required`** | Require this field to have a value. |
| **`admin`** | Admin-specific configuration. See below for [more detail](#admin-config). |
| **`custom`** | Extension point for adding custom data (e.g. for plugins) |
_\* An asterisk denotes that a property is required._
| **`name`** \* | To be used as the property name when stored and retrieved from the database. [More](/docs/fields/overview#field-names) |
| **`*relationTo`** \* | Provide a single collection `slug` to allow this field to accept a relation to. <strong>Note: the related collection must be configured to support Uploads.</strong> |
| **`filterOptions`** | A query to filter which options appear in the UI and validate against. [More](#filtering-upload-options). |
| **`maxDepth`** | Sets a number limit on iterations of related documents to populate when queried. [Depth](/docs/getting-started/concepts#depth) |
| **`label`** | Text used as a field label in the Admin panel or an object with keys for each language. |
| **`unique`** | Enforce that each entry in the Collection has a unique value for this field. |
| **`validate`** | Provide a custom validation function that will be executed on both the Admin panel and the backend. [More](/docs/fields/overview#validation) |
| **`index`** | Build an [index](/docs/database/overview) for this field to produce faster queries. Set this field to `true` if your users will perform queries on this field's data often. |
| **`saveToJWT`** | If this field is top-level and nested in a config supporting [Authentication](/docs/authentication/config), include its data in the user JWT. |
| **`hooks`** | Provide field-based hooks to control logic for this field. [More](/docs/fields/overview#field-level-hooks) |
| **`access`** | Provide field-based access control to denote what users can see and do with this field's data. [More](/docs/fields/overview#field-level-access-control) |
| **`hidden`** | Restrict this field's visibility from all APIs entirely. Will still be saved to the database, but will not appear in any API or the Admin panel. |
| **`defaultValue`** | Provide data to be used for this field's default value. [More](/docs/fields/overview#default-values) |
| **`localized`** | Enable localization for this field. Requires [localization to be enabled](/docs/configuration/localization) in the Base config. |
| **`required`** | Require this field to have a value. |
| **`admin`** | Admin-specific configuration. See the [default field admin config](/docs/fields/overview#admin-config) for more details. |
| **`custom`** | Extension point for adding custom data (e.g. for plugins) |
_\* An asterisk denotes that a property is required._
Options can be dynamically limited by supplying a [query constraint](/docs/queries/overview), which will be used both for validating input and filtering available uploads in the UI.
Options can be dynamically limited by supplying a [query constraint](/docs/queries/overview), which will be used both
for validating input and filtering available uploads in the UI.
The `filterOptions` property can either be a `Where` query directly, or a function that returns one. When using a function, it will be called with an argument object with the following properties:
The `filterOptions` property can either be a `Where` query, or a function returning `true` to not filter, `false` to
prevent all, or a `Where` query. When using a function, it will be
called with an argument object with the following properties:
- Any JavaScript package manager (Yarn, NPM, or pnpm)
- Node.js version 18+
- Any [compatible database](/docs/database/overview) (MongoDB or Postgres)
<Banner type="warning">
Before proceeding any further, please ensure that you have the above requirements met.
@@ -23,7 +23,7 @@ Payload requires the following software:
To quickly scaffold a new Payload app in the fastest way possible, you can use [create-payload-app](https://npmjs.com/package/create-payload-app). To do so, run the following command:
```
npx create-payload-app
npx create-payload-app@latest
```
Then just follow the prompts! You'll get set up with a new folder and a functioning Payload app inside.
@@ -62,9 +62,7 @@ import express from 'express'
const app = express()
app.listen(3000, async () => {
console.log(
"Express is now listening for incoming connections on port 3000."
)
console.log('Express is now listening for incoming connections on port 3000.')
})
```
@@ -86,9 +84,7 @@ const start = async () => {
})
app.listen(3000, async () => {
console.log(
"Express is now listening for incoming connections on port 3000."
)
console.log('Express is now listening for incoming connections on port 3000.')
Here is a list of all properties available to pass through `payload.init`:
##### `secret`
##### secret
**Required**. This is a secure string that will be used to authenticate with Payload. It can be random but should be at least 14 characters and be very difficult to guess.
Payload uses this secret key to generate secure user tokens (JWT). Behind the scenes, we do not use your secret key to encrypt directly - instead, we first take the secret key and create an encrypted string using the SHA-256 hash function. Then, we reduce the encrypted string to its first 32 characters. This final value is what Payload uses for encryption.
##### `config`
##### config
Allows you to pass your config directly to the onInit function. The config passed here should match the payload.config file.
##### `disableOnInit`
##### disableOnInit
A boolean that disables running your `onInit` function when Payload starts up.
##### `disableDBConnect`
##### disableDBConnect
A boolean that disables the database connection when Payload starts up.
##### `email`
##### email
An object used to configure SMTP. [Read more](/docs/email/overview).
##### `express`
##### express
This is your Express app as shown above. Payload will tie into your existing `app` and scope all of its functionalities to sub-routers. By default, Payload will add an `/admin` router and an `/api` router, but you can customize these paths.
##### `local`
##### local
A boolean that when set to `true` tells Payload to start in local-only mode which will bypass setting up API routes. When set to `true`, `express` is not required. This is useful when running scripts that need to use Payload's [local-api](/docs/local-api/overview).
##### `loggerDestination`
##### loggerDestination
Specify destination stream for the built-in Pino logger that Payload uses for internal logging. See [Pino Docs](https://getpino.io/#/docs/api?id=pino-destination) for more info on what is available.
##### `loggerOptions`
##### loggerOptions
Specify options for the built-in Pino logger that Payload uses for internal logging. See [Pino Docs](https://getpino.io/#/docs/api?id=options) for more info on what is available.
##### `onInit`
##### onInit
A function that is called immediately following startup that receives the Payload instance as it's only argument.
When working with GraphQL it is useful to have the schema for development of other projects that need to call on your GraphQL endpoint. In Payload the schema is controlled by your collections and globals and is made available to the developer or third parties, it is not necessary for developers using Payload to write schema types manually.
### Schema generatation script
### Schema generation script
Run the following command in a Payload project to generate your project's GraphQL schema from Payload:
@@ -16,19 +16,6 @@ Run the following command in a Payload project to generate your project's GraphQ
payload generate:graphQLSchema
```
You can run this command whenever you need to regenerate your GraphQL schema and output it to a file, and then you can use the schema for writing your own GraphQL elsewhere in other projects.
| `mutations` | Any custom Mutations to be added in addition to what Payload provides. [More](/docs/graphql/extending) |
| `queries` | Any custom Queries to be added in addition to what Payload provides. [More](/docs/graphql/extending) |
| `maxComplexity` | A number used to set the maximum allowed complexity allowed by requests [More](/docs/graphql/overview#query-complexity-limits) |
| `disablePlaygroundInProduction` | A boolean that if false will enable the GraphQL playground, defaults to true. [More](/docs/graphql/overview#graphql-playground) |
| `disable` | A boolean that if true will disable the GraphQL entirely, defaults to false. |
| `schemaOutputFile` | A string for the file path used by the generate schema command. Defaults to `graphql.schema` next to `payload.config.ts` [More](/docs/graphql/graphql-schema) |
| `mutations` | Any custom Mutations to be added in addition to what Payload provides. [More](/docs/graphql/extending) |
| `queries` | Any custom Queries to be added in addition to what Payload provides. [More](/docs/graphql/extending) |
| `maxComplexity` | A number used to set the maximum allowed complexity allowed by requests [More](/docs/graphql/overview#query-complexity-limits) |
| `disablePlaygroundInProduction` | A boolean that if false will enable the GraphQL playground, defaults to true. [More](/docs/graphql/overview#graphql-playground) |
| `disable` | A boolean that if true will disable the GraphQL entirely, defaults to false. |
Field-level hooks offer incredible potential for encapsulating your logic. They help to isolate concerns and package up functionalities to be easily reusable across your projects.
Field-level hooks offer incredible potential for encapsulating your logic. They help to isolate concerns and package up
functionalities to be easily reusable across your projects.
**Example use cases include:**
@@ -18,10 +19,11 @@ Field-level hooks offer incredible potential for encapsulating your logic. They
**All field types provide the following hooks:**
- `beforeValidate`
- `beforeChange`
- `afterChange`
- `afterRead`
- [beforeValidate](#beforevalidate)
- [beforeChange](#beforechange)
- beforeDuplicate(#beforeduplicate)
- [afterChange](#afterchange)
- [afterRead](#afterread)
## Config
@@ -37,6 +39,7 @@ const ExampleField: Field = {
hooks: {
beforeValidate: [(args) => {...}],
beforeChange: [(args) => {...}],
beforeDuplicate: [(args) => {...}],
afterChange: [(args) => {...}],
afterRead: [(args) => {...}],
}
@@ -46,7 +49,8 @@ const ExampleField: Field = {
## Arguments and return values
All field-level hooks are formatted to accept the same arguments, although some arguments may be `undefined` based on which field hook you are utilizing.
All field-level hooks are formatted to accept the same arguments, although some arguments may be `undefined` based on
which field hook you are utilizing.
<Banner type="success">
<strong>Tip:</strong>
@@ -69,14 +73,19 @@ Field Hooks receive one `args` argument that contains the following properties:
| **`operation`** | A string relating to which operation the field type is currently executing within. Useful within `beforeValidate`, `beforeChange`, and `afterChange` hooks to differentiate between `create` and `update` operations. |
| **`originalDoc`** | The full original document in `update` operations. In the `afterChange` hook, this is the resulting document of the operation. |
| **`previousDoc`** | The document before changes were applied, only in `afterChange` hooks. |
| **`previousSiblingDoc`** | The sibling data from the previous document in `afterChange` hook. |
| **`previousSiblingDoc`** | The sibling data of the document before changes being applied, only in `beforeChange` and `afterChange` hook. |
| **`req`** | The Express `request` object. It is mocked for Local API operations. |
| **`value`** | The value of the field. |
| **`previousValue`** | The previous value of the field, before changes were applied, only in `afterChange` hooks. |
| **`previousValue`** | The previous value of the field, before changes, only in `beforeChange` and `afterChange` hooks. |
| **`context`** | Context passed to this hook. More info can be found under [Context](/docs/hooks/context) |
| **`field`** | The field which the hook is running against. |
| **`collection`** | The collection which the field belongs to. If the field belongs to a global, this will be null. |
| **`global`** | The global which the field belongs to. If the field belongs to a collection, this will be null. |
#### Return value
All field hooks can optionally modify the return value of the field before the operation continues. Field Hooks may optionally return the value that should be used within the field.
All field hooks can optionally modify the return value of the field before the operation continues. Field Hooks may
optionally return the value that should be used within the field.
<Banner type="warning">
<strong>Important</strong>
@@ -86,6 +95,155 @@ All field hooks can optionally modify the return value of the field before the o
reconsider Field Hooks and instead evaluate if Collection / Global hooks might suit you better.
</Banner>
## Examples of Field Hooks
To better illustrate how field-level hooks can be applied, here are some specific examples. These demonstrate the
flexibility and potential of field hooks in different contexts. Remember, these examples are just a starting point - the
true potential of field-level hooks lies in their adaptability to a wide array of use cases.
### beforeValidate
Runs before the `update` operation. This hook allows you to pre-process or format field data before it undergoes
validation.
```ts
import { Field } from 'payload/types'
const usernameField: Field = {
name: 'username',
type: 'text',
hooks: {
beforeValidate: [
({ value }) => {
// Trim whitespace and convert to lowercase
return value.trim().toLowerCase()
},
],
},
}
```
In this example, the `beforeValidate` hook is used to process the `username` field. The hook takes the incoming value of
the field and transforms it by trimming whitespace and converting it to lowercase. This ensures that the username is
stored in a consistent format in the database.
### beforeChange
Immediately following validation, `beforeChange` hooks will run within `create` and `update` operations. At this stage,
you can be confident that the field data that will be saved to the document is valid in accordance to your field
validations.
```ts
import { Field } from 'payload/types'
const emailField: Field = {
name: 'email',
type: 'email',
hooks: {
beforeChange: [
({ value, operation }) => {
if (operation === 'create') {
// Perform additional validation or transformation for 'create' operation
}
return value
},
],
},
}
```
In the `emailField`, the `beforeChange` hook checks the `operation` type. If the operation is `create`, it performs
additional validation or transformation on the email field value. This allows for operation-specific logic to be applied
to the field.
### afterChange
The `afterChange` hook is executed after a field's value has been changed and saved in the database. This hook is useful
for post-processing or triggering side effects based on the new value of the field.
```ts
import { Field } from 'payload/types'
const membershipStatusField: Field = {
name: 'membershipStatus',
type: 'select',
options: [
{ label: 'Standard', value: 'standard' },
{ label: 'Premium', value: 'premium' },
{ label: 'VIP', value: 'vip' },
],
hooks: {
afterChange: [
({ value, previousValue, req }) => {
if (value !== previousValue) {
// Log or perform an action when the membership status changes
console.log(
`User ID ${req.user.id} changed their membership status from ${previousValue} to ${value}.`,
)
// Here, you can implement actions that could track conversions from one tier to another
}
},
],
},
}
```
In this example, the `afterChange` hook is used with a `membershipStatusField`, which allows users to select their
membership level (Standard, Premium, VIP). The hook monitors changes in the membership status. When a change occurs, it
logs the update and can be used to trigger further actions, such as tracking conversion from one tier to another or
notifying them about changes in their membership benefits.
### afterRead
The `afterRead` hook is invoked after a field value is read from the database. This is ideal for formatting or
transforming the field data for output.
```ts
import { Field } from 'payload/types'
const dateField: Field = {
name: 'createdAt',
type: 'date',
hooks: {
afterRead: [
({ value }) => {
// Format date for display
return new Date(value).toLocaleDateString()
},
],
},
}
```
Here, the `afterRead` hook for the `dateField` is used to format the date into a more readable format
using `toLocaleDateString()`. This hook modifies the way the date is presented to the user, making it more
user-friendly.
### beforeDuplicate
The `beforeDuplicate` field hook is called on each locale (when using localization), when duplicating a document. It may be used when documents having the
exact same properties may cause issue. This gives you a way to avoid duplicate names on `unique`, `required` fields or when external systems expect non-repeating values on documents.
This hook gets called after `beforeChange` hooks are called and before the document is saved to the database.
By Default, unique and required text fields Payload will append "- Copy" to the original document value. The default is not added if your field has its own, you must return non-unique values from your beforeDuplicate hook to avoid errors or enable the `disableDuplicate` option on the collection.
Here is an example of a number field with a hook that increments the number to avoid unique constraint errors when duplicating a document:
```ts
import { Field } from 'payload/types'
const numberField: Field = {
name: 'number',
type: 'number',
hooks: {
// increment existing value by 1
beforeDuplicate: [({ value }) => {
return (value ?? 0) + 1
}],
}
}
```
## TypeScript
Payload exports a type for field hooks which can be accessed and used as follows:
@@ -36,7 +36,7 @@ If your Hook simply performs a side-effect, such as updating a CRM, it might be
#### Server-only execution
Payload Hooks do not have any effect within the Payload Admin panel. You can safely [remove your hooks](/docs/admin/webpack#aliasing-server-only-modules) from your Admin panel's code by customizing the Webpack config, which not only keeps your Admin bundles' filesize small but also ensures that any server-side only code does not cause problems within browser environments.
Payload Hooks are only triggered on the server. You can safely [remove your hooks](/docs/admin/webpack#aliasing-server-only-modules) from your Admin panel's client-side code by customizing the Webpack config, which not only keeps your Admin bundles' filesize small but also ensures that any server-side only code does not cause problems within browser environments.
@@ -8,27 +8,32 @@ keywords: live preview, frontend, react, next.js, vue, nuxt.js, svelte, hook, us
While using Live Preview, the Admin panel emits a new `window.postMessage` event every time a change is made to the document. Your front-end application can listen for these events and re-render accordingly.
Wiring your front-end into Live Preview is easy. If your front-end application is built with React or Next.js, use the [`useLivePreview`](#react) React hook that Payload provides. In the future, all other major frameworks like Vue and Svelte will be officially supported. If you are using any of these framework today, you can still easily integrate with Live Preview using the underlying tooling that Payload provides. See [building your own hook](#building-your-own-hook).
Wiring your front-end into Live Preview is easy. If your front-end application is built with React or Next.js, use the [`useLivePreview`](#react) React hook that Payload provides. In the future, all other major frameworks like Vue, Svelte, etc will be officially supported. If you are using any of these frameworks today, you can still integrate with Live Preview yourself using the underlying tooling that Payload provides. See [building your own hook](#building-your-own-hook) for more information.
| **`data`** | The live data of the document, merged with the initial data. |
| **`isLoading`** | A boolean that indicates whether or not the document is loading. |
<Banner type="info">
If your front-end is tightly coupled to required fields, you should ensure that your UI does not break when these fields are removed. For example, if you are rendering something like `data.relatedPosts[0].title`, your page will break once you remove the first related post. To get around this, use conditional logic, optional chaining, or default values in your UI where needed. For example, `data?.relatedPosts?.[0]?.title`.
If your front-end is tightly coupled to required fields, you should ensure that your UI does not
break when these fields are removed. For example, if you are rendering something like
`data.relatedPosts[0].title`, your page will break once you remove the first related post. To get
around this, use conditional logic, optional chaining, or default values in your UI where needed.
If is important that the `depth` argument matches exactly with the depth of your initial page request. The depth property is used to populated relationships and uploads beyond their IDs. See [Depth](../getting-started/concepts#depth) for more information.
If is important that the `depth` argument matches exactly with the depth of your initial page
request. The depth property is used to populated relationships and uploads beyond their IDs. See
[Depth](../getting-started/concepts#depth) for more information.
</Banner>
## Building your own hook
No matter what JS-based front-end framework you are using, you can build your own hook using the underlying tooling that Payload provides.
No matter what front-end framework you are using, you can build your own hook using the same underlying tooling that Payload provides.
First, install the base `@payloadcms/live-preview` package:
When building your own hook, ensure that the args and return values are consistent with the ones listed at the top of this document. This will ensure that all hooks follow the same API.
When building your own hook, ensure that the args and return values are consistent with the ones
listed at the top of this document. This will ensure that all hooks follow the same API.
</Banner>
## Example
For a working demonstration of this, check out the official [Live Preview Example](https://github.com/payloadcms/payload/tree/main/examples/live-preview/payload). There you will find examples of various front-end frameworks and how to integrate each one of them, including:
#### Relationships and/or uploads are not populating
If you are using relationships or uploads in your front-end application, and your front-end application runs on a different domain than your Payload server, you may need to configure [CORS](../configuration/overview) to allow requests to be made between the two domains. This includes sites that are running on a different port or subdomain. Similarly, if you are protecting resources behind user authentication, you may also need to configure [CSRF](../authentication/overview#csrf-protection) to allow cookies to be sent between the two domains. For example:
```ts
// payload.config.ts
{
// ...
// If your site is running on a different domain than your Payload server,
// This will allows requests to be made between the two domains
cors: {
[
'http://localhost:3001' // Your front-end application
],
},
// If you are protecting resources behind user authentication,
// This will allow cookies to be sent between the two domains
csrf: {
[
'http://localhost:3001' // Your front-end application
],
},
}
```
#### Relationships and/or uploads disappear after editing a document
It is possible that either you are setting an improper [`depth`](../getting-started/concepts#depth) in your initial request and/or your `useLivePreview` hook, or they're mismatched. Ensure that the `depth` parameter is set to the correct value, and that it matches exactly in both places. For example:
```tsx
// Your initial request
const { docs } = await payload.find({
collection: 'pages',
depth: 1, // Ensure this is set to the proper depth for your application
where: {
slug: {
equals: 'home',
},
},
})
```
```tsx
// Your hook
const { data } = useLivePreview<PageType>({
initialData: initialPage,
serverURL: PAYLOAD_SERVER_URL,
depth: 1, // Ensure this matches the depth of your initial request
desc: With Live Preview you can render your front-end application directly within the Admin panel. Your changes take effect as you type. No save needed.
**With Live Preview you can render your front-end application directly within the Admin panel. As you type, your changes take effect in real-time. No need to save a draft or publish your changes.**
Live Preview works by rendering an iframe on the page that loads your front-end application. The Admin panel communicates with your app through `window.postMessage` events. These events are emitted every time a change is made to the document. Your app then listens for these events and re-renders itself with the data it receives.
Live Preview works by rendering an iframe on the page that loads your front-end application. The Admin panel communicates with your app through [`window.postMessage`](https://developer.mozilla.org/en-US/docs/Web/API/Window/postMessage) events. These events are emitted every time a change is made to the document. Your app then listens for these events and re-renders itself with the data it receives.
{/* IMAGE OF LIVE PREVIEW HERE */}
<Banner type="warning">
Live Preview is currently in beta. You may use this feature in production, but please be aware
that it is subject to change and may not be fully stable for all use cases. If you encounter any
Setting up Live Preview is easy. You first need to enable it through the `admin.components.livePreview` property of your Payload config. It takes the following options:
Setting up Live Preview is easy. You first need to enable it through the `admin.livePreview` property of your Payload config. It takes the following options:
| **`url`** \* | String, or function that returns a string, pointing to your front-end application. This value is used as the iframe `src`. [More details](#url). |
| **`breakpoints`** | Array of breakpoints to be used as “device sizes” in the preview window. Each item appears as an option in the toolbar. [More details](#breakpoints). |
| **`collections`** | Array of collection slugs to enable Live Preview on. |
| **`globals`** | Array of global slugs to enable Live Preview on. |
_\* An asterisk denotes that a property is required._
@@ -30,12 +38,27 @@ Here is a basic example of enabling Live Preview on a `pages` collection:
```ts
// payload.config.ts
{
// ...
admin: {
components: {
livePreview: {
url: 'http://localhost:3000', // The URL to your front-end, this can also be a function (see below)
collections: ['pages'], // The collections to enable Live Preview on (globals are also possible)
},
// ...
livePreview: {
url: 'http://localhost:3000', // The URL to your front-end, this can also be a function (see below)
collections: ['pages'], // The collections to enable Live Preview on (globals are also possible)
},
}
}
```
Alternatively, you can define the <code>admin.livePreview</code> property on individual collection and global configs. Settings defined here will be merged into the top-level as overrides (if applicable).
```ts
// Collection.ts
{
// ...
admin: {
// ...
livePreview: {
url: 'http://localhost:3000',
},
}
}
@@ -43,39 +66,35 @@ Here is a basic example of enabling Live Preview on a `pages` collection:
Once configured, a new "Live Preview" tab will appear at the top of enabled documents. Navigating to this tab opens the preview window and loads your front-end application.
<Banner type="info">
You can also define the <code>admin.components.livePreview</code> property on individual collection and global configs. Settings defined here will be merged into the top-level (if defined) as overrides.
</Banner>
### URL
The `url` property is a string that points to your front-end application. This value is used as the `src` attribute of the iframe rendering your front-end.
You can also pass a function in order to dynamically format URLs. This function is called with the following arguments:
@@ -85,15 +104,50 @@ Here is an example of using a function that returns a dynamic URL:
The breakpoints property is an array of objects which are used as “device sizes” in the preview window. Each item will render as an option in the toolbar. When selected, the preview window will resize to the exact dimensions specified in that breakpoint. Each breakpoint takes the following properties:
| **`label`** \* | The label to display in the drop-down. This is what the user will see. |
| **`name`** \* | The name of the breakpoint. |
| **`width`** \* | The width of the breakpoint. This is used to set the width of the iframe. |
| **`height`** \* | The height of the breakpoint. This is used to set the height of the iframe. |
_\* An asterisk denotes that a property is required._
Here is an example of defining breakpoints:
```ts
// payload.config.ts
{
// ...
admin: {
// ...
livePreview: {
url: 'http://localhost:3000',
breakpoints: [
{
label: 'Mobile',
name: 'mobile',
width: 375,
height: 667,
},
{
label: 'Tablet',
name: 'tablet',
width: 768,
height: 1024,
},
{
label: 'Desktop',
name: 'desktop',
width: 1440,
height: 900,
},
],
},
}
}
```
{/* IMAGE OF TOOLBAR HERE */}
The "Responsive" option is always available in the drop-down and requires no additional configuration. This is the default breakpoint that will be used on initial load. This option styles the iframe with a width and height of `100%` so that it fills the screen at its maximum size and automatically resizes as the window changes size.
@@ -101,3 +155,7 @@ The "Responsive" option is always available in the drop-down and requires no add
You may also explicitly resize the Live Preview by using the corresponding inputs in the toolbar. This will temporarily override the breakpoint selection to "Custom" until a predefined breakpoint is selected once again.
If you prefer to freely resize the Live Preview without the use of breakpoints, you can open it in a new window by clicking the button in the toolbar. This will close the iframe and open a new window which can be resized as you wish. Closing it will automatically re-open the iframe.
## Example
For a working demonstration of this, check out the official [Live Preview Example](https://github.com/payloadcms/payload/tree/main/examples/live-preview/payload).
The Payload Local API gives you the ability to execute the same operations that are available through REST and GraphQL within Node, directly on your server. Here, you don't need to deal with server latency or network speed whatsoever and can interact directly with your database.
The Payload Local API gives you the ability to execute the same operations that are available through REST and GraphQL
within Node, directly on your server. Here, you don't need to deal with server latency or network speed whatsoever and
can interact directly with your database.
<Banner type="success">
<strong>Tip:</strong>
@@ -30,7 +32,9 @@ You can gain access to the currently running `payload` object via two ways:
##### Importing it
You can import or require `payload` into your own files after it's been initialized, but you need to make sure that your `import` / `require` statements come **after** you call `payload.init()`—otherwise Payload won't have been initialized yet. That might be obvious. To us, it's usually not.
You can import or require `payload` into your own files after it's been initialized, but you need to make sure that
your `import` / `require` statements come **after** you call `payload.init()`—otherwise Payload won't have been
initialized yet. That might be obvious. To us, it's usually not.
TODO: talk about how plugins need to ensure compatibility with both Vite and Webpack
- It's best practice to alias your plugin to an admin-only version, so if you have admin-only changes, put them in the admin plugin, and then leave the full plugin, complete with server code, to be installed on the server side
Building your own plugin is easy, and if you're already familiar with Payload then you'll have everything you need to get started. You can either start from scratch or use the Payload plugin template to get up and running quickly.
<Banner type="success">
To use the template, run `npx create-payload-app@latest -t plugin -n my-new-plugin` directly in
your terminal or [clone the template directly from
Our plugin template includes everything you need to build a full life-cycle plugin:
- Example files and functions for extending the payload config
- A local dev environment to develop the plugin
- Test suite with integrated GitHub workflow
By abstracting your code into a plugin, you'll be able to reuse your feature across multiple projects and make it available for other developers to use.
### Plugins Recap
Here is a brief recap of how to integrate plugins with Payload, to learn more head back to the [plugin overview page](https://payloadcms.com/docs/plugins/overview).
#### How to install a plugin
To install any plugin, simply add it to your Payload config in the plugins array.
```
import samplePlugin from 'sample-plugin';
const config = buildConfig({
plugins: [
// Add plugins here
samplePlugin({
enabled: true,
}),
],
});
export default config;
```
#### Initialization
The initialization process goes in the following order:
1. Incoming config is validated
2. Plugins execute
3. Default options are integrated
4. Sanitization cleans and validates data
5. Final config gets initialized
### Plugin Template
In the [Payload plugin template](https://github.com/payloadcms/payload-plugin-template), you will see a common file structure that is used across plugins:
1. root folder - general configuration
2. /src folder - everything related to the plugin
3. /dev folder - sanitized test project for development
#### Root
In the root folder, you will see various files related to the configuration of the plugin. We set up our environment in a similar manner in Payload core and across other projects. The only two files you need to modify are:
- **README**.md - This contains instructions on how to use the template. When you are ready, update this to contain instructions on how to use your Plugin.
- **package**.json - Contains necessary scripts and dependencies. Overwrite the metadata in this file to describe your Plugin.
#### Dev
The purpose of the **dev** folder is to provide a sanitized local Payload project. so you can run and test your plugin while you are actively developing it.
Do **not** store any of the plugin functionality in this folder - it is purely an environment to _assist_ you with developing the plugin.
If you're starting from scratch, you can easily setup a dev environment like this:
```
mkdir dev
cd dev
npx create-payload-app@latest
```
If you're using the plugin template, the dev folder is built out for you and the `samplePlugin` has already been installed in `dev/payload.config()`.
```
plugins: [
// when you rename the plugin or add options, make sure to update it here
samplePlugin({
enabled: false,
})
]
```
You can add to the `dev/payload.config` and build out the dev project as needed to test your plugin.
When you're ready to start development, navigate into this folder with `cd dev`
And then start the project with `yarn dev` and pull up `http://localhost:3000` in your browser.
### Testing
Another benefit of the dev folder is that you have the perfect environment established for testing.
A good test suite is essential to ensure quality and stability in your plugin. Payload typically uses [Jest](https://jestjs.io/); a popular testing framework, widely used for testing JavaScript and particularly for applications built with React.
Jest organizes tests into test suites and cases. We recommend creating tests based on the expected behavior of your plugin from start to finish. Read more about tests in the [Jest documentation.](https://jestjs.io/)
The plugin template provides a stubbed out test suite at `dev/plugin.spec.ts` which is ready to go - just add in your own test conditions and you're all set!
```
import payload from 'payload'
describe('Plugin tests', () => {
// Example test to check for seeded data
it('seeds data accordingly', async () => {
const newCollectionQuery = await payload.find({
collection: 'newCollection',
sort: 'createdAt',
})
newCollection = newCollectionQuery.docs
expect(newCollectionQuery.totalDocs).toEqual(1)
})
})
```
### Seeding data
For development and testing, you will likely need some data to work with. You can streamline this process by seeding and dropping your database - instead of manually entering data.
In the plugin template, you can navigate to `dev/src/server.ts` and see an example seed function.
```
if (process.env.PAYLOAD_SEED === 'true') {
await seed(payload)
}
```
A sample seed function has been created for you at `dev/src/seed`, update this file with additional data as needed.
Now that we have our environment setup and dev project ready to go - it's time to build the plugin!
**index.ts**
First up, the `src/index.ts` file - this is where the plugin should be imported from. It is best practice not to build the plugin directly in this file, instead we use this to export the plugin and types from their respective files.
**Plugin.ts**
To reiterate, the essence of a payload plugin is simply to extend the Payload config - and that is exactly what we are doing in this file.
```
export const samplePlugin =
(pluginOptions: PluginTypes) =>
(incomingConfig: Config): Config => {
let config = { ...incomingConfig }
// do something cool with the config here
return config
}
```
1. First, you need to receive the existing Payload config along with any plugin options.
2. Then set the variable `config` to be equal to a copy of the existing config.
3. From here, you can extend the config however you like!
4. Finally, return the config and you're all set.
### Spread Syntax
[Spread syntax](https://developer.mozilla.org/en-US/docs/Web/JavaScript/Reference/Operators/Spread_syntax) (or the spread operator) is a feature in JavaScript that uses the dot notation **(...)** to spread elements from arrays, strings, or objects into various contexts.
We are going to use spread syntax to allow us to add data to existing arrays without losing the existing data. It is crucial to spread the existing data correctly, else this can cause adverse behavior and conflicts with Payload config and other plugins.
Let's say you want to build a plugin that adds a new collection:
```
config.collections = [
...(config.collections || []),
newCollection,
// Add additional collections here
]
```
First, you need to spread the `config.collections` to ensure that we don't lose the existing collections. Then you can add any additional collections, just as you would in a regular payload config.
This same logic is applied to other properties like admin, globals, hooks:
```
config.globals = [
...(config.globals || []),
// Add additional globals here
]
config.hooks = {
...(config.hooks || {}),
// Add additional hooks here
}
```
Some properties will be slightly different to extend, for instance the `onInit` property:
```
config.onInit = async payload => {
if (incomingConfig.onInit) await incomingConfig.onInit(payload)
// Add additional onInit code by using the onInitExtension function
onInitExtension(pluginOptions, payload)
}
```
If you wish to add to the `onInit`, you must include the async/await. We don't use spread syntax in this case, instead you must await the existing `onInit` before running additional functionality.
In the template, we have stubbed out a basic `onInitExtension` file that you can use, if not needed feel free to delete it.
### Webpack
If any of your files use server only packages such as fs, stripe, nodemailer, etc, they will need to be removed from the browser bundle. To do that, you can [alias the file imports with webpack](https://payloadcms.com/docs/admin/webpack#aliasing-server-only-modules).
When files are bundled for the browser, the import paths are essentially crawled to determine what files to include in the bundle. To prevent the server only files from making it into the bundle, we can alias their import paths to a file that can be included in the browser. This will short-circuit the import path crawling and ensure browser only code is bundled.
Webpack is another part of the Payload config that can be a little more tricky to extend. To help here, the template includes a helper function `extendWebpackConfig()` which takes care of spreading the existing webpack, so you can just add your new stuff:
```
config.admin = {
...(config.admin || {}),
// Add your aliases to the helper function below
webpack: extendWebpackConfig(incomingConfig)
}
```
### Types
If your plugin has options, you should define and provide types for these options in a separate file which gets exported from the main `index.ts`.
```
export interface PluginTypes {
/**
* Enable or disable plugin
* @default false
*/
enabled?: boolean
}
```
If possible, include [JSDoc comments](https://www.typescriptlang.org/docs/handbook/jsdoc-supported-types.html#types-1) to describe the options and their types. This allows a developer to see details about the options in their editor.
### Best practices
In addition to the setup covered above, here are other best practices to follow:
##### Providing an enable / disable option:
For a better user experience, provide a way to disable the plugin without uninstalling it. This is especially important if your plugin adds additional webpack aliases, this will allow you to still let the webpack run to prevent errors.
##### Include tests in your GitHub CI workflow:
If you've configured tests for your package, integrate them into your workflow to run the tests each time you commit to the plugin repository. Learn more about [how to configure tests into your GitHub CI workflow.](https://docs.github.com/en/actions/automating-builds-and-tests/building-and-testing-nodejs)
##### Publish your finished plugin to NPM:
The best way to share and allow others to use your plugin once it is complete is to publish an NPM package. This process is straightforward and well documented, find out more about [creating and publishing a NPM package here](https://docs.npmjs.com/creating-and-publishing-scoped-public-packages/).
##### Add payload-plugin topic tag:
Apply the tag **payload-plugin** to your GitHub repository. This will boost the visibility of your plugin and ensure it gets listed with [existing payload plugins](https://github.com/topics/payload-plugin).
##### Use [Semantic Versioning](https://semver.org/) (SemVer):
With the SemVer system you release version numbers that reflect the nature of changes (major, minor, patch). Ensure all major versions reference their Payload compatibility.
This plugin allows you to build and manage custom forms directly within the admin panel. Instead of hard-coding a new form into your website or application every time you need one, admins can simply define the schema for each form they need on-the-fly, and your front-end can map over this schema, render its own UI components, and match your brand's design system.
All form submissions are stored directly in your database and are managed directly from the admin panel. When forms are submitted, you can display a custom on-screen confirmation message to the user or redirect them to a dedicated confirmation page. You can even send dynamic, personalized emails derived from the form's data. For example, you may want to send a confirmation email to the user who submitted the form, and also send a notification email to your team.
Forms can be as simple or complex as you need, from a basic contact form, to a multi-step lead generation engine, or even a donation form that processes payment. You may not need to reach for third-party services like HubSpot or Mailchimp for this, but instead use your own first-party tooling, built directly into your own application.
<Banner type="info">
This plugin is completely open-source and the [source code can be found
here](https://github.com/payloadcms/payload/tree/main/packages/plugin-form-builder). If you need
help, check out our [Community Help](https://payloadcms.com/community-help). If you think you've
- Build completely dynamic forms directly from the admin panel for a variety of use cases
- Render forms on your front-end using your own UI components and match your brand's design system
- Send dynamic, personalized emails upon form submission to multiple recipients, derived from the form's data
- Display a custom confirmation message or automatically redirect upon form submission
- Build dynamic prices based on form input to use for payment processing (optional)
## Installation
Install the plugin using any JavaScript package manager like [Yarn](https://yarnpkg.com), [NPM](https://npmjs.com), or [PNPM](https://pnpm.io):
```bash
yarn add @payloadcms/plugin-form-builder
```
## Basic Usage
In the `plugins` array of your [Payload config](https://payloadcms.com/docs/configuration/overview), call the plugin with [options](#options):
```ts
import { buildConfig } from 'payload/config'
import formBuilder from '@payloadcms/plugin-form-builder'
const config = buildConfig({
collections: [
{
slug: 'pages',
fields: [],
},
],
plugins: [
formBuilder({
// see below for a list of available options
}),
],
})
export default config
```
### Options
#### `fields` (option)
The `fields` property is an object of field types to allow your admin editors to build forms with. To override default settings, pass either a boolean value or a partial [Payload Block](https://payloadcms.com/docs/fields/blocks#block-configs) _keyed to the block's slug_. See [Fields](#fields) for more details.
```ts
// payload.config.ts
formBuilder({
// ...
fields: {
text: true,
textarea: true,
select: true,
email: true,
state: true,
country: true,
checkbox: true,
number: true,
message: true,
payment: false,
},
})
```
#### `redirectRelationships`
The `redirectRelationships` property is an array of collection slugs that, when enabled, are populated as options in the form's `redirect` field. This field is used to redirect the user to a dedicated confirmation page upon form submission (optional).
```ts
// payload.config.ts
formBuilder({
// ...
redirectRelationships: ['pages'],
})
```
#### `beforeEmail`
The `beforeEmail` property is a [beforeChange](<[beforeChange](https://payloadcms.com/docs/hooks/globals#beforechange)>) hook that is called just after emails are prepared, but before they are sent. This is a great place to inject your own HTML template to add custom styles.
```ts
// payload.config.ts
formBuilder({
// ...
beforeEmail: (emailsToSend) => {
// modify the emails in any way before they are sent
return emails.map((email) => ({
...email,
html: email.html, // transform the html in any way you'd like (maybe wrap it in an html template?)
}))
},
})
```
#### `formOverrides`
Override anything on the `forms` collection by sending a [Payload Collection Config](https://payloadcms.com/docs/configuration/collections) to the `formOverrides` property.
```ts
// payload.config.ts
formBuilder({
// ...
formOverrides: {
slug: 'contact-forms',
access: {
read: () => true,
update: () => false,
},
fields: [
{
name: 'custom-field',
type: 'text',
},
],
},
})
```
#### `formSubmissionOverrides`
Override anything on the `form-submissions` collection by sending a [Payload Collection Config](https://payloadcms.com/docs/configuration/collections) to the `formSubmissionOverrides` property.
<Banner type="warning">
By default, this plugin relies on [Payload access
control](https://payloadcms.com/docs/access-control/collections) to restrict the `update` and
`read` operations on the `form-submissions` collection. This is because _anyone_ should be able to
create a form submission, even from a public-facing website, but _no one_ should be able to update
a submission one it has been created, or read a submission unless they have permission. You can
override this behavior or any other property as needed.
</Banner>
```ts
// payload.config.ts
formBuilder({
// ...
formSubmissionOverrides: {
slug: 'leads',
},
})
```
#### `handlePayment`
The `handlePayment` property is a [beforeChange](<[beforeChange](https://payloadcms.com/docs/hooks/globals#beforechange)>) hook that is called upon form submission. You can integrate into any third-party payment processing API here to accept payment based on form input. You can use the `getPaymentTotal` function to calculate the total cost after all conditions have been applied. This is only applicable if the form has enabled the `payment` field.
First import the utility function. This will execute all of the price conditions that you have set in your form's `payment` field and returns the total price.
```ts
// payload.config.ts
import { getPaymentTotal } from '@payloadcms/plugin-form-builder'
Each field represents a form input. To override default settings pass either a boolean value or a partial [Payload Block](https://payloadcms.com/docs/fields/blocks) _keyed to the block's slug_. See [Field Overrides](#field-overrides) for more details on how to do this.
<Banner type="info">
<strong>Note:</strong>
"Fields" here is in reference to the _fields to build forms with_, not to be confused with the _fields
of a collection_ which are set via `formOverrides.fields`.
</Banner>
#### Text
Maps to a `text` input in your front-end. Used to collect a simple string.
| `message` | richText | The message to display on the form. |
#### Payment
Add this field to your form if it should collect payment. Upon submission, the `handlePayment` callback is executed with the form and submission data. You can use this to integrate with any third-party payment processing API.
| `defaultValue` | number | The default value of the field. |
| `width` | string | The width of the field on the front-end. |
| `required` | checkbox | Whether or not the field is required when submitted. |
| `priceConditions` | array | An array of objects that define the price conditions. See below for more details. |
##### Price Conditions
Each of the `priceConditions` are executed by the `getPaymentTotal` utility that this plugin provides. You can call this function in your `handlePayment` callback to dynamically calculate the total price of a form upon submission based on the user's input. For example, you could create a price condition that says "if the user selects 'yes' for this checkbox, add $10 to the total price".
| `fieldToUse` | relationship | The field to use to determine the price. |
| `condition` | string | The condition to use to determine the price. |
| `valueForOperator` | string | The value to use for the operator. |
| `operator` | string | The operator to use to determine the price. |
| `valueType` | string | The type of value to use to determine the price. |
| `value` | string | The value to use to determine the price. |
#### Field Overrides
You can provide your own custom fields by passing a new [Payload Block](https://payloadcms.com/docs/fields/blocks#block-configs) object into `fields`. You can override or extend any existing fields by first importing the `fields` from the plugin:
```ts
import { fields } from '@payloadcms/plugin-form-builder'
```
Then merging it into your own custom field:
```ts
// payload.config.ts
formBuilder({
// ...
fields: {
text: {
...fields.text,
labels: {
singular: 'Custom Text Field',
plural: 'Custom Text Fields',
},
},
},
})
```
## Email
This plugin relies on the [email configuration](https://payloadcms.com/docs/email/overview) defined in your `payload.init()`. It will read from your config and attempt to send your emails using the credentials provided.
## TypeScript
All types can be directly imported:
```js
import {
PluginConfig,
Form,
FormSubmission,
FieldsConfig,
BeforePayment,
BeforeEmail,
HandlePayment,
...
} from "@payloadcms/plugin-form-builder/types";
```
## Examples
The [Examples Directory](https://github.com/payloadcms/payload/tree/main/examples) contains an official [Form Builder Plugin Example](https://github.com/payloadcms/payload/tree/main/examples/form-builder) which demonstrates exactly how to configure this plugin in Payload and implement it on your front-end. We've also included an in-depth walk-through of how to build a form from scratch in our [Form Builder Plugin Blog Post](https://payloadcms.com/blog/create-custom-forms-with-the-official-form-builder-plugin).
## Troubleshooting
Below are some common troubleshooting tips. To help other developers, please contribute to this section as you troubleshoot your own application.
##### SendGrid 403 Forbidden Error
- If you are using [SendGrid Link Branding](https://docs.sendgrid.com/ui/account-and-settings/how-to-set-up-link-branding) to remove the "via sendgrid.net" part of your email, you must also setup [Domain Authentication](https://docs.sendgrid.com/ui/account-and-settings/how-to-set-up-domain-authentication). This means you can only send emails from an address on this domain — so the `from` addresses in your form submission emails **_cannot_** be anything other than `something@your_domain.com`. This means that from `{{email}}` will not work, but `website@your_domain.com` will. You can still send the form's email address in the body of the email.
| `label` | The label of the breadcrumb. This field is automatically set to either the `collection.admin.useAsTitle` (if defined) or is set to the `ID` of the document. You can also dynamically define the `label` by passing a function to the options property of [`generateLabel`](#generateLabel). |
| `url` | The URL of the breadcrumb. By default, this field is undefined. You can manually define this field by passing a property called function to the plugin options property of [`generateURL`](#generateURL). |
### Options
#### `collections`
An array of collections slugs to enable nested docs.
#### `generateLabel`
Each `breadcrumb` has a required `label` field. By default, its value will be set to the collection's `admin.useAsTitle`
or fallback the the `ID` of the document.
You can also pass a function to dynamically set the `label` of your breadcrumb.
```ts
// payload.config.ts
nestedDocs({
//...
generateLabel: (_, doc) => doc.title, // NOTE: 'title' is a hypothetical field
})
```
The function takes two arguments and returns a string:
@@ -20,16 +20,16 @@ Writing plugins is no more complex than writing regular JavaScript. If you know
- Automatically sync data from a specific collection to HubSpot or a similar CRM when data is added or changes
- Add password-protection functionality to certain documents
- Add a full ecommerce backend to any Payload app
- Add a full e-commerce backend to any Payload app
- Add custom reporting views to Payload's admin panel
- Encrypt specific collections' data
- Add a full form builder implementation
- Integrate all `upload`-enabled collections with a third-party file host like S3 or Cloudinary
- Add custom routes or GraphQL queries / mutations with any type of custom functionality that you can think of
- Add custom endpoints or GraphQL queries / mutations with any type of custom functionality that you can think of
### How to install plugins
The base Payload config allows for a `plugins` property which takes an `array` of [`Plugins`](https://github.com/payloadcms/payload/blob/master/src/config/types.ts#L21).
The base Payload config allows for a `plugins` property which takes an `array` of [`Plugins`](https://github.com/payloadcms/payload/blob/main/packages/payload/src/config/types.ts).
This plugin allows you to easily manage redirects for your application from within your admin panel. It does so by adding a `redirects` collection to your config that allows you specify a redirect from one URL to another. Your front-end application can use this data to automatically redirect users to the correct page using proper HTTP status codes. This is useful for SEO, indexing, and search engine ranking when re-platforming or when changing your URL structure.
For example, if you have a page at `/about` and you want to change it to `/about-us`, you can create a redirect from the old page to the new one, then you can use this data to write HTTP redirects into your front-end application. This will ensure that users are redirected to the correct page without penalty because search engines are notified of the change at the request level. This is a very lightweight plugin that will allow you to integrate managed redirects for any front-end framework.
<Banner type="info">
This plugin is completely open-source and the [source code can be found
here](https://github.com/payloadcms/payload/tree/main/packages/plugin-redirects). If you need
help, check out our [Community Help](https://payloadcms.com/community-help). If you think you've
| `collections` | `string[]` | An array of collection slugs to populate in the `to` field of each redirect. |
| `overrides` | `object` | A partial collection config that allows you to override anything on the `redirects` collection. |
## TypeScript
All types can be directly imported:
```ts
import { PluginConfig } from '@payloadcms/plugin-redirects/types'
```
## Examples
The [Examples Directory](https://github.com/payloadcms/payload/tree/main/examples) contains an official [Redirects Plugin Example](https://github.com/payloadcms/payload/tree/main/examples/redirects) which demonstrates exactly how to configure this plugin in Payload and implement it on your front-end. The [Templates Directory](https://github.com/payloadcms/payload/tree/main/templates) also contains an official [Website Template](https://github.com/payloadcms/payload/tree/main/templates/website) and [E-commerce Template](https://github.com/payloadcms/payload/tree/main/templates/ecommere), both of which use this plugin.
This plugin generates records of your documents that are extremely fast to search on. It does so by creating a new `search` collection that is indexed in the database then saving a static copy of each of your documents using only search-critical data. Search records are automatically created, synced, and deleted behind-the-scenes as you manage your application's documents.
For example, if you have a posts collection that is extremely large and complex, this would allow you to sync just the title, excerpt, and slug of each post so you can query on _that_ instead of the original post directly. Search records are static, so querying them also has the significant advantage of bypassing any hooks that may present be on the original documents. You define exactly what data is synced, and you can even modify or fallback this data before it is saved on a per-document basis.
To query search results, use all the existing Payload APIs that you are already familiar with. You can also prioritize search results by setting a custom priority for each collection. For example, you may want to list blog posts before pages. Or you may want one specific post to always take appear first. Search records are given a `priority` field that can be used as the `?sort=` parameter in your queries.
This plugin is a great way to implement a fast, immersive search experience such as a search bar in a front-end application. Many applications may not need the power and complexity of a third-party service like Algolia or ElasticSearch. This plugin provides a first-party alternative that is easy to set up and runs entirely on your own database.
<Banner type="info">
This plugin is completely open-source and the [source code can be found
here](https://github.com/payloadcms/payload/tree/main/packages/plugin-search). If you need help,
check out our [Community Help](https://payloadcms.com/community-help). If you think you've found a
- Automatically adds an indexed `search` collection to your database
- Automatically creates, syncs, and deletes search records as you manage your documents
- Saves only search-critical data that you define (e.g. title, excerpt, etc.)
- Allows you to query search results using first-party Payload APIs
- Allows you to query documents without triggering any of their underlying hooks
- Allows you to easily prioritize search results by collection or document
## Installation
Install the plugin using any JavaScript package manager like [Yarn](https://yarnpkg.com), [NPM](https://npmjs.com), or [PNPM](https://pnpm.io):
```bash
yarn add @payloadcms/plugin-search
```
## Basic Usage
In the `plugins` array of your [Payload config](https://payloadcms.com/docs/configuration/overview), call the plugin with [options](#options):
```js
import { buildConfig } from 'payload/config'
import search from '@payloadcms/plugin-search'
const config = buildConfig({
collections: [
{
slug: 'pages',
fields: [],
},
{
slug: 'posts',
fields: [],
},
],
plugins: [
search({
collections: ['pages', 'posts'],
defaultPriorities: {
pages: 10,
posts: 20,
},
}),
],
})
export default config
```
### Options
#### `collections`
The `collections` property is an array of collection slugs to enable syncing to search. Enabled collections receive a `beforeChange` and `afterDelete` hook that creates, updates, and deletes its respective search record as it changes over time.
#### `defaultPriorities`
This plugin automatically adds a `priority` field to the `search` collection that can be used as the `?sort=` parameter in your queries. For example, you may want to list blog posts before pages. Or you may want one specific post to always take appear first.
The `defaultPriorities` property is used to set a fallback `priority` on search records during the `create` operation. It accepts an object with keys that are your collection slugs and values that can either be a number or a function that returns a number. The function receives the `doc` as an argument, which is the document being created.
This plugin automatically creates the `search` collection, but you can override anything on this collection via the `searchOverrides` property. It accepts anything from the [Payload Collection Config](https://payloadcms.com/docs/configuration/collections) and merges it in with the default `search` collection config provided by the plugin.
```ts
// payload.config.ts
{
// ...
searchPlugin({
searchOverrides: {
slug: 'search-results',
},
}),
}
```
#### `beforeSync`
Before creating or updating a search record, the `beforeSync` function runs. This is an [afterChange](<[afterChange](https://payloadcms.com/docs/hooks/globals#afterchange)>) hook that allows you to modify the data or provide fallbacks before its search record is created or updated.
```ts
// payload.config.ts
{
// ...
searchPlugin({
beforeSync: ({ originalDoc, searchDoc }) => ({
...searchDoc,
// Modify your docs in any way here, this can be async
excerpt: originalDoc?.excerpt || 'This is a fallback excerpt',
}),
}),
}
```
#### `syncDrafts`
When `syncDrafts` is true, draft documents will be synced to search. This is false by default. You must have [Payload Drafts](https://payloadcms.com/docs/versions/drafts) enabled for this to apply.
#### `deleteDrafts`
If true, will delete documents from search whose status changes to draft. This is true by default. You must have [Payload Drafts](https://payloadcms.com/docs/versions/drafts) enabled for this to apply.
## TypeScript
All types can be directly imported:
```ts
import type { SearchConfig, BeforeSync } from '@payloadcms/plugin-search/types'
This plugin allows you to easily manage SEO metadata for your application from within your admin panel. When enabled on your collections and globals, it adds a new `meta` field group containing `title`, `description`, and `image` by default. Your front-end application can then use this data to render meta tags however your application requires. For example, you would inject a `title` tag into the `<head>` of your page using `meta.title` as its content.
As users are editing documents within the admin panel, they have the option to "auto-generate" these fields. When clicked, this plugin will execute your own custom functions that re-generate the title, description, and image. This way you can build your own SEO writing assistance directly into your application. For example, you could append your site name onto the page title, or use the document's excerpt field as the description, or even integrate with some third-party API to generate the image using AI.
To help you visualize what your page might look like in a search engine, a preview is rendered on page just beneath the meta fields. This preview is updated in real-time as you edit your metadata. There are also visual indicators to help you write effective meta, such as a character counter for the title and description fields. You can even inject your own custom fields into the `meta` field group as your application requires, like `og:title` or `json-ld`. If you've ever used something like Yoast SEO, this plugin might feel very familiar.
<Banner type="info">
This plugin is completely open-source and the [source code can be found
here](https://github.com/payloadcms/payload/tree/main/packages/plugin-seo). If you need help,
check out our [Community Help](https://payloadcms.com/community-help). If you think you've found a
An array of collections slugs to enable SEO. Enabled collections receive a `meta` field which is an object of title, description, and image subfields.
##### `globals`
An array of global slugs to enable SEO. Enabled globals receive a `meta` field which is an object of title, description, and image subfields.
##### `fields`
An array of fields that allows you to inject your own custom fields onto the `meta` field group. The following fields are provided by default:
- `title`: text
- `description`: textarea
- `image`: upload (if an `uploadsCollection` is provided)
- `preview`: ui
##### `uploadsCollection`
Set the `uploadsCollection` to your application's upload-enabled collection slug. This is used to provide an `image` field on the `meta` field group.
##### `tabbedUI`
When the `tabbedUI` property is `true`, it appends an `SEO` tab onto your config using Payload's [Tabs Field](https://payloadcms.com/docs/fields/tabs). If your collection is not already tab-enabled, meaning the first field in your config is not of type `tabs`, then one will be created for you called `Content`. Defaults to `false`.
<Banner type="info">
If you wish to continue to use top-level or sidebar fields with `tabbedUI`, you must not let the
default `Content` tab get created for you (see the note above). Instead, you must define the first
field of your config with type `tabs` and place all other fields adjacent to this one.
</Banner>
##### `generateTitle`
A function that allows you to return any meta title, including from document's content.
Rename the meta group interface name that is generated for TypeScript and GraphQL.
```ts
// payload.config.ts
{
// ...
seoPlugin({
interfaceName: 'customInterfaceNameSEO',
})
}
```
#### `fieldOverrides`
Pass any valid field props to the base fields: Title, Description or Image.
```ts
// payload.config.ts
seoPlugin({
// ...
fieldOverrides: {
title: {
required: true,
},
description: {
localized: true,
},
},
})
```
## TypeScript
All types can be directly imported:
```ts
import {
PluginConfig,
GenerateTitle,
GenerateDescription
GenerateURL
} from '@payloadcms/plugin-seo/types';
```
## Examples
The [Templates Directory](https://github.com/payloadcms/payload/tree/main/templates) contains an official [Website Template](https://github.com/payloadcms/payload/tree/main/templates/website) and [E-commerce Template](https://github.com/payloadcms/payload/tree/main/templates/ecommere) which demonstrates exactly how to configure this plugin in Payload and implement it on your front-end.
With this plugin you can easily integrate [Stripe](https://stripe.com) into Payload. Simply provide your Stripe credentials and this plugin will open up a two-way communication channel between the two platforms. This enables you to easily sync data back and forth, as well as proxy the Stripe REST API through Payload's access control. Use this plugin to completely offload billing to Stripe and retain full control over your application's data.
For example, you might be building an e-commerce or SaaS application, where you have a `products` or a `plans` collection that requires either a one-time payment or a subscription. You can to tie each of these products to Stripe, then easily subscribe to billing-related events to perform your application's business logic, such as active purchases or subscription cancellations.
To build a checkout flow on your front-end you can either use [Stripe Checkout](https://stripe.com/payments/checkout), or you can also build a completely custom checkout experience from scratch using [Stripe Web Elements](https://stripe.com/docs/payments/elements). Then to build fully custom, secure customer dashboards, you can leverage Payload's access control to restrict access to your Stripe resources so your users never have to leave your site to manage their accounts.
The beauty of this plugin is the entirety of your application's content and business logic can be handled in Payload while Stripe handles solely the billing and payment processing. You can build a completely proprietary application that is endlessly customizable and extendable, on APIs and databases that you own. Hosted services like Shopify or BigCommerce might fracture your application's content then charge you for access.
<Banner type="info">
This plugin is completely open-source and the [source code can be found
here](https://github.com/payloadcms/payload/tree/main/packages/plugin-stripe). If you need help,
check out our [Community Help](https://payloadcms.com/community-help). If you think you've found a
| `rest` | boolean | `false` | When `true`, opens the `/api/stripe/rest` endpoint |
| `webhooks` | object \| function | `undefined` | Either a function to handle all webhooks events, or an object of Stripe webhook handlers, keyed to the name of the event |
| `sync` | array | `undefined` | An array of sync configs |
| `logs` | boolean | `false` | When `true`, logs sync events to the console as they happen |
_\* An asterisk denotes that a property is required._
## Endpoints
The following custom endpoints are automatically opened for you:
| `/api/stripe/rest` | `POST` | Proxies the [Stripe REST API](https://stripe.com/docs/api) behind [Payload access control](https://payloadcms.com/docs/access-control/overview) and returns the result. See the [REST Proxy](#stripe-rest-proxy) section for more details. |
If `rest` is true, proxies the [Stripe REST API](https://stripe.com/docs/api) behind [Payload access control](https://payloadcms.com/docs/access-control/overview) and returns the result. If you need to proxy the API server-side, use the [stripeProxy](#node) function.
```ts
const res = await fetch(`/api/stripe/rest`, {
method: 'POST',
credentials: 'include',
headers: {
'Content-Type': 'application/json',
// Authorization: `JWT ${token}` // NOTE: do this if not in a browser (i.e. curl or Postman)
},
body: JSON.stringify({
stripeMethod: 'stripe.subscriptions.list',
stripeArgs: [
{
customer: 'abc',
},
],
}),
})
```
<Banner type="info">
<strong>Note:</strong>
<br />
The `/api` part of these routes may be different based on the settings defined in your Payload
config.
</Banner>
## Webhooks
[Stripe webhooks](https://stripe.com/docs/webhooks) are used to sync from Stripe to Payload. Webhooks listen for events on your Stripe account so you can trigger reactions to them. Follow the steps below to enable webhooks.
Development:
1. Login using Stripe cli `stripe login`
1. Forward events to localhost `stripe listen --forward-to localhost:3000/stripe/webhooks`
1. Paste the given secret into your `.env` file as `STRIPE_WEBHOOKS_ENDPOINT_SECRET`
Production:
1. Login and [create a new webhook](https://dashboard.stripe.com/test/webhooks/create) from the Stripe dashboard
1. Paste `YOUR_DOMAIN_NAME/api/stripe/webhooks` as the "Webhook Endpoint URL"
1. Select which events to broadcast
1. Paste the given secret into your `.env` file as `STRIPE_WEBHOOKS_ENDPOINT_SECRET`
1. Then, handle these events using the `webhooks` portion of this plugin's config:
```ts
import { buildConfig } from 'payload/config'
import stripePlugin from '@payloadcms/plugin-stripe'
// NOTE: you can also catch all Stripe webhook events and handle the event types yourself
// webhooks: (event, stripe, stripeConfig) => {
// switch (event.type): {
// case 'customer.subscription.updated': {
// // do something...
// break;
// }
// default: {
// break;
// }
// }
// }
}),
],
})
export default config
```
For a full list of available webhooks, see [here](https://stripe.com/docs/cli/trigger#trigger-event).
## Node
On the server you should interface with Stripe directly using the [stripe](https://www.npmjs.com/package/stripe) npm module. That might look something like this:
const stripe = new Stripe(stripeSecretKey, { apiVersion: '2022-08-01' })
export const MyFunction = async () => {
try {
const customer = await stripe.customers.create({
email: data.email,
})
// do something...
} catch (error) {
console.error(error.message)
}
}
```
Alternatively, you can interface with the Stripe using the `stripeProxy`, which is exactly what the `/api/stripe/rest` endpoint does behind-the-scenes. Here's the same example as above, but piped through the proxy:
```ts
import { stripeProxy } from '@payloadcms/plugin-stripe'
export const MyFunction = async () => {
try {
const customer = await stripeProxy({
stripeSecretKey: process.env.STRIPE_SECRET_KEY,
stripeMethod: 'customers.create',
stripeArgs: [
{
email: data.email,
},
],
})
if (customer.status === 200) {
// do something...
}
if (customer.status >= 400) {
throw new Error(customer.message)
}
} catch (error) {
console.error(error.message)
}
}
```
## Sync
This option will setup a basic sync between Payload collections and Stripe resources for you automatically. It will create all the necessary hooks and webhooks handlers, so the only thing you have to do is map your Payload fields to their corresponding Stripe properties. As documents are created, updated, and deleted from either Stripe or Payload, the changes are reflected on either side.
<Banner type="info">
<strong>Note:</strong>
<br />
If you wish to enable a _two-way_ sync, be sure to setup [`webhooks`](#webhooks) and pass the
`stripeWebhooksEndpointSecret` through your config.
</Banner>
```ts
import { buildConfig } from 'payload/config'
import stripePlugin from '@payloadcms/plugin-stripe'
fieldPath: 'name', // this is a field on your own Payload config
stripeProperty: 'name', // use dot notation, if applicable
},
],
},
],
}),
],
})
export default config
```
<Banner type="warning">
<strong>Note:</strong>
<br />
Due to limitations in the Stripe API, this currently only works with top-level fields. This is
because every Stripe object is a separate entity, making it difficult to abstract into a simple
reusable library. In the future, we may find a pattern around this. But for now, cases like that
will need to be hard-coded.
</Banner>
Using `sync` will do the following:
- Adds and maintains a `stripeID` read-only field on each collection, this is a field generated _by Stripe_ and used as a cross-reference
- Adds a direct link to the resource on Stripe.com
- Adds and maintains an `skipSync` read-only flag on each collection to prevent infinite syncs when hooks trigger webhooks
- Adds the following hooks to each collection:
- `beforeValidate`: `createNewInStripe`
- `beforeChange`: `syncExistingWithStripe`
- `afterDelete`: `deleteFromStripe`
- Handles the following Stripe webhooks
- `STRIPE_TYPE.created`: `handleCreatedOrUpdated`
- `STRIPE_TYPE.updated`: `handleCreatedOrUpdated`
- `STRIPE_TYPE.deleted`: `handleDeleted`
## TypeScript
All types can be directly imported:
```ts
import {
StripeConfig,
StripeWebhookHandler,
StripeProxy,
...
} from '@payloadcms/plugin-stripe/types';
```
## Examples
The [Templates Directory](https://github.com/payloadcms/payload/tree/main/templates) contains an official [E-commerce Template](https://github.com/payloadcms/payload/tree/main/templates/ecommerce) which demonstrates exactly how to configure this plugin in Payload and implement it on your front-end. You can also check out [How to Build An E-Commerce Site With Next.js](https://payloadcms.com/blog/how-to-build-an-e-commerce-site-with-nextjs) post for a bit more context around this template.
launch. <strong>Awesome! Great work!</strong> Now, what's next?
</Banner>
There are many ways to deploy Payload to a production environment. When evaluating how you will deploy Payload, you need to consider these main aspects:
There are many ways to deploy Payload to a production environment. When evaluating how you will deploy Payload, you need
to consider these main aspects:
1. [Basics](#basics)
1. [Security](#security)
@@ -21,22 +22,32 @@ There are many ways to deploy Payload to a production environment. When evaluati
## Basics
In order for Payload to run, it requires both the server code and the built admin panel. These will be the `dist` and `build` directories by default. If you've used `create-payload-app` to create your project, executing the `build` npm script will build both and output these directories.
In order for Payload to run, it requires both the server code and the built admin panel. These will be the `dist`
and `build` directories by default. If you've used `create-payload-app` to create your project, executing the `build`
npm script will build both and output these directories.
## Security
Payload features a suite of security features that you can rely on to strengthen your application's security. When deploying to Production, it's a good idea to double-check that you are making proper use of each of them.
Payload features a suite of security features that you can rely on to strengthen your application's security. When
deploying to Production, it's a good idea to double-check that you are making proper use of each of them.
##### The Secret Key
When you initialize Payload, you provide it with a `secret` property. This property should be impossible to guess and extremely difficult for brute-force attacks to crack. Make sure your Production `secret` is a long, complex string. It's often best practice to store it in an `env` file which is not checked into your Git repository, using `dotenv` to supply it to your `payload.init` call.
When you initialize Payload, you provide it with a `secret` property. This property should be impossible to guess and
extremely difficult for brute-force attacks to crack. Make sure your Production `secret` is a long, complex string. It's
often best practice to store it in an `env` file which is not checked into your Git repository, using `dotenv` to supply
it to your `payload.init` call.
##### Double-check and thoroughly test all Access Control
Because _**you**_ are in complete control of who can do what with your data, you should double and triple-check that you wield that power responsibly before deploying to Production.
Because _**you**_ are in complete control of who can do what with your data, you should double and triple-check that you
wield that power responsibly before deploying to Production.
<Banner type="error">
<strong>By default, all Access Control functions require that a user is successfully logged in to Payload to create, read, update, or delete data.</strong>{' '}
<strong>
By default, all Access Control functions require that a user is successfully logged in to
Payload to create, read, update, or delete data.
</strong>{' '}
But, if you allow public user registration, for example, you will want to make sure that your
access control functions are more strict - permitting <strong>only appropriate users</strong> to
perform appropriate actions.
@@ -44,7 +55,8 @@ Because _**you**_ are in complete control of who can do what with your data, you
##### Building the Admin panel
Before running in Production, you need to have built a production-ready copy of the Payload Admin panel. To do this, Payload provides the `build` NPM script. You can use it by adding a `script` to your `package.json` file like this:
Before running in Production, you need to have built a production-ready copy of the Payload Admin panel. To do this,
Payload provides the `build` NPM script. You can use it by adding a `script` to your `package.json` file like this:
`package.json`:
@@ -60,19 +72,26 @@ Before running in Production, you need to have built a production-ready copy of
}
```
Then, to build Payload, you would run `npm run build` in your project folder. A production-ready Admin bundle will be created in the `build` directory.
Then, to build Payload, you would run `npm run build` in your project folder. A production-ready Admin bundle will be
created in the `build` directory.
##### Setting Node to Production
Make sure you set the environment variable `NODE_ENV` to `production`. Based on this variable, many Node packages automatically optimize themselves. In production, Payload automatically disables the [GraphQL Playground](/docs/graphql/overview#graphql-playground), serves a production-ready version of the Admin panel, and other changes.
Make sure you set the environment variable `NODE_ENV` to `production`. Based on this variable, many Node packages
automatically optimize themselves. In production, Payload automatically disables
the [GraphQL Playground](/docs/graphql/overview#graphql-playground), serves a production-ready version of the Admin
panel, and other changes.
##### Secure Cookie Settings
You should be using an SSL certificate for production Payload instances, which means you can [enable secure cookies](/docs/authentication/config) in your Authentication-enabled Collection configs.
You should be using an SSL certificate for production Payload instances, which means you
can [enable secure cookies](/docs/authentication/config) in your Authentication-enabled Collection configs.
##### Preventing API Abuse
Payload comes with a robust set of built-in anti-abuse measures, such as locking out users after X amount of failed login attempts, request rate limiting, GraphQL query complexity limits, max `depth` settings, and more. [Click here to learn more](/docs/production/preventing-abuse).
Payload comes with a robust set of built-in anti-abuse measures, such as locking out users after X amount of failed
login attempts, request rate limiting, GraphQL query complexity limits, max `depth` settings, and
more. [Click here to learn more](/docs/production/preventing-abuse).
## MongoDB
@@ -80,11 +99,18 @@ Payload can be used with any MongoDB compatible database including AWS DocumentD
##### Managing MongoDB yourself
If you are using a [persistent filesystem-based cloud host](#persistent-vs-ephemeral-filesystems) such as a [DigitalOcean Droplet](https://www.digitalocean.com/products/droplets/) or an [Amazon EC2](https://aws.amazon.com/ec2/?ec2-whats-new.sort-by=item.additionalFields.postDateTime&ec2-whats-new.sort-order=desc) server, you might opt to install MongoDB directly on that server itself so that Node can communicate with it locally. With this approach, you can benefit from faster response times, but scaling can become more involved as your app's user base grows.
If you are using a [persistent filesystem-based cloud host](#persistent-vs-ephemeral-filesystems) such as
a [DigitalOcean Droplet](https://www.digitalocean.com/products/droplets/) or
an [Amazon EC2](https://aws.amazon.com/ec2/?ec2-whats-new.sort-by=item.additionalFields.postDateTime&ec2-whats-new.sort-order=desc)
server, you might opt to install MongoDB directly on that server itself so that Node can communicate with it locally.
With this approach, you can benefit from faster response times, but scaling can become more involved as your app's user
base grows.
##### Letting someone else do it
Alternatively, you can rely on a third-party MongoDB host such as [MongoDB Atlas](https://www.mongodb.com/). With Atlas or a similar cloud provider, you can trust them to take care of your database's availability, security, redundancy, and backups.
Alternatively, you can rely on a third-party MongoDB host such as [MongoDB Atlas](https://www.mongodb.com/). With Atlas
or a similar cloud provider, you can trust them to take care of your database's availability, security, redundancy, and
backups.
<Banner type="warning">
<strong>Note:</strong>
@@ -98,21 +124,31 @@ Alternatively, you can rely on a third-party MongoDB host such as [MongoDB Atlas
##### DocumentDB
When using AWS DocumentDB, you will need to configure connection options for authentication in the `mongoOptions` passed to `payload.init`. You also need to set `mongoOptions.useFacet` to `false` to disable use of the unsupported `$facet` aggregation.
When using AWS DocumentDB, you will need to configure connection options for authentication in the `connectOptions`
passed to the `mongooseAdapter` . You also need to set `connectOptions.useFacet` to `false` to disable use of the
unsupported `$facet` aggregation.
##### CosmosDB
When using Azure Cosmos DB, an index is needed for any field you may want to sort on. To add the sort index for all fields that may be sorted in the admin UI use the <a href="/docs/configuration/overview">indexSortableFields</a> configuration option.
When using Azure Cosmos DB, an index is needed for any field you may want to sort on. To add the sort index for all
fields that may be sorted in the admin UI use the <a href="/docs/configuration/overview">indexSortableFields</a>
configuration option.
## File storage
If you are using Payload to [manage file uploads](/docs/upload/overview), you need to consider where your uploaded files will be permanently stored. If you do not use Payload for file uploads, then this section does not impact your app whatsoever.
If you are using Payload to [manage file uploads](/docs/upload/overview), you need to consider where your uploaded files
will be permanently stored. If you do not use Payload for file uploads, then this section does not impact your app
whatsoever.
#### Persistent vs Ephemeral Filesystems
Some cloud app hosts such as [Heroku](https://heroku.com) use `ephemeral` file systems, which means that any files uploaded to your server only last until the server restarts or shuts down. Heroku and similar providers schedule restarts and shutdowns without your control, meaning your uploads will accidentally disappear without any way to get them back.
Some cloud app hosts such as [Heroku](https://heroku.com) use `ephemeral` file systems, which means that any files
uploaded to your server only last until the server restarts or shuts down. Heroku and similar providers schedule
restarts and shutdowns without your control, meaning your uploads will accidentally disappear without any way to get
them back.
Alternatively, persistent filesystems will never delete your files and can be trusted to reliably host uploads perpetually.
Alternatively, persistent filesystems will never delete your files and can be trusted to reliably host uploads
perpetually.
**Popular cloud providers with ephemeral filesystems:**
@@ -135,21 +171,26 @@ Alternatively, persistent filesystems will never delete your files and can be tr
##### Using ephemeral filesystem providers like Heroku
If you don't use Payload's `upload` functionality, you can go ahead and use Heroku or similar platform easily. Everything will work exactly as you want it to.
If you don't use Payload's `upload` functionality, you can go ahead and use Heroku or similar platform easily.
Everything will work exactly as you want it to.
But, if you do, and you still want to use an ephemeral filesystem provider, you can write a hook-based solution to _copy_ the files your users upload to a more permanent storage solution like Amazon S3 or DigitalOcean Spaces.
But, if you do, and you still want to use an ephemeral filesystem provider, you can write a hook-based solution to
_copy_ the files your users upload to a more permanent storage solution like Amazon S3 or DigitalOcean Spaces.
**To automatically send uploaded files to S3 or similar, you could:**
- Write an asynchronous `beforeChange` hook for all Collections that support Uploads, which takes any uploaded `file` from the Express `req` and sends it to an S3 bucket
- Write an `afterRead` hook to save a `s3URL` field that automatically takes the `filename` stored and formats a full S3 URL
- Write an asynchronous `beforeChange` hook for all Collections that support Uploads, which takes any uploaded `file`
from the Express `req` and sends it to an S3 bucket
- Write an `afterRead` hook to save a `s3URL` field that automatically takes the `filename` stored and formats a full S3
URL
- Write an `afterDelete` hook that automatically deletes files from the S3 bucket
With the above configuration, deploying to Heroku or similar becomes no problem.
## DigitalOcean Tutorials
DigitalOcean provides extremely helpful documentation that can walk you through the entire process of creating a production-ready Droplet to host your Payload app:
DigitalOcean provides extremely helpful documentation that can walk you through the entire process of creating a
production-ready Droplet to host your Payload app:
1. Create a new Ubuntu 20.04 droplet on [DigitalOcean](https://digitalocean.com)
1. [Initial server setup](https://www.digitalocean.com/community/tutorials/initial-server-setup-with-ubuntu-20-04)
@@ -158,9 +199,27 @@ DigitalOcean provides extremely helpful documentation that can walk you through
1. [Create a new MongoDB and user](https://medium.com/@mhagemann/how-to-add-a-new-user-to-a-mongodb-database-d896776b5362)
1. [Set up Node for production](https://www.digitalocean.com/community/tutorials/how-to-set-up-a-node-js-application-for-production-on-ubuntu-20-04)
### Swap Space
Swap refers to a section of storage on the hard drive that is reserved to temporarily store data that can no longer fit
within RAM. This allows for the expansion of your server's working memory, with some limitations. Swap space comes into
play when available RAM can no longer accommodate actively used application data, enabling the system to continue
functioning.
Insufficient space can lead to deployment errors and memory-related issues, resulting in application crashes, sluggish
performance, or an unresponsive server.
Common deployment error due to **space limitations** (as reported by users):
- `Error: Command failed with exit code 1`
To configure swap, we recommend following this tutorial
on [How To Add Swap Space](https://www.digitalocean.com/community/tutorials/how-to-add-swap-space-on-ubuntu-22-04).
## Docker
This is an example of a multi-stage docker build of Payload for production. Ensure you are setting your environment variables on deployment, like `PAYLOAD_SECRET`, `PAYLOAD_CONFIG_PATH`, and `MONGODB_URI` if needed.
This is an example of a multi-stage docker build of Payload for production. Ensure you are setting your environment
variables on deployment, like `PAYLOAD_SECRET`, `PAYLOAD_CONFIG_PATH`, and `DATABASE_URI` if needed.
| `limit` | Limits the number of documents returned |
| `page` | Get a specific page number |
### Disabling pagination within Local API
For `find` operations within the Local API, you can disable pagination to retrieve all documents from a collection by passing `pagination: false` to the `find` local operation.
Give an example for how to render JSX on the frontend
In the future, we will add docs that show how to add virtual fields for HTML / MDX transforming
Some files were not shown because too many files have changed in this diff
Show More
Reference in New Issue
Block a user
Blocking a user prevents them from interacting with repositories, such as opening or commenting on pull requests or issues. Learn more about blocking a user.