130 lines
6.2 KiB
Plaintext
130 lines
6.2 KiB
Plaintext
---
|
||
title: Cloud Projects
|
||
label: Projects
|
||
order: 40
|
||
desc: Manage your Payload Cloud projects.
|
||
keywords: cloud, payload cloud, projects, project, overview, database, file storage, build settings, environment variables, custom domains, email, developing locally
|
||
---
|
||
|
||
## Overview
|
||
|
||
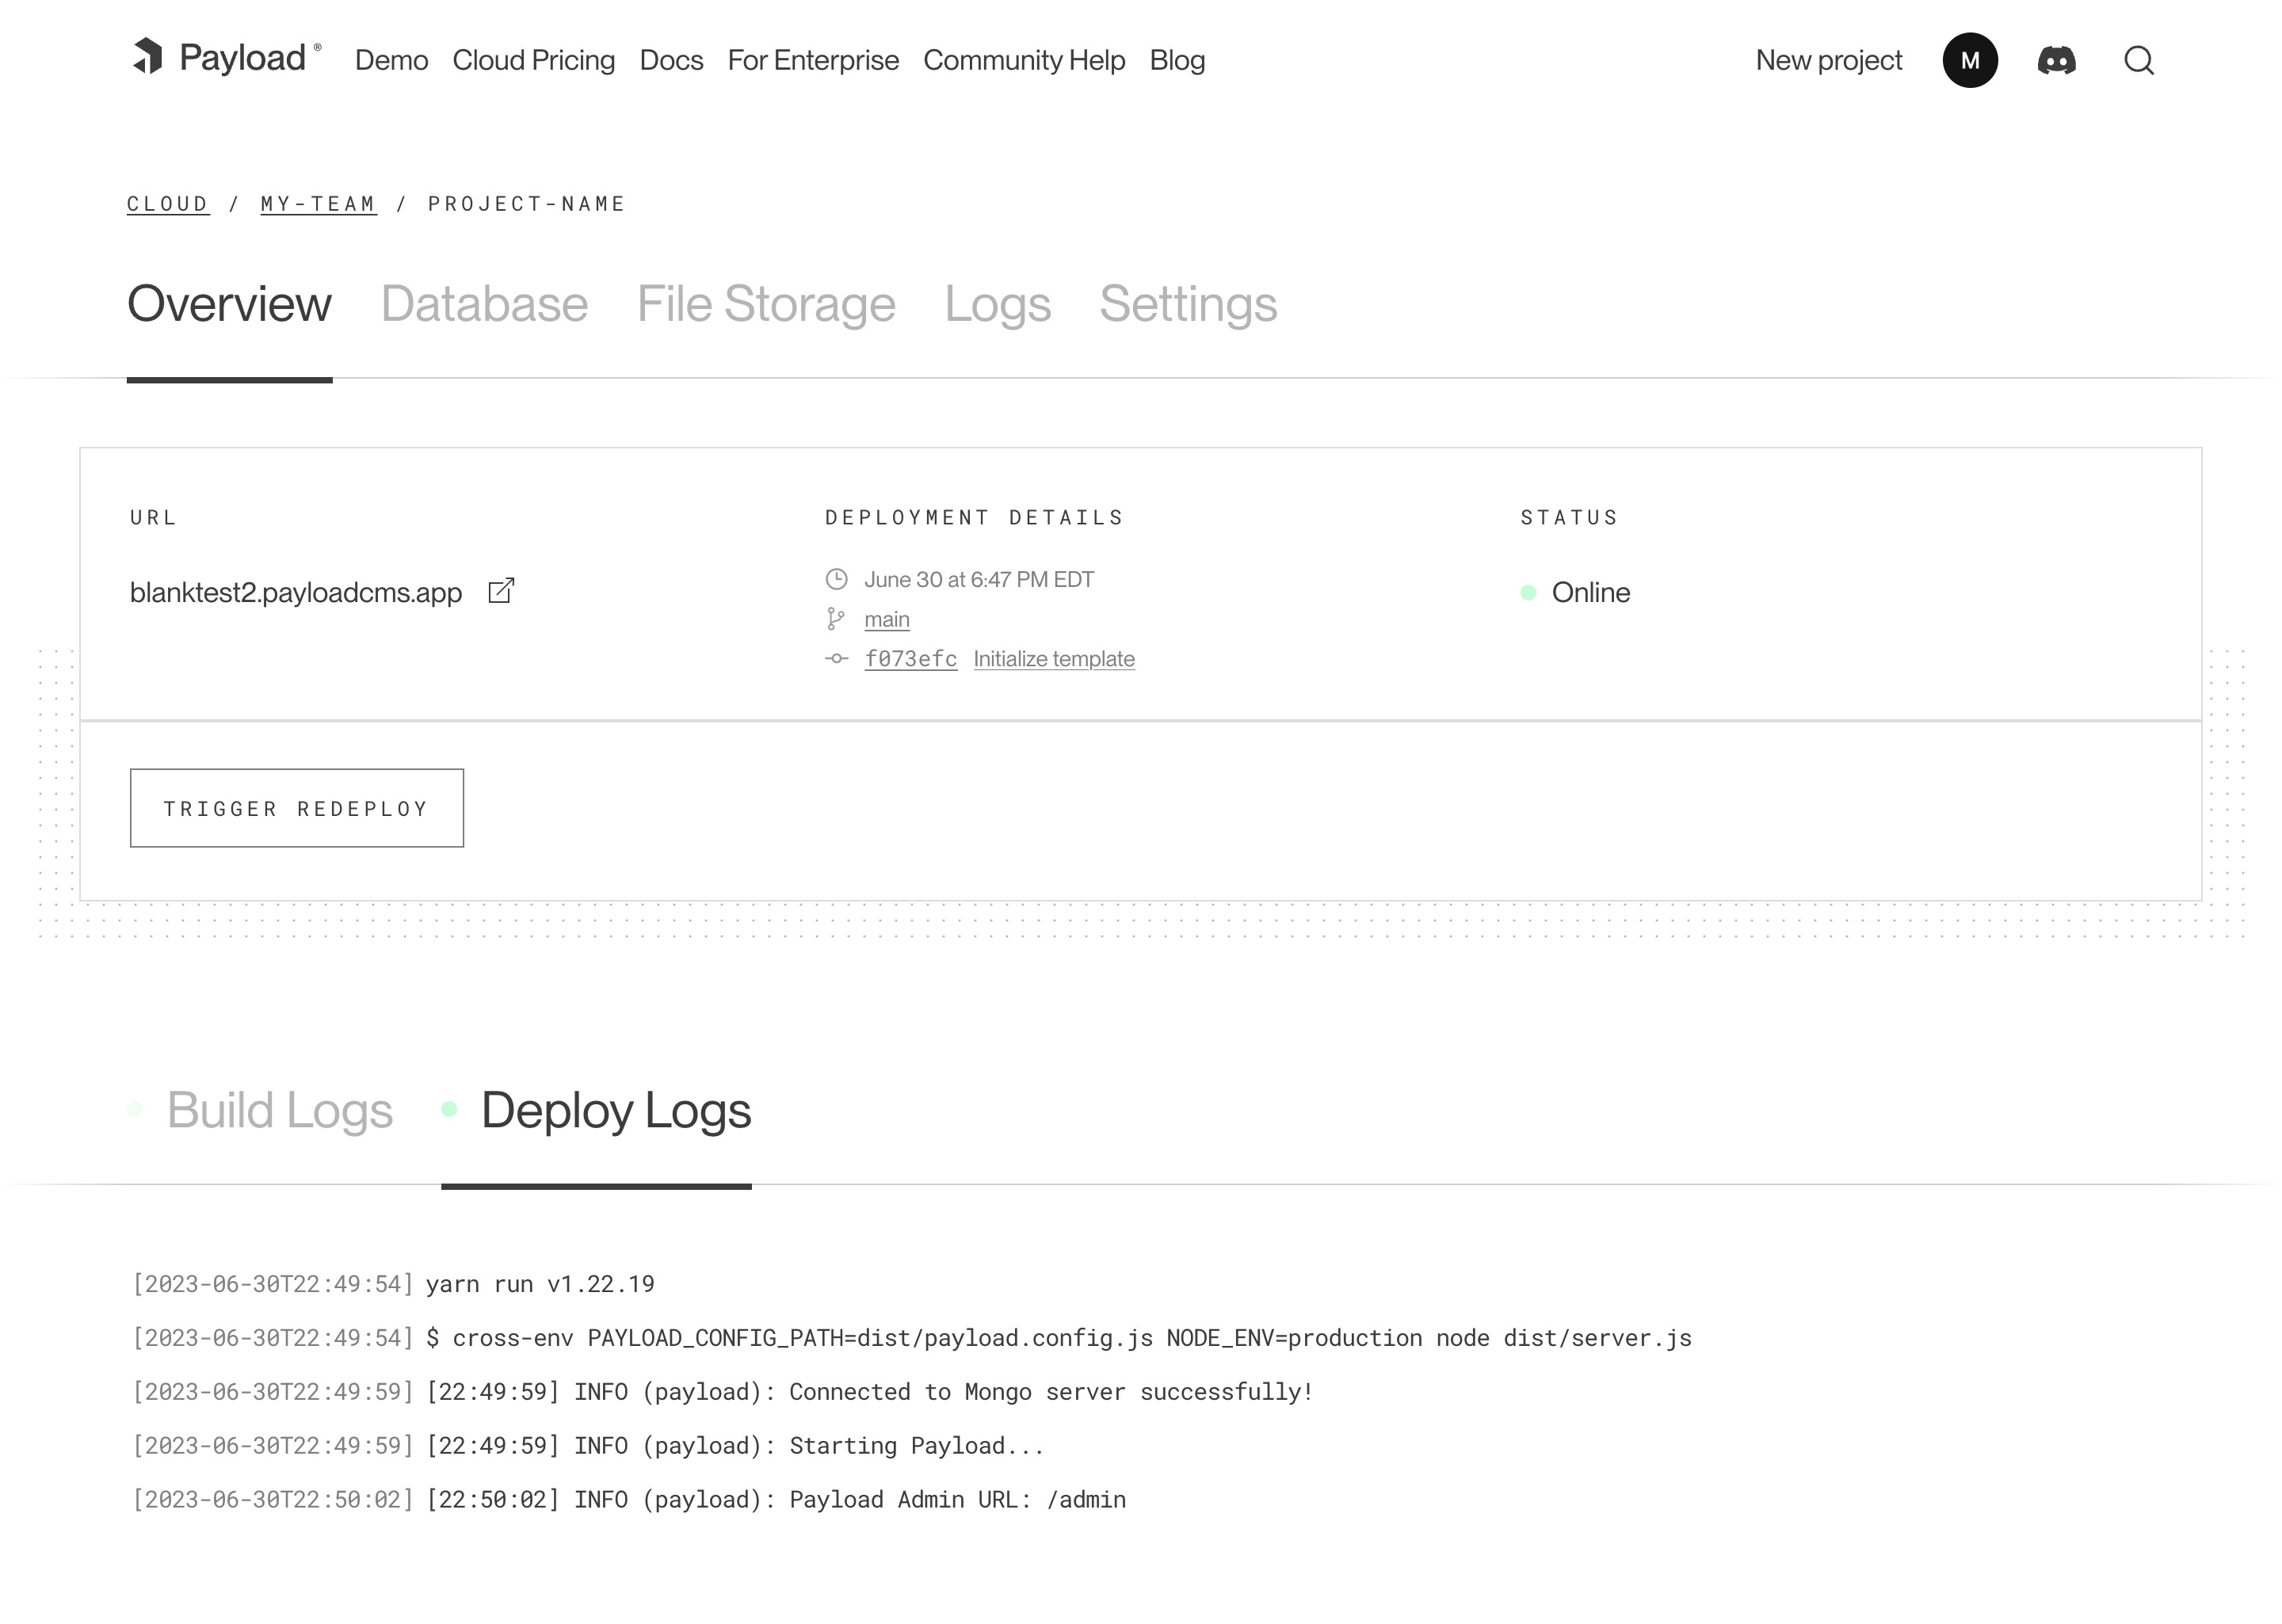
<Banner>
|
||
The overview tab shows your most recent deployment, along with build and deployment logs. From
|
||
here, you can see your live URL, deployment details like timestamps and commit hash, as well as
|
||
the status of your deployment. You can also trigger a redeployment manually, which will rebuild
|
||
your project using the current configuration.
|
||
</Banner>
|
||
|
||
|
||
_A screenshot of the Overview page for a Cloud project._
|
||
|
||
## Database
|
||
|
||
Your Payload Cloud project comes with a MongoDB serverless Atlas DB instance or a Dedicated Atlas cluster, depending on your plan. To interact with your cloud database, you will be provided with a MongoDB connection string. This can be found under the **Database** tab of your project.
|
||
|
||
`mongodb+srv://your_connection_string`
|
||
|
||
## File Storage
|
||
|
||
Payload Cloud gives you S3 file storage backed by Cloudflare as a CDN, and this plugin extends Payload so that all of your media will be stored in S3 rather than locally.
|
||
|
||
AWS Cognito is used for authentication to your S3 bucket. The [Payload Cloud Plugin](https://github.com/payloadcms/plugin-cloud) will automatically pick up these values. These values are only if you'd like to access your files directly, outside of Payload Cloud.
|
||
|
||
### Accessing Files Outside of Payload Cloud
|
||
|
||
If you'd like to access your files outside of Payload Cloud, you'll need to retrieve some values from your project's settings and put them into your environment variables. In Payload Cloud, navigate to the File Storage tab and copy the values using the copy button. Put these values in your .env file. Also copy the Cognito Password value separately and put into your .env file as well.
|
||
|
||
When you are done, you should have the following values in your .env file:
|
||
|
||
```env
|
||
PAYLOAD_CLOUD=true
|
||
PAYLOAD_CLOUD_ENVIRONMENT=prod
|
||
PAYLOAD_CLOUD_COGNITO_USER_POOL_CLIENT_ID=
|
||
PAYLOAD_CLOUD_COGNITO_USER_POOL_ID=
|
||
PAYLOAD_CLOUD_COGNITO_IDENTITY_POOL_ID=
|
||
PAYLOAD_CLOUD_PROJECT_ID=
|
||
PAYLOAD_CLOUD_BUCKET=
|
||
PAYLOAD_CLOUD_BUCKET_REGION=
|
||
PAYLOAD_CLOUD_COGNITO_PASSWORD=
|
||
```
|
||
|
||
The plugin will pick up these values and use them to access your files.
|
||
|
||
## Build Settings
|
||
|
||
You can update settings from your Project’s Settings tab. Changes to your build settings will trigger a redeployment of your project.
|
||
|
||
## Environment Variables
|
||
|
||
From the Environment Variables page of the Settings tab, you can add, update and delete variables for use in your project. Like build settings, these changes will trigger a redeployment of your project.
|
||
|
||
<Banner>
|
||
Note: For security reasons, any variables you wish to provide to the Admin panel must be prefixed
|
||
with `PAYLOAD_PUBLIC_`. Learn more
|
||
[here](https://payloadcms.com/docs/admin/environment-vars).
|
||
</Banner>
|
||
|
||
## Custom Domains
|
||
|
||
With Payload Cloud, you can add custom domain names to your project. To do so, first go to the Domains page of the Settings tab of your project. Here you can see your default domain. To add a new domain, type in the domain name you wish to use.
|
||
|
||
<Banner>
|
||
Note: do not include the protocol (http:// or https://) or any paths (/page). Only include the
|
||
domain name and extension, and optionally a subdomain. - your-domain.com - backend.your-domain.com
|
||
</Banner>
|
||
|
||
Once you click save, a DNS record will be generated for your domain name to point to your live project. Add this record into your DNS provider’s records, and once the records are resolving properly (this can take 1hr to 48hrs in some cases), your domain will now to point to your live project.
|
||
|
||
You will also need to configure your Payload project to use your specified domain. In your `payload.config.ts` file, specify your `serverURL` with your domain:
|
||
|
||
```ts
|
||
export default buildConfig({
|
||
serverURL: 'https://example.com',
|
||
// the rest of your config,
|
||
})
|
||
```
|
||
|
||
## Email
|
||
|
||
Powered by [Resend](https://resend.com), Payload Cloud comes with integrated email support out of the box. No configuration is needed, and you can use `payload.sendEmail()` to send email right from your Payload app. To learn more about sending email with Payload, checkout the [Email Configuration](https://payloadcms.com/docs/email/overview) overview.
|
||
|
||
If you are on the Pro or Enterprise plan, you can add your own custom Email domain name. From the Email page of your project’s Settings, add the domain you wish to use for email delivery. This will generate a set of DNS records. Add these records to your DNS provider and click verify to check that your records are resolving properly. Once verified, your emails will now be sent from your custom domain name.
|
||
|
||
## Developing Locally
|
||
|
||
To make changes to your project, you will need to clone the repository defined in your project settings to your local machine. In order to run your project locally, you will need configure your local environment first. Refer to your repository’s `README.md` file to see the steps needed for your specific template.
|
||
|
||
From there, you are ready to make updates to your project. When you are ready to make your changes live, commit your changes to the branch you specified in your Project settings, and your application will automatically trigger a redeploy and build from your latest commit.
|
||
|
||
## Cloud Plugin
|
||
|
||
Projects generated from a template will come pre-configured with the official Cloud Plugin, but if you are using your own repository you will need to add this into your project. To do so, add the plugin to your Payload config:
|
||
|
||
`yarn add @payloadcms/plugin-cloud`
|
||
|
||
```js
|
||
import { payloadCloud } from '@payloadcms/plugin-cloud'
|
||
import { buildConfig } from 'payload/config'
|
||
|
||
export default buildConfig({
|
||
plugins: [payloadCloud()],
|
||
// rest of config
|
||
})
|
||
```
|
||
|
||
<Banner type="warning">
|
||
**Note:** If your Payload config already has an email with transport, this will take precedence
|
||
over Payload Cloud's email service.
|
||
</Banner>
|
||
|
||
#### **Optional configuration**
|
||
|
||
If you wish to opt-out of any Payload cloud features, the plugin also accepts options to do so.
|
||
|
||
```js
|
||
payloadCloud({
|
||
storage: false, // Disable file storage
|
||
email: false, // Disable email delivery
|
||
})
|
||
```
|